Drying Lavender Successfully
Harvesting Lavender Flowers
Timing is everything to snag the best scent from lavender. Aim to harvest in the morning, just after the dew takes a hike but before the sun turns the heat up. This way, the oils in the lavender kick it into high gear, keeping that fragrance top-notch (Gardenia).
Grab those sharp scissors or pruning shears and snip the stalks right above the leaves, leaving a bit of leadway, like 1-2 inches of the stem. This length makes drying smoother and keeps the flowers in tip-top shape (The Tattered Pew).
| Best Time to Harvest | Tool for Harvesting | Ideal Stem Length |
|---|---|---|
| Morning after dew dries off | Sharp shears or scissors | 1-2 inches of stem |
Curious about keeping your lavender happy long-term? Check out our lavender plants maintenance guide.
Preparing Lavender Bunches
Getting your lavender ready for the drying phase is key. Start by bunching the stems together with a rubber band. Tight is good, but not so tight that it squishes ’em. The usual trick is to wrap the band three times, about a couple of inches from where you snipped. (B&B Family Farm)
Make a hook from a paper clip and attach it to the rubber band. This handy little hack sets you up to hang the lavender upside down—ideal for getting it nice and dry. Store it in a place that’s dry and dark to keep the color and smell in check.
| Step | Description |
|---|---|
| Secure with Rubber Band | Wrap thrice around the bunch near the cut end |
| Attach Paper Clip | Use to make a hook for hanging |
| Storage Location | Dry, dark spot, out of direct sun |
Hang those bunches upside down and let gravity do its thing. Want more details on drying techniques? Dive into our section on methods for drying lavender.
Stick to these tips, and you’ll have no trouble preserving your lavender’s vibe and aroma. Hungry for more? Peek at our articles on the best time to plant lavender and the ideal soil type for lavender plants.
Methods for Drying Lavender
Lavender flowers can be dried in a bunch of ways, each giving you something special. We’re gonna go through air drying, sun drying, and using a dehydrator so you can keep your lavender’s smell and goodness.
Air Drying Lavender
Air drying is the spot-on traditional method and super popular for keeping lavender. This way makes sure the herb keeps its form and bottles up all those essential oils in the buds.
- Harvesting: Snip fully open lavender flowers early in the morning after the dew’s gone bye-bye.
- Bundling: Gather those lovely stems into small bunches and tie them with string or even a rubber band.
- Hanging: Let ’em hang upside down in a dark, dry, and warm place for about two weeks.
| Method | Key Points | Duration |
|---|---|---|
| Air Drying | Hang upside down in a dark, dry place | ~2 weeks |
Make sure the air flows nicely in the drying spot, so they don’t get all musty. If you wanna delve into more on lavender plant maintenance, check out our guide.
Sun Drying Lavender
Sun drying’s another nifty method for drying lavender, especially for folks short on indoor spots.
- Harvesting: Just like with air drying, cut those lavender flowers in the morning once dew’s not around.
- Preparation: Lay the flowers on a clean, dry surface, like a screen or some mesh.
- Drying: Plop the screen in a sunny spot, turning flowers every now and then to get them evenly dry. Just don’t let them soak up the sun too long or they’ll lose their smell.
| Method | Key Points | Duration |
|---|---|---|
| Sun Drying | Spread on a screen, turn flowers regularly, avoid long sun | ~1 week |
Wondering when’s prime time to pick and dry lavender? Head over to our seasonal characteristics of lavender plants.
Dehydrating Lavender
Using a dehydrator is like the express train in drying lavender while keeping its oils and colors intact.
- Harvesting: Snatch lavender flowers when they’re all the way open.
- Preparation: Lay the lavender on dehydrator trays, nice and single-file.
- Dehydrating: Set that dehydrator to a cool 95°F (35°C) and dry for 24-48 hours till it’s snug and dry.
| Method | Key Points | Duration |
|---|---|---|
| Dehydrating | Dehydrator at 95°F (35°C) | 24-48 hours |
A dehydrator’s awesome for getting it done quick and neat. Curious about protecting your plants during drying? Peek at our guide on winterizing lavender plants.
Choose what fits you best and keep your lavender smelling dreamy. Dig into our other guides on extracting lavender oil and lavender plant toughness to make the most of your lavender.
Determining Lavender Readiness
Getting your lavender just right for storage and use takes a bit of care and attention. When dried properly, lavender maintains its delightful smell, stays vibrant, and keeps all its perks intact.
Testing Lavender Stems
One easy way to check if your lavender’s good to go is by feeling the stems. Shoot for that dry-to-the-bone crispiness like potato chips. When you give one a bend, it ought to snap easily—not flop around like a damp tortilla. If it’s flop city, it’s back to drying for a bit longer.
| Stem Condition | Ready to Rock? |
|---|---|
| Like a crispy chip | You’re good! |
| Bendy but not snappy | Needs more drying love |
Assessing Drying Progress
Keeping an eye on how your lavender’s drying up is just as key. Whether you’re leaving it out to air-dry, soaking up some rays with sun drying, or giving it a go in the dehydrator, drying times will vary. Typically, lavender can take anywhere from 2 to 6 weeks when hanging out in a warm, airy spot. Humidity and how thick your bundles are can change that timeline.
| Drying Method | How Long to Hang Tight |
|---|---|
| Air Drying | 2 – 6 weeks |
| Sun Drying | 1 – 3 days |
| Dehydrating | A few hours |
Be sure to give the stems and flowers a feel every now and then. If you’re going the air-dry route, make sure the spot’s breezy enough to avoid mold. Sun drying’s great, but aim to keep it out of the harsh midday light to keep the colors popping. For the dehydrator lovers, stick to the instructions for the best results.
Curious about more lavender lore? Check our guides on how to keep your lavender in top shape, planting lavender successfully, and what’s up with lavender through the seasons.
Proper Storage of Dried Lavender
Keeping dried lavender as fragrant as the day it was picked is all about how you stash it away. A sprinkle of proper storage techniques lets your lavender keep its delightful aroma and many uses for longer than you might expect.
Airtight Containers for Lavender
The trusty airtight container is your best friend when stashing dried lavender. These keep pesky moisture at bay, preserving lavender’s sweet smell and stopping any moldy misfortunes. You could use mason jars, plastic bins, glass jars, or even good old metal tins to do the trick. They’re easy to find and do the job like a champ!
Here’s a handy list of container choices:
| Container Type | Description | Capacity Suggestion |
|---|---|---|
| Mason Jars | Sturdy and glassy with a tight fit | 16 oz – 32 oz |
| Plastic Containers | Tough, often stackable | 5 – 15 liters |
| Glass Jars | See-through for those who like a peek | Sizes vary |
| Metal Tins | Solid and light-blocking | Sizes vary |
Stash these containers in a chill and dark corner – less light and moisture mean more sweet smell sticking around (Gardenia).
Maintaining Lavender Fragrance
Want to keep that lavender smell strong and proud? Here’s how to make sure it doesn’t fade away:
-
Cool and Dark Nook: Tuck your airtight treasures in the shade, safe from sunbeams that might dull the scent.
-
Moisture No-No: Keep the storage spot dry. Dampness is a ticket to mold city, which means a quick goodbye to that fragrance.
-
Limit Opens: Don’t pop open those containers too much. Air just loves to zap the essential oils straight out of the lavender’s heart.
-
Dust and Clean: Since lavender itself keeps things clean (Plantura Garden), a clean storage area will help keep everything fresh.
Lavender that’s dried and stored with care can smell as strong as ever for a whole season, or even up to a decade if treated right (The Tattered Pew). Proper storage is the magic that keeps its aroma and variety of uses alive, whether you’re into crafts, cooking, or sprucing up your home.
Curious for more on lavender adventures? Check out our guide on how to extract lavender oil from a lavender plant and take a look at topics like planting French lavender and maintaining lavender plants.
Harvesting Lavender Tips
Harvesting lavender the right way is your ticket to getting those lovely fragrances and top-notch quality when you dry it. Here’s the lowdown to get you started.
Ideal Harvesting Time
Picking the right moment to snip your lavender makes all the difference in fragrance and potency:
-
Fresh and Fragrant Flowers: Grab your scissors when the flowers are fresh, and the oils are at their best. That’s when you’ll get the richest scent. (Gardenia)
-
Flowering Stage: Aim to cut when the flowers begin to pop open, usually in early to mid-spring, with about 40% to 50% of the plant sporting flowered buds. If you see bees having a party, it’s probably time. (The Tattered Pew)
-
Morning Harvest: Morning’s the prime time—after the dew is gone. This captures the best fragrance and keeps things dry, reducing mold risks. (Gardenia)
-
Full Bloom Time: Or, you can wait until mid-summer when they’re in full bloom. Look for vibrant color, a papery feel, and a strong scent. (Source)
| Flower Stage | Description | Optimal Time |
|---|---|---|
| Just starting to open | 40%-50% flowered buds | Early to mid-spring |
| Full bloom | Vibrant color, papery texture | Mid-summer |
Cutting and Preparation
Once you’ve nailed the timing, here’s how to chop and prep your lavender:
-
Cutting the Stems: With sharp scissors or pruning shears, snip the stems when about a third to half of the flower’s opened. This keeps the fragrance top-notch. (Gardenia)
-
Cutting Angle and Length: Slice at an angle to stop water from gathering and causing rot. Leave around 2 inches of green so the plant can bounce back quickly.
-
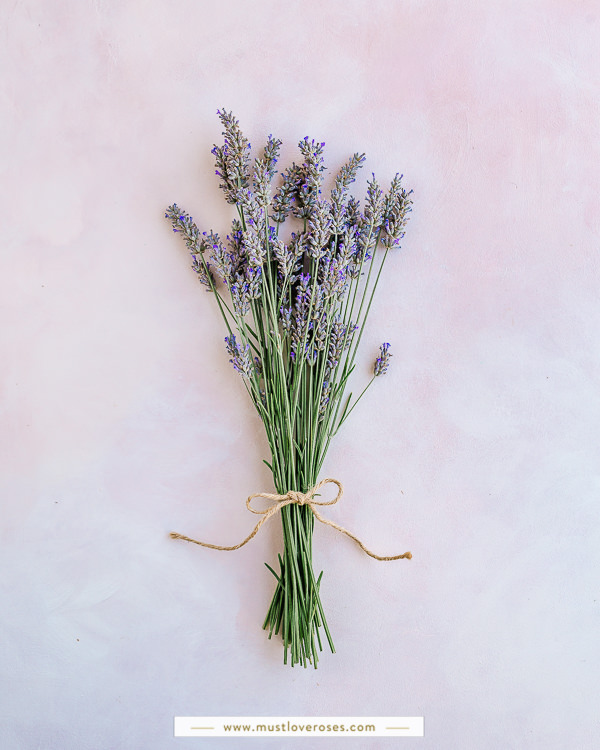
Bundling Lavender: Gather the stems into small bunches, wrapping them with rubber bands or twine. This holds them together just right while they dry. (B&B Family Farm)
-
Hanging the Bundles: Hang these bundles upside down in a dry, dark, and airy spot. It’s the way to keep that color and fragrance locked in.
Want to get the full scoop on how to dry lavender plants and keep them preserved? Dive into our detailed guide.
Using Dried Lavender
Got some dried lavender in your stash? Great news—there are loads of ways to make those fragrant flowers earn their keep! Two standout areas where lavender struts its stuff are in the kitchen and in craft projects.
Cooking Magic
Think of culinary-grade lavender as your secret ingredient for boosting flavor in your dishes. With its floral punch, it’s a wild card that can take both sweet and savory recipes to another level.
- Baked Treats: Adding lavender to cookies, cakes, or pastries can offer a gentle floral surprise. Just a bit in your batter will work wonders.
- Sippin’ Delights: Brew some into teas or lemonades for a refreshing drink with a fragrant twist.
- Lavender Sugar: Mix those dried buds with sugar, and bring a little sweetness to your tea or sprinkle it over a dessert for a bit of magic.
- Spice Combos: Lavender pairs well in blends like “Herbs of Provence” and it shines in Mediterranean dishes, infused butters, and even fancy salts.
- Meaty Mixes: Give your marinades, meat rubs, or salads a lavender lift. Your taste buds will thank you!
Need some tips on grabbing that lavender essence? Check out our guide on how to extract lavender oil from a lavender plant.
Crafty and Cozy Creations
Dried lavender isn’t just for eating—it’s a craft superstar too. Here’s how it can jazz up your living space:
- Sniff-worthy Sachets: Stuff small bags with lavender for a soothing aroma in drawers, closets, or under your pillow. Great for sleep, too!
- Homemade Potpourri: Mix dried lavender with other aromatic friends to create a potpourri that’ll freshen up any room.
- Pretty Wreaths: Use dried stems to make beautiful, scented wreaths to hang on your front door or anywhere indoors. Instant charm!
- Candles and Soaps: Toss some dried flowers into your DIY candles and soaps. They add a lovely scent and look pretty nifty too.
- Relaxing Massage Oil: Cover those flowers with olive oil and let ’em sit for a bit—like a homemade spa brew that’s perfect for unwinding massages.
Get your creative juices flowing with dried lavender projects and see how far you can stretch the wonders of these plants. If you want to keep that sweet scent going strong, visit our guide on maintaining lavender fragrance.
Go beyond your garden and experience the many perks of dried lavender. Let it rock your recipes and crafts, and see how versatile these little blossoms can be!


