Growing Pothos Plant Cuttings
Propagation Basics
Propagating pothos plants from cuttings is a simple and effective way to expand your indoor garden. It’s essential to start with healthy cuttings taken from a well-maintained mother plant. If the plant is diseased or infested with pests, quarantine the cutting until it’s free of the issue (HerbSpeak). For tips on pothos plant care and how to maintain a healthy mother plant, visit our detailed guide.
| Type of Cutting | Best Season | Characteristics |
|---|---|---|
| Softwood | Spring | Quick to root but high-risk of drying out |
| Semi-ripe | Summer | Balance between rooting speed and stability |
| Hardwood | Fall/Winter | Slower to root but more stable |
Optimal Times for Cuttings
The best times to propagate pothos are during the plant’s active growth periods, typically in spring and summer (The Spruce). Propagating in these months ensures a higher success rate due to the plant’s increased metabolic activity.
| Season | Success Rate | Explanation |
|---|---|---|
| Spring | High | Active growth period; ideal for softwood cuttings |
| Summer | High | Suitable for semi-ripe cuttings, active growth continues |
| Fall | Moderate | Stability in hardwood cuttings; slower root development |
| Winter | Low | Dormant period; reduced success rate |
By understanding the basics and optimal times for propagating pothos, you can ensure a higher success rate and healthier plants. Remember to consider factors like the type of cutting and the health of the mother plant for the best results. For more on pothos plant propagation techniques and related care tips, refer to our comprehensive guides.
Taking Pothos Cuttings
Steps for Successful Cutting
To successfully propagate a pothos plant, follow these steps to ensure healthy and viable cuttings.
-
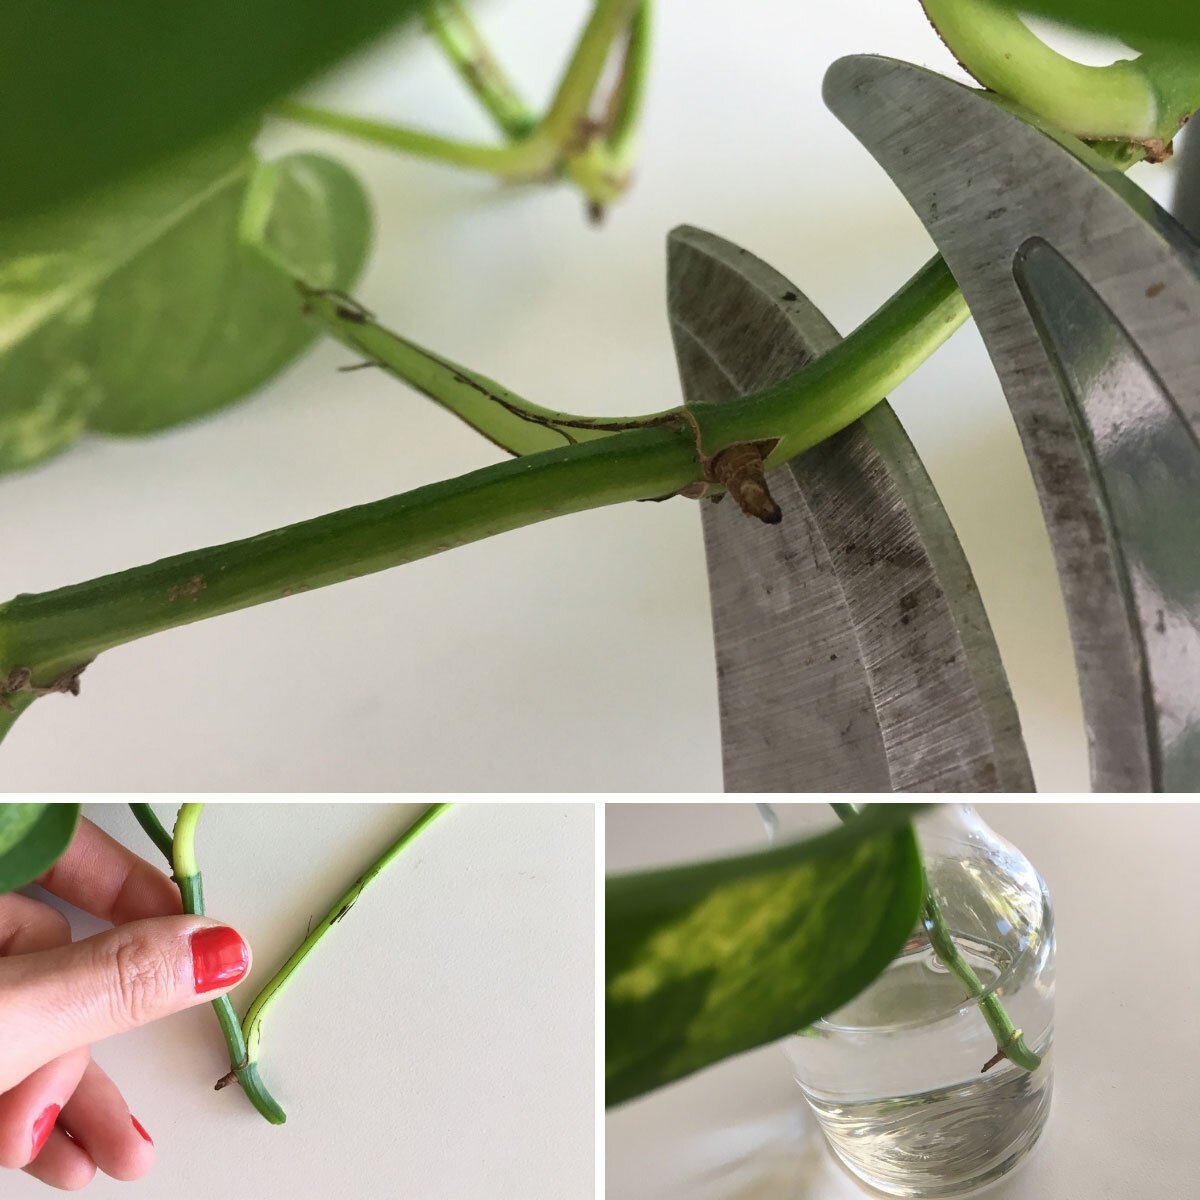
Select Healthy Stems: Identify healthy stems with several nodes and at least four leaves. The ideal length for cuttings is 4-6 inches.
-
Prepare Cutting Tools: Use a sharp, clean tool to make your cuts. Sterilize your cutting tool to prevent introducing pathogens to the plant tissue.
-
Make the Cut: Take the cutting from the current season’s growth. Trim below a single leaf joint or pair of leaves, ensuring the cutting is around 8-10 cm long (Gardeners’ World).
-
Remove Lower Leaves: Carefully remove any leaves from the bottom half of the cutting. This prevents leaves from rotting when submerged in water or planted in soil.
| Step | Action |
|---|---|
| Select Stems | Choose healthy stems with several nodes |
| Prepare Tools | Sterilize a sharp cutting tool |
| Make the Cut | Cut 8-10 cm below a leaf joint |
| Remove Leaves | Remove leaves from the bottom half |
Best Practices for Cutting
Implementing best practices ensures that your cuttings have the highest chance of successfully rooting and growing into healthy pothos plants.
-
Use Rooting Powder: While not essential for pothos cuttings, rooting powder can promote quicker root development. Dip the base of the cutting in rooting powder before planting.
-
Optimizing Potting Compost: Mix equal parts of perlite or horticultural grit with compost. This creates an ideal rooting medium that encourages root growth (Gardeners’ World).
-
Keep Cuttings Moist: To avoid drying, ensure that the cutting’s environment is kept moist but not waterlogged. Covering the pot with a plastic bag can maintain humidity.
-
Avoid Direct Sunlight: Place the cuttings in a well-lit area, but out of direct sunlight, to prevent them from drying out or burning.
Follow these best practices to ensure your pothos cuttings develop strong roots and thrive. For more detailed information, visit our related article on how to plant pothos. Proper pothos plant care is essential for ongoing health and growth.
By taking careful steps and following best practices, you can successfully propagate pothos plants and expand your indoor garden. Always remember to use sharp and clean tools, maintain optimal conditions, and monitor growth closely. For further reading on issues that may arise, refer to our articles on pothos plant problems and pothos plant not growing.
Rooting Pothos Cuttings
When it comes to rooting your pothos plant cuttings, using the water propagation technique is one of the most effective methods. This section will guide you through the water propagation technique and provide insights into the root development timeframe for pothos cuttings.
Water Propagation Technique
Rooting pothos cuttings in water is a simple and effective method. Here’s a step-by-step guide to help you get started:
-
Prepare Your Cuttings: Select healthy stem cuttings with at least two nodes (the small bumps where leaves and roots grow) and remove the lower leaves to expose the nodes.
-
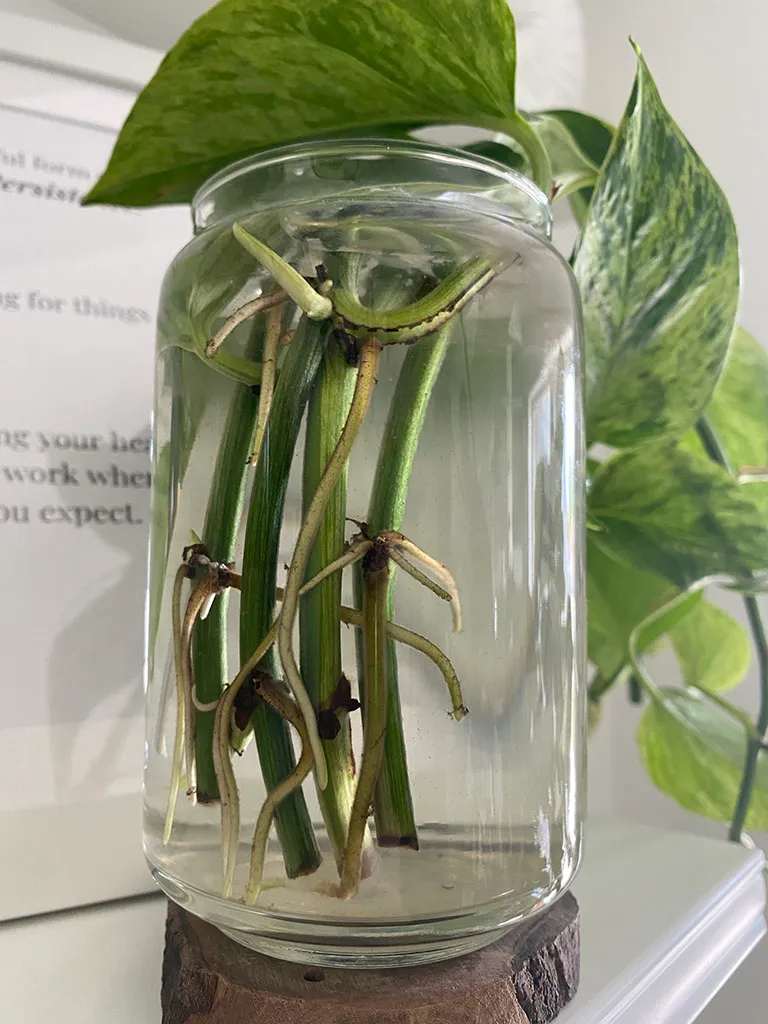
Submerge Cuttings: Place the cuttings in a glass or jar filled with water, ensuring that at least the bottom node is submerged. Aim for 2-3 nodes underwater to encourage root growth.
-
Optimal Conditions: Keep the container in a location with bright, indirect light. Direct sunlight can cause algae growth in the water, which can hinder root development.
-
Regular Water Changes: Change the water every 5-7 days to prevent bacterial growth (Greg App). Fresh water keeps the environment clean and provides the necessary nutrients for healthy root growth.
-
Monitor Progress: Observe the cuttings for signs of root development. Tiny roots should start to emerge from the nodes within a few weeks.
Root Development Timeframe
Understanding the root development timeframe for pothos cuttings is crucial for successful propagation. Here’s a breakdown of what to expect:
| Stage | Timeframe | Description |
|---|---|---|
| Initial Root Formation | 10-14 days | Tiny roots begin to emerge from the nodes (The Spruce) |
| Significant Root Growth | 3-6 weeks | Roots become longer and thicker, indicating successful propagation (Greg App) |
| Ready for Transfer | 6-8 weeks | Roots should be established enough to transfer to soil (Greg App) |
During the first few weeks, you should notice small roots beginning to form. These roots will continue to develop and thicken as time progresses. By around 3-6 weeks, the roots should be strong enough to support the plant in soil. For optimal success, wait until the roots are around 2-3 inches long before transferring them.
Root development can vary based on several factors, including light, temperature, and water quality. Regularly monitoring your cuttings and maintaining a consistent routine will help ensure successful root growth. For more information on how to care for your rooted cuttings and transfer them to soil, check out our section on transferring to soil.
By following these steps and understanding the root development timeline, you can confidently propagate pothos plant cuttings and enjoy thriving new plants.
Care for Rooted Cuttings
After successfully propagating pothos cuttings in water, it’s essential to transition them to soil for long-term growth. This section will guide you through transferring your rooted cuttings to soil and provide tips for maintaining healthy pothos plants.
Transferring to Soil
Rooted cuttings are ready to be transferred to soil once they have developed a strong root system, typically within two to four weeks of water propagation.
Follow these steps for a smooth transfer:
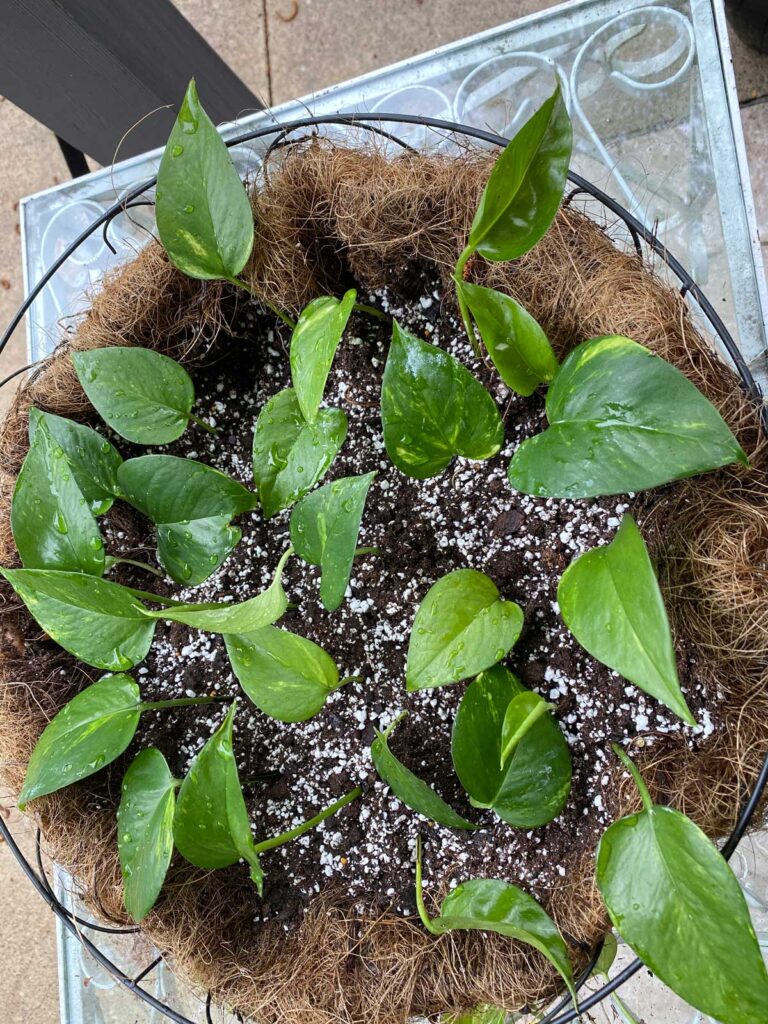
- Prepare the Pot: Select a pot with drainage holes to prevent waterlogging. Fill it with nutrient-rich potting soil to support healthy plant growth (pothos plant soil).
- Add the Cutting: Create a small hole in the soil using a pencil or your finger. Gently place the rooted cutting into the hole, ensuring the roots are covered by soil.
- Secure the Cutting: Lightly press the soil around the base of the cutting to keep it in place and ensure good soil-to-root contact.
- Watering: Water the newly potted cutting thoroughly, but avoid overwatering. The soil should be moist, not soggy. For more information, see pothos plant watering.
Maintenance and Next Steps
Proper care is crucial to help your newly transferred pothos cuttings thrive. Here are the next steps to ensure their healthy growth:
- Lighting: Place the pot in a location with bright, indirect light. Pothos plants can tolerate low light, but they thrive in medium to bright light conditions. Ensure you meet the pothos plant light requirements.
- Humidity and Temperature: Pothos plants prefer moderate humidity and a temperature range of 60-85°F (15-29°C). Avoid placing the plant near drafts or air conditioners as sudden temperature changes can stress the plant.
- Fertilizing: Use a balanced liquid fertilizer every 4-6 weeks during the growing season (spring and summer). Follow the product’s instructions to avoid over-fertilizing.
- Pruning: Regularly trim your pothos to maintain its shape and encourage bushier growth. Remove any yellow or dead leaves to keep the plant healthy. Learn more about pothos plant trimming.
| Care Task | Frequency | Notes |
|---|---|---|
| Watering | Weekly | Keep soil moist but not waterlogged |
| Light | Daily | Bright, indirect light |
| Humidity | As needed | Moderate humidity |
| Temperature | As needed | 60-85°F (15-29°C) |
| Fertilizing | 4-6 weeks | During growing season |
For further assistance on common issues, such as pothos plant leaves curling or pothos plant leaves turning yellow, explore our related articles on pothos care. Proper maintenance ensures that your pothos will flourish as an attractive and vibrant addition to your indoor plant collection.


