Understanding Rubber Plant Issues
Common Culprits for Brown Leaves
Rubber plants, also known as Ficus elastica, can develop brown leaves for various reasons. Understanding these triggers is crucial for effective treatment and prevention.
Brown leaves on your rubber plant can be caused by several factors including:
- Overwatering: This is a prevalent issue. It can lead to root rot, causing brown spots on the leaves.
- Underwatering: When the plant doesn’t receive enough water, the leaves can turn brown and crispy ([Vintage Revivals).
- Direct Sunlight: Excessive exposure can lead to sunburn, resulting in brown patches on the foliage.
- Temperature Fluctuations: Sudden changes in temperature can stress the plant, leading to brown leaves.
- Pests and Fungal Infections: Both can cause significant damage to the plant’s health and appearance.
| Potential Cause | Symptoms |
|---|---|
| Overwatering | Soft, brown spots on leaves |
| Underwatering | Brown, crispy leaves |
| Direct Sunlight | Scorched, brown patches |
| Temperature Fluctuations | Overall browning of leaves |
| Pests/Fungal Infections | Irregular brown spots or patches |
Signs of Overwatering
Overwatering is a common issue for rubber plants and can lead to root rot. Identifying the signs early can help save your plant from severe damage.
- Brown Spots: Overwatered rubber plants often develop brown spots on their leaves as a result of root rot (Fig & Bloom).
- Yellowing Leaves: Leaves may begin to yellow and fall off due to the stress of waterlogged soil.
- Mushy Stems: The base of the plant might feel mushy or soft, indicating the roots are compromised.
- Wet Soil: Consistently wet soil is a key indicator. Rubber plants prefer slightly moist soil, but overwatering can lead to problems.
To prevent overwatering, ensure your plant is in well-draining soil and pots equipped with proper drainage holes. Checking soil moisture levels before watering is also advisable. For further guidance on optimizing your rubber plant’s watering routine, refer to our article on rubber plant watering.
If you notice signs of overwatering, consider transferring your plant to a well-draining soil mix and reducing the watering frequency. For more in-depth information on treating and preventing root rot, visit our detailed guide on rubber plant root rot.
Addressing Overwatering
Overwatering is a common issue that can lead to your rubber plant leaves turning brown. To maintain a healthy plant, it’s essential to address overwatering by focusing on proper drainage and preventing root rot.
Importance of Proper Drainage
Proper drainage is crucial in ensuring that your rubber plant remains healthy. Without it, water can pool at the bottom of the pot, leading to waterlogged soil and, eventually, root rot. Here are a few steps to ensure proper drainage:
- Choose the Right Pot: Ensure your pot has drainage holes that allow excess water to escape. If your current pot lacks drainage, consider drilling holes or repotting your plant into a better-suited container.
- Use Appropriate Soil: Use a well-draining soil mix specifically designed for rubber plants. You can find more information on selecting the right soil in our guide on rubber plant soil.
- Elevate the Plant: Place pebbles or small stones at the bottom of the pot before adding soil to create a water reservoir below the roots, which will help with drainage.
Preventing Root Rot
Root rot is a severe condition caused by fungal infections that thrive in overly moist environments. If left untreated, it can kill your rubber plant. To prevent root rot, follow these key practices:
-
Allow Soil to Dry Between Waterings: Rubber plants prefer their soil to dry out slightly between waterings. Ensure the top 1-2 inches of soil are dry before watering again.
-
Check Moisture Levels: Use a moisture meter or insert your finger into the soil to check moisture levels. Avoid watering if the soil feels damp.
-
Optimize Pot Size: Use a pot that allows for adequate space for roots to grow but isn’t too large. Oversized pots can retain excess moisture. For guidance on choosing the right pot, visit our section on rubber plant pot size.
| Watering Schedule | Frequency |
|---|---|
| Summer | Every 1-2 weeks |
| Winter | Every 2-3 weeks |
- Provide Adequate Light: Ensure your rubber plant gets bright, indirect light. Correct light exposure helps prevent overwatering issues. Check out our detailed article on rubber plant light requirements for more insights.
If you suspect root rot, it’s important to act quickly. Refer to our detailed steps on rubber plant root rot for instructions on how to identify and treat this condition.
By understanding the importance of proper drainage and actively preventing root rot, you can help your rubber plant thrive and avoid the common issue of brown leaves. For more tips on maintaining healthy rubber plants, explore our articles on rubber plant watering practices and tineke rubber tree care.
Treating Root Rot
Steps to Save an Affected Plant
If your rubber plant’s leaves are turning brown, root rot may be the culprit. Treating root rot involves several crucial steps to ensure the plant’s recovery. Follow these guidelines to save your affected plant.
-
Examine the Roots: Gently remove the plant from its pot. Examine the roots for signs of mushiness or black spots, indicating root rot.
-
Trim Damaged Roots: Use sterilized scissors to trim off the mushy, rotten roots. Make clean cuts to avoid further damage.
-
Dispose of Soil: Discard the old, contaminated soil from the pot. It’s important not to reuse this soil as it can reintroduce pathogens.
-
Disinfect the Pot: Clean the pot thoroughly with a mild bleach solution to eliminate any remaining bacteria or fungi.
-
Allow Roots to Air Dry: Place the plant in a shaded, well-ventilated area to let the healthy roots air out for a few hours.
-
Repot with Fresh Soil: Repot the plant in fresh, well-draining soil. Ensure the new pot has adequate drainage holes to prevent water logging (Homeowner.com).
Using Fungicide for Recovery
Applying a fungicide can help combat the root rot and prevent further damage. Here’s how to use fungicide effectively:
-
Choose a Plant-Safe Fungicide: Select a fungicide that is safe for houseplants and specifically designed to combat root rot.
-
Prepare the Fungicide: Follow the manufacturer’s instructions for preparing the fungicide solution.
-
Apply Fungicide to Roots: Carefully apply the fungicide to the roots of the plant. Ensure thorough coverage, especially on the freshly cut areas (Fig & Bloom).
-
Monitor Recovery: After repotting, keep an eye on your plant’s progress. Water it sparingly and ensure it’s placed in an area with proper rubber plant light requirements.
Taking these steps can revive your rubber plant and prevent it from developing root rot in the future. For additional care tips, visit our articles on rubber plant care in winter and rubber plant watering.
Dealing with Black Spots
Rubber plant leaves developing black spots can be a sign of underlying issues, commonly linked to root rot. Knowing how to identify and address these symptoms is essential for maintaining your plant’s health.
Identifying and Addressing Root Rot
Rubber plant leaves turning brown or developing black spots often indicate overwatering, which can lead to root rot (Fig & Bloom). Root rot is a serious condition where roots become mushy and unable to absorb nutrients effectively. Signs of root rot include:
- Wilting leaves
- Black or brown spots on leaves
- Slow growth
- Mushy roots
To address root rot:
- Carefully remove the rubber plant from its pot.
- Dispose of the existing soil.
- Trim away any mushy or decayed roots.
- Apply a plant-safe fungicide treatment to the roots.
- Allow the roots to air out and dry.
- Repot the plant in fresh soil that has good drainage (Homeowner.com).
| Step | Action |
|---|---|
| 1 | Remove plant from pot |
| 2 | Dispose of old soil |
| 3 | Trim decayed roots |
| 4 | Apply fungicide |
| 5 | Air out roots |
| 6 | Repot in fresh soil |
For more information on root rot, visit our rubber plant root rot page.
Trimming Damaged Leaves
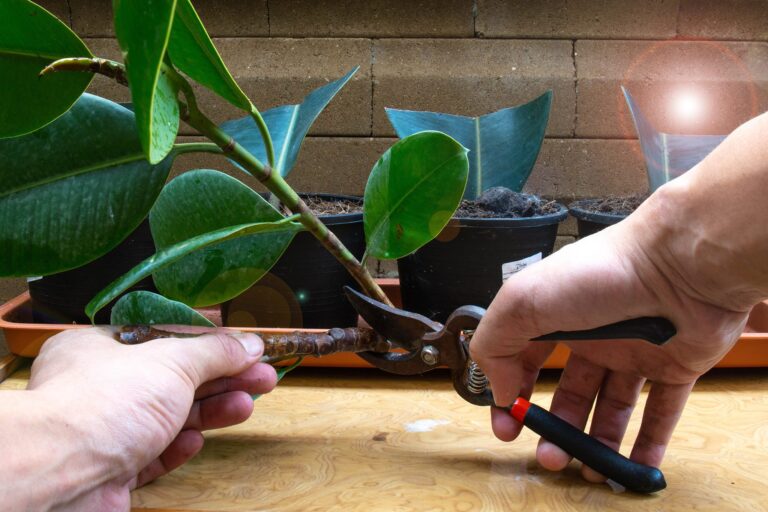
Trimming damaged leaves helps in redirecting the plant’s energy to healthier parts, promoting overall recovery. Removing leaves with black spots prevents the spread of disease and enables the plant to focus on new growth.
- Use sterilized scissors or pruning shears to trim the affected leaves.
- Cut the leaves at the base, close to the stem.
- Dispose of the trimmed leaves to prevent any contamination.
By consistently removing damaged leaves, the rubber plant can maintain its vigor and aesthetics. Learn more about effective pruning techniques on our rubber plant pruning page.
Proper care, including optimal rubber plant watering and suitable soil mix, is crucial to prevent the recurrence of black spots. For preventive measures, check out rubber plant care in winter for tips on maintaining plant health even during colder months.
Sunlight and Watering Tips
To keep your rubber plant healthy and prevent its leaves from turning brown, it is crucial to balance sunlight exposure and watering practices. Here are the essential tips you need to know.
Effects of Sun Exposure
Overexposure to sunlight or intense artificial rays can cause rubber plant leaves to turn brown or develop scorched spots, a condition known as sunburn. The brown spots and leaves won’t recover and can be safely trimmed. Ensure your rubber plant receives the proper amount of sunlight based on its variety and environment.
| Light Condition | Effect on Rubber Plant Leaves |
|---|---|
| Direct Harsh Sun | Can cause brown or scorched spots |
| Indirect Bright Light | Optimal for healthy growth |
| Low Light | Leads to slower growth and potential leaf drop |
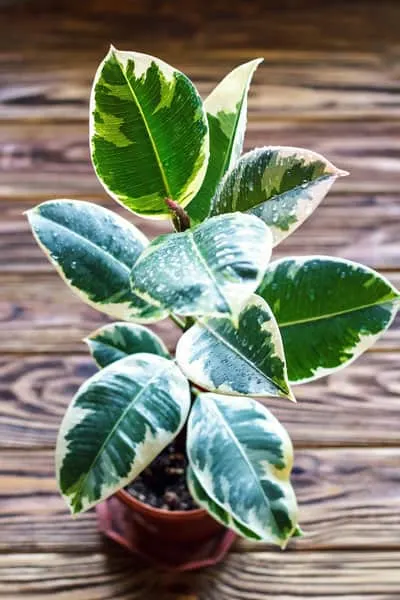
Variegated varieties of rubber plants, such as those covered in tineke rubber tree care, may require some direct sunlight but should be protected from harsh midday rays. If it’s growing outdoors in a hot climate, ensure it gets gentle morning sun rather than harsh afternoon sunlight.
Optimizing Watering Practices
Proper watering is essential to prevent the leaves of your rubber plant from turning brown. Here are key factors to consider:
Checking Soil Moisture
Overwatering and underwatering can both cause issues. Soil should be checked regularly to maintain optimal moisture levels. Use well-draining soil and pots with drainage holes to avoid soggy conditions.
| Watering Issue | Symptoms | Action |
|---|---|---|
| Overwatering | Yellowing leaves, root rot | Allow soil to dry out, improve drainage |
| Underwatering | Brown, crispy leaf tips and edges | Ensure thorough watering, avoid drying out |
For specific guidance, refer to the article on rubber plant watering.
Water Quality
Tap water with high levels of minerals or chemicals can lead to brown spots and tips on the leaves. If you notice such symptoms, consider using pure or filtered water to see if it makes a difference.
Frequency and Environment
Adjust watering frequency based on the plant’s environment. For instance, a rubber plant that is rootbound will require more frequent watering to ensure the root ball is well-saturated. Use the following general guidance:
| Environment | Watering Frequency |
|---|---|
| Dry Indoor Air | More frequent watering |
| Humid Conditions | Less frequent watering |
By following these sunlight and watering tips, you can maintain a healthy rubber plant and avoid the common issue of brown leaves. For more information on specific care practices, check out our articles on rubber plant leaves curling and rubber plant root rot.
Additional Care Tips
Ensuring the health of your rubber plant involves more than just dealing with brown leaves. Here we cover additional care tips to address common issues such as leaf curling and other red flags you should be aware of.
Resolving Leaf Curling
Curling rubber plant leaves can indicate several issues including over or underwatering and low humidity levels. Here are steps to resolve leaf curling:
- Check Soil Moisture: Allow the soil to nearly dry out between waterings. Water the plant thoroughly but avoid letting it sit in standing water.
- Increase Humidity: Use a mister or a humidifier to increase the indoor humidity levels.
- Inspect for Pests: Look for signs of pests that may cause leaf curling. Immediate action can prevent further damage.
For detailed guidance on how to manage leaf curling effectively, visit our article on rubber plant leaves curling.
Red Flags to Watch For
Certain symptoms can indicate that your rubber plant is experiencing stress or other issues. By recognizing these red flags early, you can take prompt action to remedy the situation.
Common Red Flags
- Brown, Crispy Leaves: This usually points to underwatering or lack of sufficient light (Vintage Revivals).
- Yellow Leaves: Could be a sign of overwatering, insufficient light, or temperature fluctuations (Quora).
- Leaf Drop: A combination of underwatering and low light can cause leaves to turn brown and drop as the plant focuses on maintaining living leaves.
Monitoring and Action
- Watering Adjustments: Adjust watering frequency based on the plant’s needs. Refer to rubber plant watering for more tips.
- Light Exposure: Ensure your rubber plant receives adequate light. Lack of light can exacerbate issues like leaf drop and yellowing. Refer to rubber plant light requirements for more information.
- Temperature Control: Maintain a stable indoor temperature to avoid stressing the plant.
| Symptom | Possible Cause(s) | Solution |
|---|---|---|
| Brown, Crispy Leaves | Underwatering, Low Light | Increase watering, Ensure adequate light |
| Yellow Leaves | Overwatering, Inadequate Light, Temperature Fluctuations | Adjust watering, Ensure proper lighting, Stabilize temperature |
| Leaf Drop | Underwatering, Low Light | Check watering schedule, Optimize light exposure |
Addressing these issues early can prevent further damage and help maintain a healthy and vibrant rubber plant. Visit our article on rubber plant diseases for more information on identifying and treating common problems.


