Spider Plant Propagation
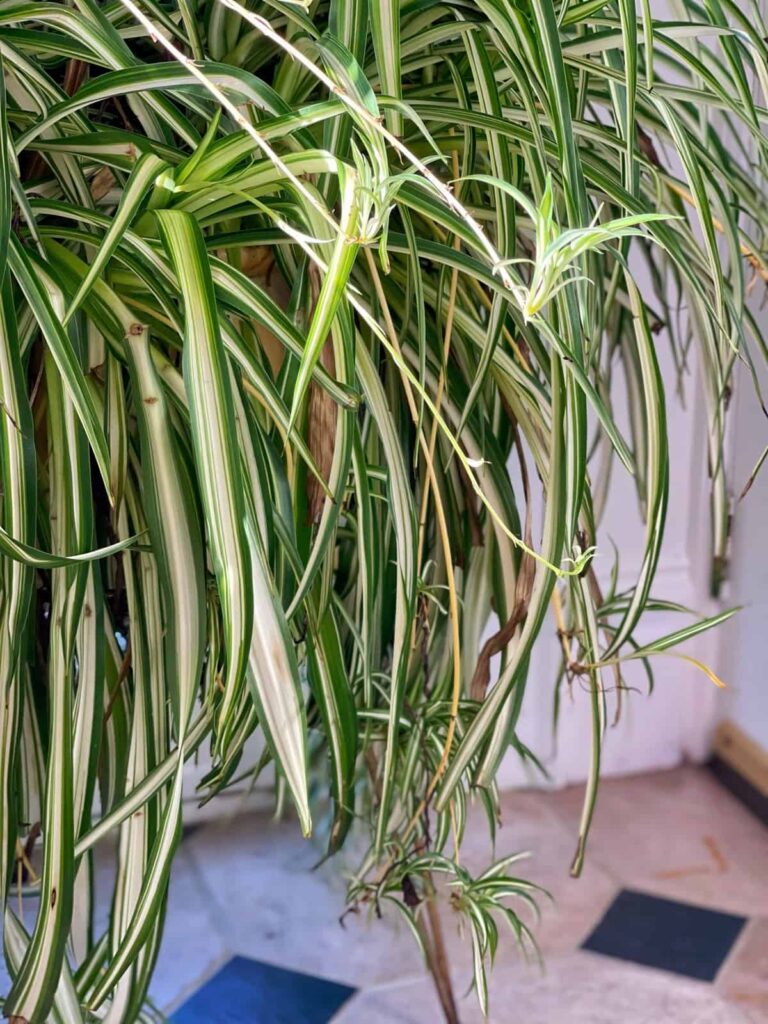
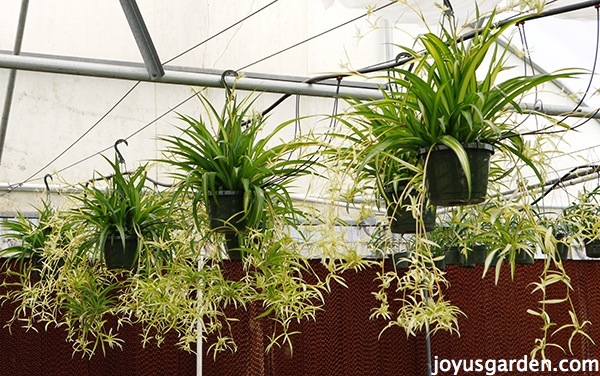
Spider plants are known for their ease of propagation, making them a favorite among gardeners. Propagation not only expands your indoor garden but can also provide plants to gift to friends and family.
Methods of Propagation
Spider plants can be propagated through various techniques, primarily involving rooting spiderettes or dividing mature plants. Here are some common methods:
-
Cuttings Rooted in Soil or Water: This involves clipping the spiderettes (small offshoots) from the main plant and rooting them either in soil or water.
-
Stolon Planting: Spider plants produce stolons, which are horizontal plant stems that can be clipped and replanted to form new plants.
-
Dividing the Root Ball: This method involves separating a mature plant’s root ball, allowing the new sections to grow independently.
Water vs. Soil Propagation
When propagating spider plants, gardeners often debate between using water or soil. Each method has its unique benefits and considerations.
Water Propagation
Propagating in water allows for the development of roots that can be observed throughout the process. This method typically shows root growth within seven to ten days (The Spruce).
| Advantages | Disadvantages |
|---|---|
| Quick root formation within 7-10 days | Roots may be weaker and need acclimation to soil later |
| Easy to monitor root development | Roots primarily formed for water may struggle initially in soil (The Spruce) |
For those new to spider plant care, water propagation can be a straightforward way to start.
Soil Propagation
Propagating spider plants directly in soil can lead to sturdier root growth. The resistance encountered in the soil environment aids in developing stronger and healthier plants.
| Advantages | Disadvantages |
|---|---|
| Stronger, more robust root development | Slower initial root formation compared to water propagation (Lively Root) |
| Better acclimation to soil conditions |
Both methods have their merits, and choosing between them can depend on the gardener’s preference and experience level. For more detailed techniques, visit our page on spider plant propagation.
Spider plants, once well-established, can produce spiderettes after about a year. These offshoots can be utilized to propagate new plants, contributing to a lush indoor garden or as thoughtful green gifts.
By understanding these propagation methods and their benefits, gardeners can effectively multiply their spider plants and enjoy a thriving indoor garden.
Propagating Spider Plants
Proper propagation of spider plants not only helps in spreading their beauty but also ensures continuous growth and health. Two effective methods are rooting spiderettes in water and dividing mature plants.
Rooting Spiderettes in Water
Spider plants produce baby plants known as spiderettes on long runners called stolons. Rooting these spiderettes in water is a simple and effective method (Lively Root).
Steps for Rooting Spiderettes in Water
- Identify healthy spiderettes with visible roots.
- Cut the spiderette from the main plant using sterile scissors.
- Place the spiderette in a container of water, ensuring the roots are submerged.
- Position the container in indirect sunlight.
- Change the water every few days to prevent stagnation.
With this method, new roots typically develop within a few weeks, making the plantlets ready for potting.
| Step | Action |
|---|---|
| 1 | Identify healthy spiderettes |
| 2 | Cut from the main plant |
| 3 | Submerge roots in water |
| 4 | Place in indirect sunlight |
| 5 | Change water every few days |
Dividing Mature Plants
Dividing mature spider plants is another propagation method, ideal for revitalizing older plants and encouraging new growth (The Spruce).
Steps for Dividing Mature Plants
- Gently remove the mature plant from its pot.
- Examine the root ball and identify natural division points.
- Use a sharp sterilized knife to separate the plant into smaller sections.
- Plant each section in a separate pot with fresh potting soil.
- Water the newly potted plants thoroughly and place them in indirect light.
Dividing allows for the propagation of multiple plants from one mature spider plant, giving each new plant room to grow.
| Step | Action |
|---|---|
| 1 | Remove plant from pot |
| 2 | Identify division points |
| 3 | Separate using a knife |
| 4 | Pot each section separately |
| 5 | Water and place in indirect light |
For more detailed guidelines on propagation, visit our page on spider plant propagation.
By understanding these methods, gardeners can effectively expand their spider plant collection. Regular propagation aids in maintaining healthy plants and allows for the enjoyment of various spider plant species. To ensure the best outcome, adhere to proper spider plant care practices and monitor for common issues like spider plant root rot.
Best Time for Propagation
Understanding the best time for propagation is essential for ensuring healthy and successful growth of spider plants. Let’s explore the ideal seasons and techniques for propagating these popular indoor plants.
Ideal Seasons for Propagation
Spider plants can be propagated throughout the year due to their robust and resilient nature. However, they tend to respond best during the spring and summer growing seasons (The Spruce). During these periods, the plant is actively growing and more likely to produce viable baby plants, also known as spiderettes.
Propagating during these seasons ensures that the new plants have ample sunlight and warm temperatures to establish themselves. Additionally, this period aligns with the natural growth cycle of spider plants, making it easier for them to root and develop.
| Season | Propagation Success |
|---|---|
| Spring | High |
| Summer | High |
| Fall | Moderate |
| Winter | Low |
Propagation Tips and Techniques
Successful propagation involves understanding and applying various techniques. Here are some essential tips and methods to consider:
- Rooting Spiderettes in Water:
- Clip a healthy spiderette from the mother plant.
- Place the spiderette in a cup of water, ensuring the base is submerged.
- Change the water every few days to keep it fresh.
- Wait for roots to develop before transferring to soil.
- Rooting Spiderettes in Soil:
- Prepare a small pot with a moist, rich potting mix.
- Plant the spiderette directly into the soil.
- Water the soil lightly and keep it in a spot with bright, indirect sunlight.
- Monitor the growth and water when the top inches of the potting mix dry out.
- Dividing Mature Plants:
- Remove the mature plant from its pot.
- Gently separate the root ball into sections, ensuring each section has roots attached.
- Repot each section in a new pot with fresh potting mix.
- Water the newly potted plants thoroughly and place them in a suitable location.
For optimal results, always use a balanced plant food every two to four weeks during the growing season. This ensures your plants receive the necessary nutrients for growth. Be mindful of indoor conditions and adjust care routines as needed, such as increasing humidity around the plant to keep leaves healthy.
For more information on propagation methods, please visit our detailed article on spider plant propagation.
Spider Plant Care Tips
Proper care is essential for maintaining the health and beauty of spider plants. Here are some crucial tips on light and water requirements, ideal growing conditions, and common care mistakes to avoid.
Light and Water Requirements
Spider plants thrive in bright, indirect sunlight but can tolerate low light conditions.
| Light Condition | Effect on Plant |
|---|---|
| Bright, Indirect Sunlight | Optimal growth |
| Low Light | Slower growth |
| Direct Sunlight | Potential leaf burn |
For optimal watering, spider plants prefer their soil lightly moist but not soggy (The Spruce). It is also essential to use rainwater or distilled water, as these plants are sensitive to fluoride and chlorine commonly found in tap water.
Ideal Growing Conditions
Spider plants prefer temperatures between 60–80° F and will do well in normal household humidity but thrive with increased humidity (Bloomscape).
| Condition | Ideal Range |
|---|---|
| Temperature | 60–80° F |
| Humidity | Normal household level, but can benefit from higher humidity |
Spider plants thrive in loose, loamy soil with sharp drainage. Regular misting may help to avoid brown leaf tips, which can indicate dry air.
Common Care Mistakes
To keep your spider plant healthy, avoid these common care mistakes:
- Overwatering: Ensure the plant’s soil is not overly saturated. Spider plants prefer slightly moist soil.
- Inadequate Light: Provide bright, indirect sunlight for optimal growth. Avoid direct sunlight to prevent leaf burn.
- Using Tap Water: Avoid using water with high fluoride or chlorine content. Use distilled or rainwater when possible.
- Ignoring Humidity: Regularly mist the plant, especially in dry indoor environments, to maintain leaf health (Bloomscape).
For additional guidance on spider plant maintenance, consider visiting our article on spider plant care. Learn more about specific issues such as spider plant brown tips or spider plant yellow leaves to keep your plant thriving and healthy.
Spider Plant Species
Exploring the diverse spider plant species allows gardeners to choose the variety that best fits their indoor garden. Each species and variety offers unique characteristics suited to different preferences and aesthetics.
Popular Spider Plant Varieties
Spider plants (Chlorophytum comosum) are popular for their ease of care and attractive foliage. Among the many cultivars, several stand out due to their unique features and wide availability:
| Cultivar | Description |
|---|---|
| Variegatum | Green leaves edged in white. |
| Vittatum | White stripe down the center with green margins. |
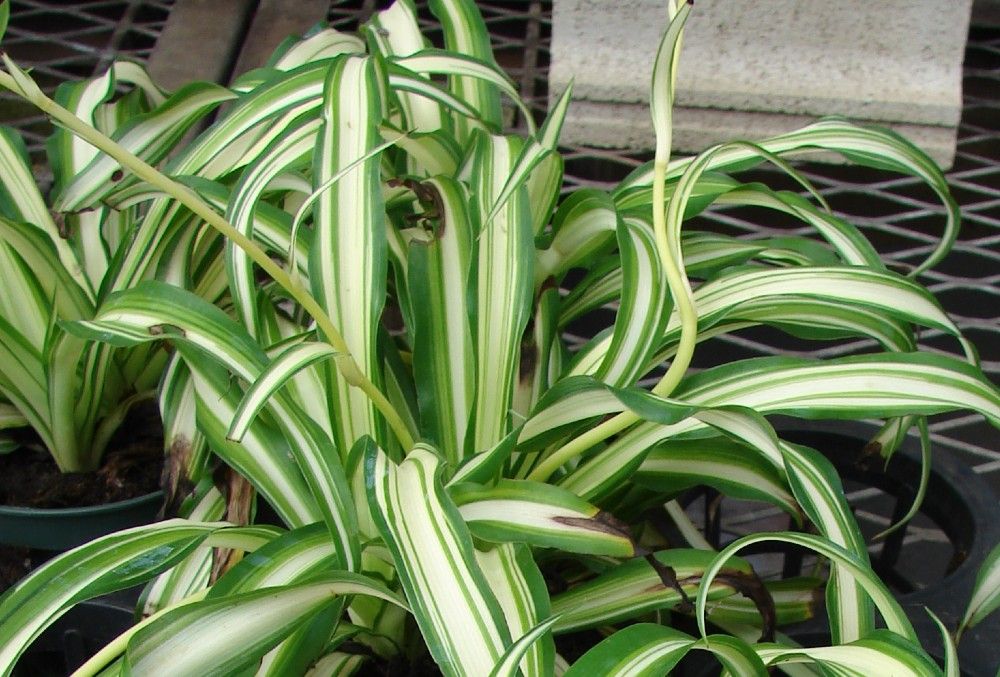
| Bonnie | Compact curly cultivar with variegated leaves. |
Information courtesy of Jane Perrone
These varieties are particularly favored by indoor gardeners. For more tips on caring for these options, visit our spider plant care guide.
Unique Characteristics and Names
In addition to the well-known Chlorophytum comosum, several other spider plant species offer unique characteristics:
| Species | Characteristics |
|---|---|
| Chlorophytum orchidastrum | Known for its broader leaves and orange stems. |
| Chlorophytum viridescens | Features greener leaves with a less pronounced stripe. |
For more information on lesser-known species and specific care needs, refer to Plantura.
Understanding the various spider plant species and their unique traits can greatly enhance your indoor gardening experience. Whether it’s maintaining proper light conditions or choosing the right soil, each species brings something special to your home garden.
Troubleshooting Spider Plants
Spider plants can encounter several issues that might impede their growth and aesthetic appeal. This section will help gardeners identify and manage common problems as well as pests and diseases.
Common Plant Issues
Yellow Leaves
Spider plants may develop yellow leaves due to improper watering. Both underwatering and overwatering can cause this symptom. Additionally, rootbound plants will show yellowing as they struggle to absorb moisture (Plant Addicts). To address watering issues, water the plant only when the top inches of soil are dry. If the plant is rootbound, consider repotting into a larger pot with fresh soil.
Brown Tips
Brown tips on spider plant leaves can be caused by several factors, including low humidity, fluoride in the water, or excessive fertilizer. Ensure the plant is away from direct drafts and mist it regularly if humidity is low. Use filtered or distilled water to minimize fluoride exposure, and dilute any fertilizers to avoid overfeeding.
Leaf Spots
Spider plants are susceptible to leaf spot diseases caused by pathogens like Alternaria, Cercospora, Fusarium, and Phyllosticta spp. Symptoms include brown, black, or yellow spots on the leaves (Gardener’s Path). Treatment involves applying broad-spectrum fungicides such as copper fungicide or Mycostop.
Root Rot
Root rot in spider plants is most commonly due to overwatering and can be caused by pathogens like Pythium splendens, Rhizoctonia solani, or Sclerotium rolfsii. Symptoms include wilting and yellowing of leaves. Treat root rot by repotting the plant with fresh soil after removing the affected roots.
| Issue | Symptom | Cause | Solution |
|---|---|---|---|
| Yellow Leaves | Yellowing of leaves | Overwatering or rootbound | Adjust watering, check for rootbound, repot |
| Brown Tips | Brown leaf tips | Low humidity, fluoride, fertilizers | Mist regularly, use filtered water, dilute fertilizer |
| Leaf Spots | Spots on leaves | Pathogens like Alternaria | Use copper fungicide or Mycostop |
| Root Rot | Wilting, yellow leaves | Overwatering, pathogens | Remove affected roots, repot with fresh soil |
Pests and Diseases Management
Aphids
Aphids can cause leaves to twist and stunt growth. They are generally found on the undersides of leaves and can be treated by rinsing the plant with water or using insecticidal soap.
Whiteflies
Whiteflies are tiny, winged insects that suck sap from the plant, causing leaves to yellow and drop. Control measures include using sticky traps and applying horticultural oil.
Spider Mites
Spider mites cause stippling and discoloration on leaves, and are identifiable by the fine webs they leave behind. Treatment includes rinsing the plant, using insecticidal soap, and increasing humidity to deter mites.
| Pest Type | Symptoms | Treatment |
|---|---|---|
| Aphids | Twisting/stunted growth | Rinse, insecticidal soap |
| Whiteflies | Yellowing, dropping leaves | Sticky traps, horticultural oil |
| Spider Mites | Stippling, discoloration, webs | Rinse, insecticidal soap, increase humidity |
For more detailed advice on caring for spider plants, including handling specific pests and diseases, check out related articles on:
This comprehensive troubleshooting guide will help gardeners to maintain healthy and vibrant spider plants.


