Spider Plant Care Basics
Understanding the basics of caring for spider plants entails knowing the ideal methods for propagating them and ensuring they have the right conditions for thriving. Here’s an overview of the most effective ways to propagate spider plants.
Propagation Methods
Spider plants can be propagated through three main methods: stem cuttings, divisions, and stolons.
Stem Cuttings
Propagation through stem cuttings involves cutting a portion of the plant’s stem and allowing it to root in water or soil. This method is simple and effective for producing healthy new plants.
- Select a healthy stem.
- Cut a 4-6 inch section below a node.
- Place the cutting in water or soil.
- Wait for roots to develop before transplanting.
Divisions
Divisions involve separating an existing spider plant into multiple smaller plants. This method is often used when the plant becomes too large for its pot.
- Remove the plant from its pot.
- Gently separate the plant into smaller sections.
- Replant each division in individual pots.
Stolons
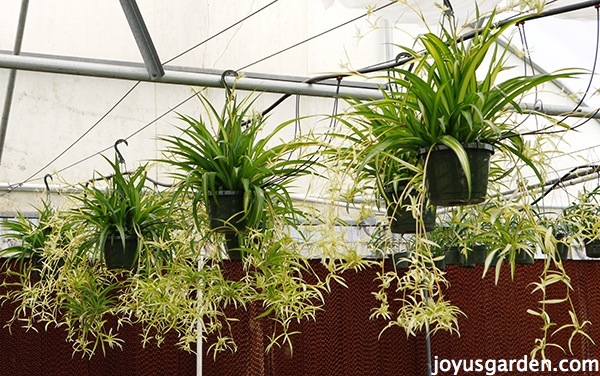
Stolons, or runners, are the baby spider plants that develop on the ends of long stems. These can be rooted while still attached to the parent plant or detached and planted separately.
- Locate a healthy runner.
- Allow the runner to root in a separate pot while still attached.
- Once roots develop, sever from the parent plant.
- Transplant to a permanent pot.
For more detailed instructions, see our article on spider plant propagation.
Ideal Propagation Conditions
Creating optimal conditions for propagation ensures the success of new spider plants. Here are some key factors to consider:
Temperature
Spider plants thrive in warm temperatures, similar to their native habitat in South Africa. A temperature range of 70°F to 90°F is ideal for propagation.
| Optimal Temperature | 70°F – 90°F |
|---|---|
| Minimum Temperature | 50°F |
| Maximum Temperature | 100°F |
For more on temperature preferences, check out spider plant temperature tolerance.
Light
Moderate indirect light is preferred for successful propagation. Direct sunlight can be too harsh, while low light conditions can slow down growth. More information on light needs can be found in our spider plant light requirements.
Soil
Spider plants grow best in slightly clayey soil with good water retention. A mixture of coconut fibers, high-quality compost, and loamy garden soil provides the perfect environment.
| Soil Type | Characteristics |
|---|---|
| Loamy Garden Soil | Good water storage |
| Coconut Fibers | Reduces compacting |
| High-quality Compost | Nutrient-rich |
Humidity
High humidity levels mimic the spider plant’s native environment and enhance root development. Aim for a humidity level of around 50-70%. Learn more about creating the ideal environment in our article on spider plant humidity.
Providing these optimal conditions will support the healthy growth of new spider plants. For dealing with common problems like spider mites or nutrient issues, visit our articles on spider plant diseases and spider plant fertilizer.
Repotting Spider Plants
Repotting is a crucial aspect of spider plant care that ensures healthy growth and vibrant foliage. Here, we’ll explore the signs that indicate when a spider plant needs repotting and outline the proper technique for repotting spider plants.
Signs for Repotting
Recognizing when your spider plant requires repotting is vital for maintaining its health. Several signs indicate that repotting is necessary (Epic Gardening):
- Roots Growing Through Drainage Holes: Roots emerging from the bottom of the pot indicate that the plant is root-bound and needs more space.
- Roots Growing Above Soil Line: Visible roots above the soil suggest insufficient room for root expansion.
- Stunted Growth: Limited growth or reduced foliage can be due to cramped roots and inadequate nutrient absorption.
- Disintegrated Soil: Soil that has broken down and lost its structure impacts the plant’s ability to access nutrients and water.
| Signs | Indications |
|---|---|
| Roots growing through drainage holes | Root-bound, needs more space |
| Roots above soil line | Insufficient room for roots |
| Stunted growth | Nutrient deficiency due to cramped roots |
| Disintegrated soil | Decline in soil quality |
Proper Repotting Technique
Repotting spider plants should be done with care to avoid damaging the roots and to provide the plant with adequate space to thrive. The optimal time for repotting is during the plant’s active growth period, typically in early spring (Epic Gardening).
- Prepare the New Pot:
- Choose a container that is one to two sizes larger than the current one.
- Use a well-draining soil mix to promote airflow and prevent root rot.
- Remove the Plant from Its Current Pot:
- Gently turn the pot upside down while supporting the plant.
- Tap the bottom of the pot to loosen the soil, allowing the plant to slide out.
- Tease the Roots:
- Carefully untangle the roots to encourage them to spread out in the new pot.
- Trim any damaged or excessively long roots.
- Optional Division:
- If the plant has become too large, it can be divided into smaller sections, each with its own root system.
- Plant in the New Pot:
- Place the plant in the center of the new pot.
- Fill in with additional soil, ensuring the roots are well-covered.
- Water Thoroughly:
- Water the plant to help settle the soil around the root system.
- Post-Repotting Care:
- Place the plant in a suitable location with appropriate light and temperature (spider plant light requirements).
- Monitor the plant closely for any signs of stress or adjustment issues.
By following these steps, gardeners can ensure that their spider plants remain healthy and continue to thrive. For more information on other aspects of spider plant care, including common issues and pest management, visit our spider plant repotting guide.
Spider Plant Characteristics
Understanding the characteristics of spider plants is essential for their proper care. This section covers the basic profile of the spider plant and its growth preferences.
Plant Profile
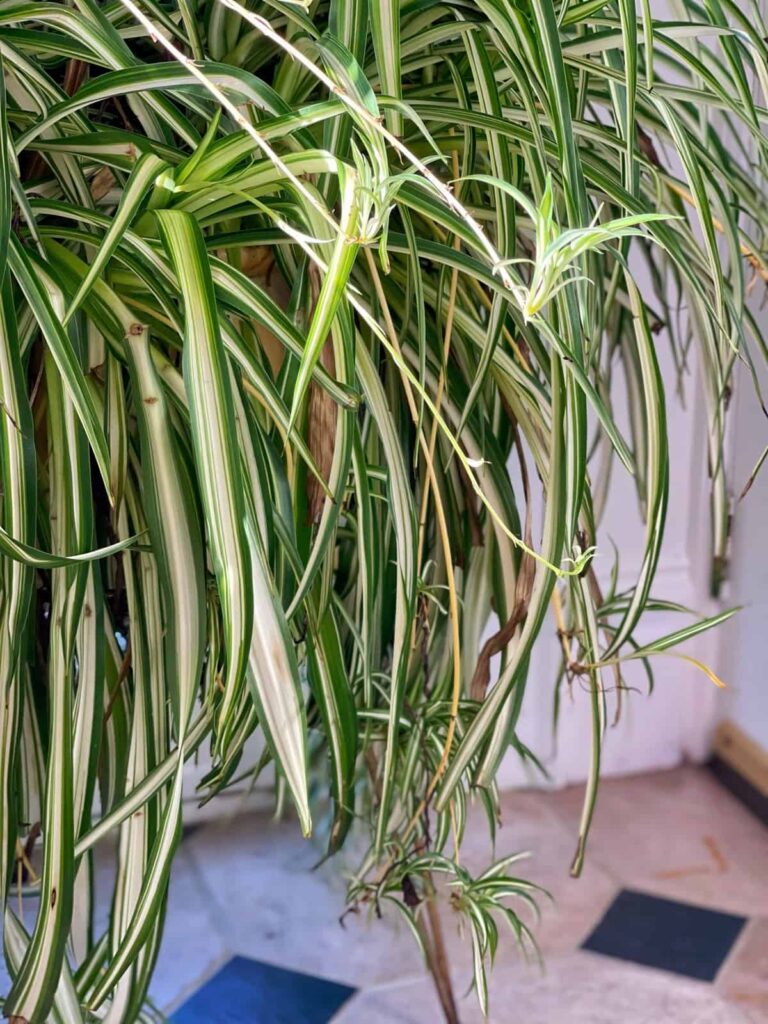
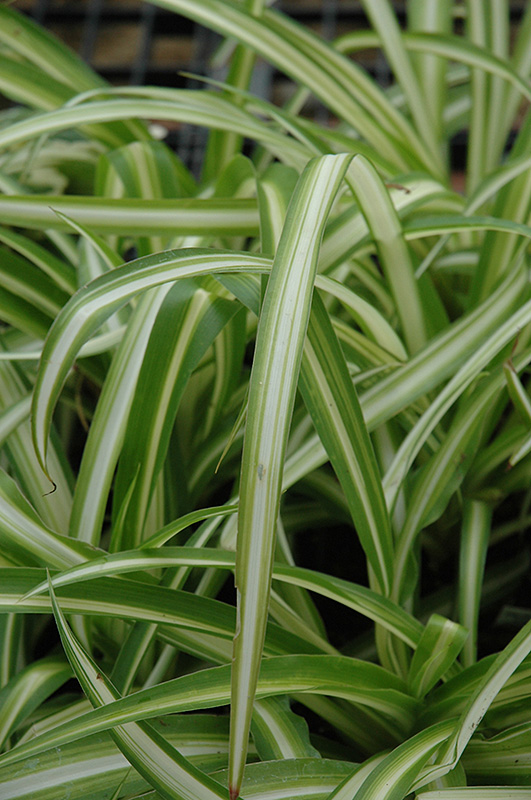
Spider plants, scientifically known as Chlorophytum comosum, are popular houseplants due to their easy maintenance and appealing appearance. They feature rosettes of slender, gently arching leaves that can stretch from around 12 to 18 inches long. These leaves are usually green or striped green and white (The Spruce).
Key characteristics:
- Scientific Name: Chlorophytum comosum
- Common Names: Spider plant, airplane plant, St. Bernard’s lily
- Leaf Structure: Slender, arching leaves
- Leaf Length: 12 to 18 inches
- Colors: Green or variegated (striped green and white)
Spider plants are known for their hardiness and ability to thrive with minimal care. They are non-toxic, making them safe to have around pets and children (Patch Plants).
Growth Preferences
Spider plants are quite undemanding in terms of care and location. They thrive in various light conditions but prefer brighter spots in the home. However, harsh direct sunlight should be avoided as it can damage the leaves (Patch Plants).
Key growth preferences:
- Light Requirements: Indirect, bright light is best (spider plant light requirements)
- Temperature Tolerance: Prefers temperatures between 65-75°F (spider plant temperature tolerance). Can tolerate a range of temperatures but should be kept away from cold drafts.
Spider plants also have specific needs when it comes to watering and soil:
| Requirement | Preferred Conditions |
|---|---|
| Soil | Lightly moist, well-draining soil |
| Water | Prefer lightly moist but not soggy soil to prevent root rot. Sensitive to fluoride and chlorine in water (The Spruce) |
| Humidity | Moderate humidity levels are sufficient (spider plant humidity) |
| Fertilizer | Light feeding during the growing season (spider plant fertilizer) |
Spider plants retain moisture well in their fleshy tubers, so inconsistent watering won’t harm them too much. However, using rainwater or distilled water is recommended to avoid browning leaf tips due to sensitivity to fluoride and chlorine (The Spruce).
For more specific guidance on propagating spider plants, see our section on spider plant propagation. If you notice issues such as spider plant brown tips or yellow leaves, these might indicate care adjustments are needed.
Watering and Feeding
Proper care for your spider plant includes understanding its watering and feeding needs. These essential practices ensure that your plant remains healthy and vibrant.
Watering Guidelines
Spider plants prefer lightly moist but not soggy soil. To prevent root rot, it is essential to avoid overwatering. Here’s a detailed guide for watering:
- Frequency: A light drink of water every week is usually sufficient. Reduce the frequency in autumn and winter when the plant’s growth slows down.
- Water Type: These plants are sensitive to fluoride and chlorine, which may cause browning of the leaf tips. Using rainwater or distilled water is recommended.
- Checking Moisture: To check if the plant needs watering, dip your finger into the soil up to the second knuckle. If the soil feels dry at this depth, it’s time to water.
| Season | Watering Frequency |
|---|---|
| Spring/Summer | Weekly |
| Autumn/Winter | Bi-weekly |
For more details on spider plant brown tips and their causes, review our internal guide for in-depth insights.
Fertilizing Tips
Spider plants benefit from regular feeding, especially during the growing season. Follow these fertilizing guidelines to keep your plant nourished:
- Fertilizer Type: Use a balanced, water-soluble fertilizer.
- Frequency: Feed the plant once a month during the growing season (spring and summer). Reduce feeding to once every two months in the autumn and winter.
- Application Method: Dilute the fertilizer according to the manufacturer’s instructions and apply directly to the soil.
| Season | Fertilizing Frequency |
|---|---|
| Spring/Summer | Monthly |
| Autumn/Winter | Every two months |
For more specific recommendations, explore our detailed article on spider plant fertilizer to learn about the different types and their benefits.
Always remember to monitor the plant for any signs of nutrient deficiency, such as yellowing leaves, which may require adjustments in your fertilizing routine. For further guidance, visit our page on spider plant yellow leaves.
By adhering to these watering and feeding tips, you can ensure optimal growth and health for your spider plant. For additional information, check related topics such as spider plant propagation and spider plant repotting.
Light and Temperature Requirements
Lighting Needs
Spider plants, known for their adaptability, can tolerate various light conditions, making them a popular choice for many indoor gardening enthusiasts. However, to ensure optimal growth and health, it is recommended to provide them with bright, indirect light. This helps mimic their natural habitat, where they receive filtered sunlight.
Spider plants prefer sunny to semi-shady locations but should be kept away from harsh, direct sunlight. Direct sunlight can cause leaf burn and damage the plant. Instead, place them near a window where they can receive plenty of indirect light throughout the day.
| Light Conditions | Suitability |
|---|---|
| Bright, Indirect Light | Ideal |
| Semi-Shady | Suitable |
| Direct Sunlight | Not Recommended |
For more detailed guidance, check out our article on spider plant light requirements.
Temperature Tolerance
Spider plants thrive in warm, humid conditions and are quite versatile when it comes to temperature requirements. The optimal temperature range for spider plants is around 68°F to 75°F (20°C to 24°C). They can tolerate a range of temperatures but should be protected from extreme heat and frost conditions (Patch Plants).
One important aspect of spider plant care is maintaining adequate humidity levels. Spider plants require humidity levels of 50% to 60%, although they thrive at levels above 70%. Using an indoor humidifier can help achieve the necessary humidity, especially during dry winter months.
| Temperature | Suitability |
|---|---|
| 68°F to 75°F (20°C to 24°C) | Ideal |
| Above 50°F (10°C) | Tolerable |
| Below 50°F (10°C) | Not Tolerable |
In colder months, it is essential to take precautionary measures to maintain the plant’s health. For more information on caring for spider plants during winter, visit our page on spider plant care in winter.
By understanding these lighting and temperature needs, gardeners can ensure that their spider plants not only survive but thrive in various indoor environments. Adjustments to light and temperature conditions, along with humidity control, can make a significant difference in the overall health and appearance of your spider plant. For further details on the various care aspects, explore our comprehensive guides on topics such as spider plant fertilization and spider plant repotting.
Common Issues and Pests
Spider plants are generally hardy, but like any other plant, they can be susceptible to pests. One of the most common pests that affect spider plants are spider mites. This section will explore how to recognize and manage spider mite infestations.
Recognizing Spider Mite Infestations
Spider mites are tiny pests that have needle-like sucking mouthparts. They feed by penetrating plant tissue, causing significant damage in a short period. Recognizing an infestation is the first step in managing it.
Symptoms of Spider Mite Infestation:
- Small yellowish or whitish specks on leaves, mainly around the midrib and larger veins.
- As the spots grow bigger and merge, affected areas of the leaf may appear whitish or silvery-transparent.
Monitoring for these symptoms can help catch an infestation early, preventing extensive damage to your spider plant.
| Symptom | Description |
|---|---|
| Yellowish/Whitish Specks | Found mainly around the midrib and larger veins. |
| Merged Spots | Affected areas appear whitish or silvery. |
Preventing and Managing Infestations
Preventing spider mite infestations involves creating an environment that is less conducive to their reproduction and survival.
Prevention Tips:
- Temperature: Keep the temperature lower than 77°F.
- Humidity: Maintain humidity levels higher than 60%.
- Cleanliness: Ensure growing areas are clean and free of leaf litter.
- Irrigation: Proper watering prevents damage from water-stressed plants.
To learn more about maintaining proper humidity, refer to our article on spider plant humidity.
Management Techniques:
- Remove Affected Leaves: Cut off and dispose of leaves showing symptoms.
- Spray Mixture: Use a mixture of alcohol and soap to spray the plant thoroughly. Repeat several times a week.
- Natural Predators: Introduce natural enemies such as predatory mites, ladybirds, predatory bugs, and lacewings to control spider mite populations (Canna Gardening).
For additional advice on keeping your spider plant healthy, check out our guidelines on spider plant care in winter.
Implementing these strategies can help keep your spider plant vibrant and healthy. Early detection and intervention can prevent most issues from becoming severe, ensuring that your indoor garden thrives. If you want to explore more on similar issues, visit our page on spider plant diseases.


