Understanding Indoor Plant Humidity
Indoor humidity plays a significant role in the health and well-being of houseplants like the spider plant. Monitoring and adjusting humidity levels can lead to thriving, lush vegetation.
Importance of Indoor Humidity
Humidity refers to the amount of moisture in the air. For plants, proper humidity levels are essential for several reasons:
- Moisture Regulation: Plants like the spider plant, calatheas, and crotons originate from tropical regions where humidity is naturally high. This environment supports their growth and development (Gardeners’ World).
- Nutrient Absorption: Adequate humidity enables efficient transpiration—the process by which plants lose water vapor through their leaves. This water movement helps transport essential nutrients from the soil to various parts of the plant.
- Pest Resistance: High humidity levels make plants less susceptible to common pests such as spider mites, which thrive in dry conditions and can sap a plant’s health (Gardeners’ World).
- Air Purification: Spider plants are noted for their ability to humidify the air and remove toxins like carbon monoxide and formaldehyde (Healthline).
Effects of Low Humidity
When indoor humidity levels drop, especially in winter when heating systems are in use, plants can suffer from several issues:
- Leaf Damage: Low humidity often results in leaves turning brown, curling, or becoming crispy at the edges.
- Water Loss: Plants lose moisture more rapidly in low-humidity environments, leading to dehydration. This increases their need for frequent watering during periods of active growth (MyPlantIn).
- Increased Susceptibility to Pests: Dry conditions can attract pests like spider mites that feed on plant sap, weakening the plant and making it prone to further pest infestations (Gardeners’ World).
| Issue | Effect of Low Humidity | Solution |
|---|---|---|
| Leaf Damage | Brown, crispy edges | Increase humidity using a humidifier or water vessel |
| Water Loss | Rapid moisture evaporation | More frequent watering, especially during growth |
| Pest Attraction | Spider mites infestation | Maintain high humidity environments |
Understanding the importance of indoor humidity and its effects on plants can aid gardeners in creating optimal conditions for their spider plants. Consider utilizing methods to boost humidity and monitoring plant health for signs of low humidity. For more information on spider plant care, explore our comprehensive care guide.
Spider Plant Characteristics
Spider Plant Features
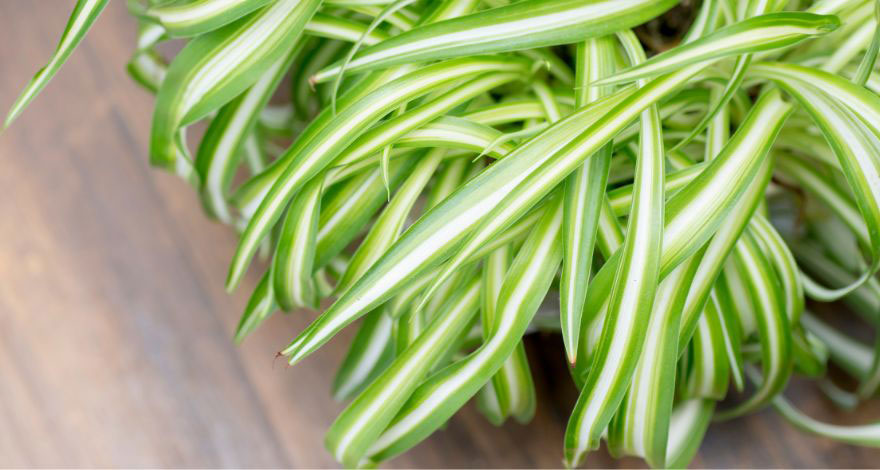
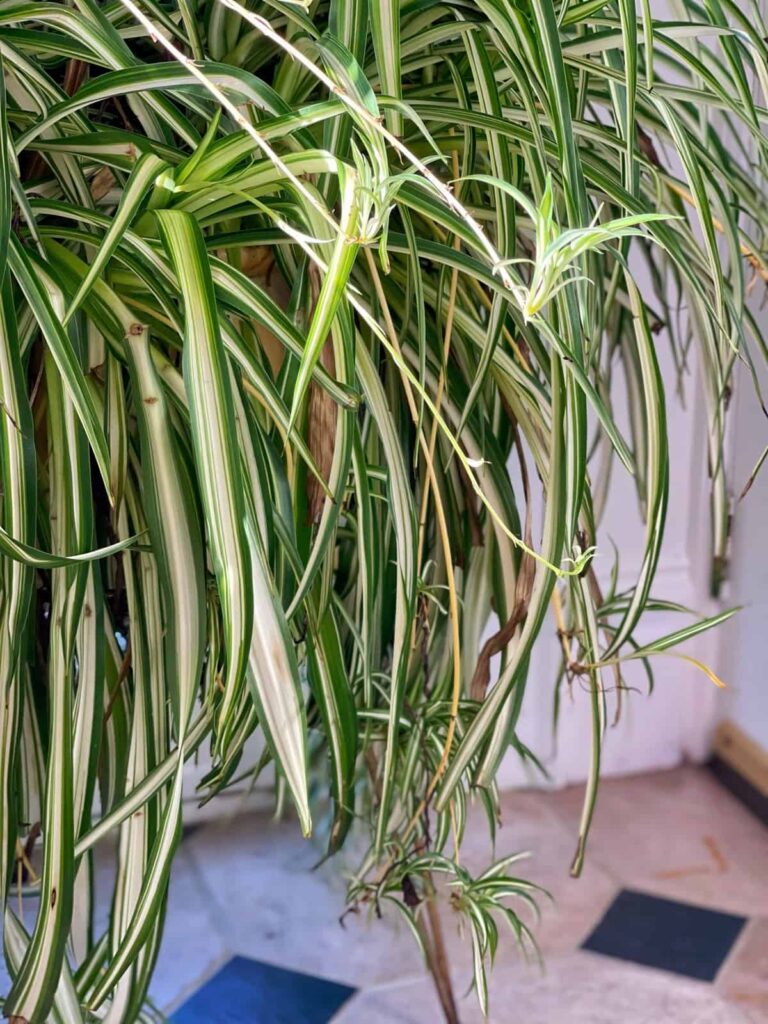
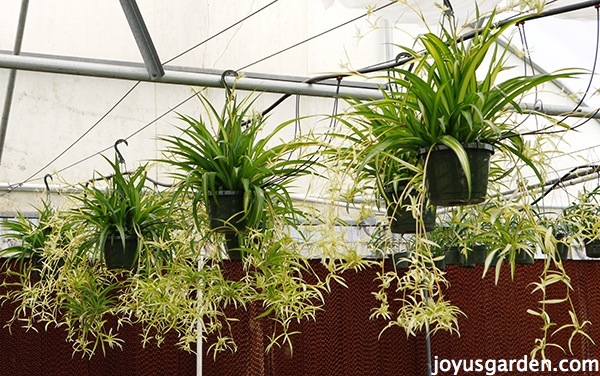
Spider plants, known scientifically as Chlorophytum comosum, are popular houseplants favored for their air-purifying qualities. Originating from South Africa, these plants are appreciated for their ease of care and attractive appearance. Characterized by their long, arching, variegated leaves and small white flowers, spider plants are also known to produce “pups” or spiderettes, which can be cultivated into new plants.
Spider Plant Care Basics
Taking care of spider plants is relatively straightforward. They are resilient and can grow in a range of indoor conditions. Here are a few basic care guidelines:
- Watering: Spider plants prefer their soil to be kept moist but not waterlogged. Water them when the top inch of soil feels dry.
- Light: They thrive in bright, indirect sunlight but can also tolerate low light conditions. For optimal growth, place them near a window where they receive filtered light.
- Fertilization: Use a balanced liquid fertilizer every month during the growing season (spring and summer).
- Humidity: These plants enjoy humidity levels between 50-60%. Using a humidifier, placing a tray of water with pebbles beneath the plant, or grouping plants together can help maintain proper humidity levels.
For additional tips, you can refer to our spider plant care page.
Ideal Environment for Spider Plants
Creating an ideal environment is key to a healthy spider plant. Understanding the environment that suits them best will ensure they flourish indoors.
| Factor | Ideal Conditions |
|---|---|
| Light | Bright, indirect sunlight |
| Temperature | 60°F to 80°F (Lively Root) |
| Humidity | 50-60% (MyPlantIn) |
Humidity levels are particularly important for spider plants as they are humidity-loving plants. Studies show that using small indoor plants like Boston ferns and peace lilies can boost ambient humidity, benefiting spider plants (Quirky Plants). Mist spider plants regularly to maintain their hydration levels and prevent issues like spider plant brown tips.
Additionally, keeping spider plants away from drafts, air-conditioning vents, and heating sources will prevent excessive drying of leaves, which is essential during winter months. For more insights on providing the best environment during colder seasons, check our guide on spider plant care in winter.
For those looking to propagate, repot, or maintain spider plants, additional resources are available on spider plant propagation, spider plant repotting, and more.
Increasing Humidity for Spider Plants
Proper humidity is vital for ensuring the health and vitality of spider plants. With an optimal humidity range between 50-60%, indoor conditions often need to be adjusted to meet these requirements. Here are some effective methods to boost humidity, along with other plants that can help maintain indoor air moisture.
Methods to Boost Humidity
There are several ways to increase humidity for your spider plant:
-
Humidifiers: Using an indoor humidifier can consistently maintain the desired humidity levels. Models like Honeywell, TaoTronics Cool, and Pure Guardian are reliable options.
-
Pebble Tray: Place a tray filled with pebbles and water under the plant pot. As the water evaporates, it raises the humidity around the plant.
-
Grouping Plants: Placing multiple plants together can create a mini micro-environment, increasing the localized humidity.
-
Misting: Lightly misting the leaves with water can temporarily boost humidity. Be cautious not to over-mist, as this can lead to mold and fungus.
-
Water Vessels: Position containers filled with water near the plants. As the water evaporates, it adds humidity to the air.
Here’s a quick comparison of these methods:
| Method | Pros | Cons |
|---|---|---|
| Humidifiers | Consistent, Easy to control | Requires electricity |
| Pebble Tray | Simple, Low cost | Requires refill |
| Grouping Plants | Natural, Effective | Space-consuming |
| Misting | Easy, Immediate effect | Short-term, Risk of mold |
| Water Vessels | Inexpensive, Effective | Frequent refill needed |
For more detailed practices, visit our guide on spider plant care.
Best Plants for Indoor Humidity
Some plants are well-known for their ability to boost indoor humidity levels. Incorporating these alongside your spider plant can help maintain a healthy environment:
- Boston Ferns: These plants release moisture into the air and thrive in humid conditions.
- Rubber Plants: Known for their ability to increase humidity and purify air.
- Baby Palms: Effective at releasing moisture, creating a humid environment.
- Peace Lilies: Apart from improving humidity, they also help in purifying indoor air.
Spider plants themselves are effective at increasing indoor humidity and are renowned for their air-purifying qualities, as highlighted by NASA’s study on removing toxins like carbon monoxide (Healthline).
For detailed descriptions and care tips for these plants, you can explore articles on spider plant variegated and spider plant toxic to cats. These resources will guide you in creating an ideal, lush, and humid indoor environment.
Signs of Low Humidity
Humidity plays a crucial role in maintaining the health of spider plants. Recognizing the signs of low humidity can help gardeners address and rectify these issues promptly.
Symptoms to Watch For
Spider plants can exhibit various symptoms when exposed to low humidity levels. Some common signs include:
- Drying Leaf Tips: One of the most noticeable indicators is the drying or browning of leaf tips. This symptom often signifies inadequate moisture levels in the air (Houseplant Resource Center).
- Curling Leaves: In low-humidity environments, you may observe the leaves of spider plants starting to curl. This curling is a response to the plant’s efforts to conserve moisture.
- Crispy Light-Brown Spots: The development of crispy, light-brown spots on the leaves can also be a sign of insufficient humidity.
- Wilting Aerial Roots: Spider plants have aerial roots, and wilting or shriveling of these roots is another symptom of low humidity.
- Darkening and Yellowing Leaf Tips: In addition to the drying tips, darkening and yellowing can occur, signaling a lack of moisture.
- Stunted Growth: Low humidity can lead to stunted growth, affecting the overall vitality and appearance of the plant (Idyl).
Addressing Low Humidity Issues
Once the symptoms of low humidity have been identified, several methods can be used to increase humidity levels for your spider plants:
- Using a Humidifier: Place a humidifier near the plant to maintain consistent humidity levels, especially during dry seasons or in air-conditioned environments.
- Grouping Plants Together: Grouping multiple plants together can create a micro-humidity environment, as the transpiration process from each plant adds moisture to the air.
- Misting: Regularly misting the leaves of your spider plant can provide temporary relief from low humidity. However, ensure that the leaves dry out quickly to prevent fungal issues.
- Pebble Tray: Place the pot of the spider plant on a tray filled with water and pebbles. As the water evaporates, it will increase the humidity around the plant. Make sure the pot is not directly sitting in water to avoid root rot.
- Relocate the Plant: Sometimes, simply moving the plant to a more humid room, such as a bathroom or kitchen, can help.
- Cover with a Cloche: Using a glass or plastic cloche can help maintain humidity around the plant. However, ensure proper ventilation to prevent mold growth.
Monitoring and maintaining the right humidity levels is essential for thriving spider plants. For more information on spider plant care, visit our spider plant care guide.
Maintaining Ideal Conditions
Ensuring optimal conditions for your spider plant is crucial for its health and vibrancy. This section covers two key aspects: proper watering practices and suitable temperature range.
Proper Watering Practices
Proper watering is essential for maintaining spider plant care, especially in low-humidity environments. The general guideline involves watering your spider plant when the top inch of soil becomes dry. This helps prevent overwatering, which can lead to root rot.
- Water approximately once a week.
- Use rainwater or distilled water; tap water with chlorine and fluoride can harm the plant.
Misting the plant can also help maintain humidity levels, preventing issues like spider plant brown tips, often a sign of underwatering or low humidity levels.
Suitable Temperature Range
Spider plants thrive in mild temperature ranges. For optimal growth, maintain temperatures between 65-85°F (18-29°C). Exposure to extreme temperatures or direct sunlight can stress the plant.
| Temperature Range | Growth Impact |
|---|---|
| 60-80°F (15-27°C) | Ideal for growth |
| Under 60°F | Potential stunt in growth |
| Over 85°F | Higher risk of poor growth |
Using these conditions as a guide will help ensure your spider plant remains healthy and robust. Careful attention to both watering practices and temperature can help gardeners achieve the best results in maintaining their spider plants. For more detailed tips on spider plant care in winter, visit our dedicated guide.
Propagation and Maintenance
Proper propagation and maintenance practices are essential for ensuring the health and longevity of spider plants. This section will cover repotting spider plants and propagating spider plant pups, both of which are vital steps in caring for these popular houseplants.
Repotting Spider Plants
Spider plants typically need to be repotted every one to two years or when the roots become crowded. Repotting helps to ensure that the plant has enough space to grow and absorbs the necessary nutrients to thrive. Choose a pot that is only slightly larger than the previous one to avoid waterlogging (Idyl).
Steps for repotting a spider plant:
- Choose a new pot that is 1-2 inches larger in diameter than the current pot.
- Gently remove the spider plant from its current pot.
- Shake off excess soil from the roots and inspect them.
- Place the plant in the new pot and fill it with fresh potting mix.
- Water the plant thoroughly and place it in a suitable environment with the right humidity levels.
For detailed guidance on repotting, visit our article on spider plant repotting.
Propagating Spider Plant Pups
Spider plants reproduce by sending out offshoots known as “spiderettes” or “pups.” These can be trimmed and nurtured to produce entirely new plants. Propagating spider plant pups is a straightforward process and can help maintain the health of the parent plant.
Steps for propagating spider plant pups:
- Wait until the spiderettes develop small roots.
- Trim the spiderette from the mother plant using clean scissors.
- Place the bottom end in a glass of water until the roots grow more robust (usually 2-4 weeks).
- Once roots have developed, plant the pup in a pot filled with soil.
- Water the new plant lightly and ensure it has adequate humidity levels and indirect sunlight.
| Propagation Method | Time for Root Development | Notes |
|---|---|---|
| Water Propagation | 2-4 weeks | Roots develop in water, then transplant to soil |
| Soil Propagation | Immediate | Place directly into soil and water regularly |
More detailed steps can be found in our article on spider plant propagation.
Regular maintenance and proper propagation techniques will ensure your spider plant remains healthy and continues to thrive. Maintaining optimal conditions, including the right humidity levels and proper watering practices, is crucial for the overall well-being of your spider plant. Keep an eye out for signs of low humidity, and address any issues promptly to keep your spider plant happy and healthy.


