Understanding Spider Plant Roots
Signs of Root Boundness
Spider plants, known for their ability to thrive even when slightly stressed, often show signs of being root-bound before they need repotting. Identifying these signs ensures the plant remains healthy and continues to produce vibrant foliage and offsets.
Common indicators of root-bound spider plants include:
- Roots emerging from drainage holes
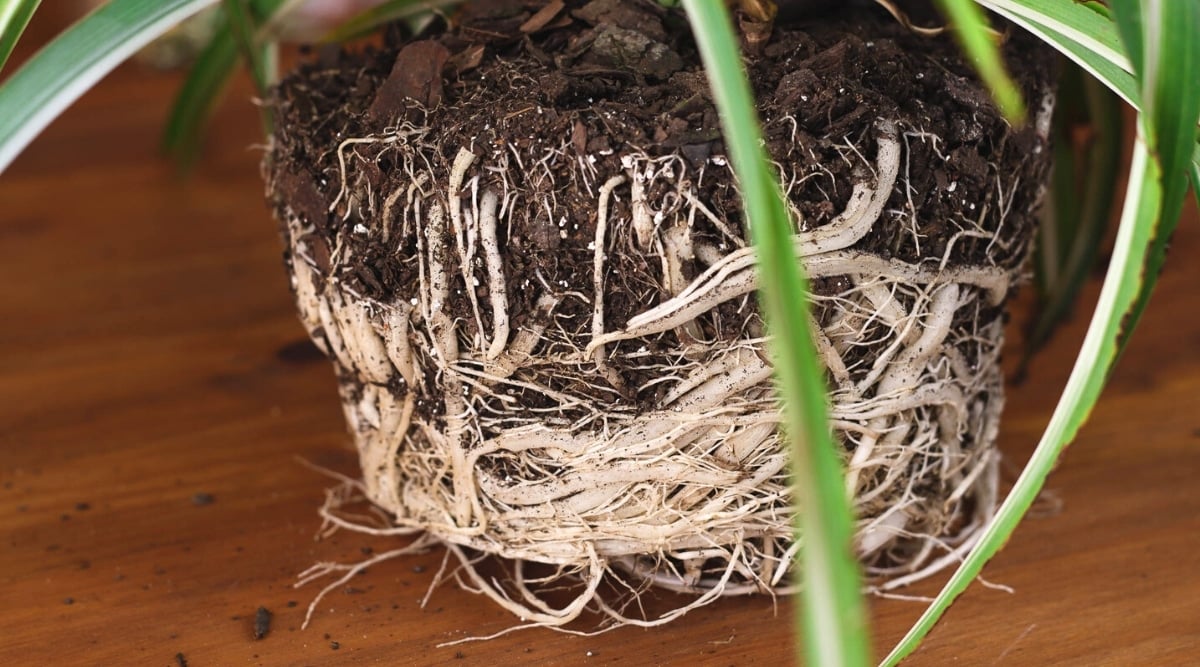
- A dense tangle of roots at the base of the pot
- Yellowing leaves
- Slowed growth
According to Gregarious, seeing roots sprouting from the drainage holes or a visible root mass at the pot bottom are clear signs that your plant needs repotting. Yellow leaves and reduced growth also suggest that the plant’s roots require more space.
Impact of Root Boundness
While spider plants do perform well under slight root stress, severe root boundness can have negative consequences. A spider plant that is excessively root-bound may exhibit stunted growth and leaf issues. Root-bound plants can become less efficient at absorbing water and nutrients, potentially leading to health problems.
Benefits of mild root boundness include:
- Increased production of offsets (pups)
- Enhanced flowering
However, as stressed by Lively Root, excessive circling of roots within the pot limits the plant’s growth and can cause leaf discoloration or other leaf-related issues.
For optimal health, it’s essential to strike a balance. Repotting at the right time and ensuring proper spider plant care promotes a robust and flourishing plant.
To learn more about spider plant repotting, check our detailed guide on spider plant repotting. Additionally, understanding other aspects like spider plant root rot and spider plant roots above soil can further enhance plant health.
Repotting Spider Plants
Efficiently managing spider plant root bound conditions requires understanding the best practices for repotting. This includes selecting the ideal repotting time, acknowledging the benefits of repotting, and following structured guidelines.
Ideal Repotting Time
Spider plants should ideally be repotted during their natural growth spurt in the spring. This timing allows the plant to settle into its new pot and environment quickly, ensuring robust growth. Avoid repotting during the winter months as it can stress the plant and hinder its growth (Gregarious). Before repotting, monitor the plant’s growth cycle and overall health to determine the best timing.
Benefits of Repotting
Repotting spider plants offers several advantages, including:
- Stimulated Growth: Repotting provides the roots with more space, allowing them to expand and absorb nutrients more efficiently.
- Healthier Roots: By providing room for root growth, repotting helps prevent complications like root rot and encourages healthier root systems.
- Enhanced Foliage: A newly repotted plant can handle dry indoor air better, leading to more vibrant foliage and vigorous growth.
- Flower and Offset Production: Slightly root-bound conditions can encourage spider plants to produce more flowers and offsets, but extreme root binding can cause stunted growth and leaf issues.
Repotting Guidelines
Following specific guidelines ensures successful repotting and the continued health of your spider plant:
- Choose the Right Pot: Select a pot that is one size larger than the current one, providing enough space for root growth without overwhelming the plant.
- Prepare Fresh Soil Mix: Use a well-draining soil mix to facilitate healthy root development. For detailed information on soil mix, visit our section on soil mix for spider plants.
- Remove Plant Gently: Carefully remove the plant from its current pot, taking care not to damage the roots.
- Trim Excessive Roots: If the roots are extremely tangled or circling, trim them slightly to encourage new growth.
- Place in New Pot: Position the spider plant in the new pot, filling around the roots with fresh soil. Avoid burying the plant too deep.
- Water Thoroughly: After repotting, water the plant well to help settle the soil and eliminate air pockets. Place the plant in bright, indirect light to aid recovery.
- Avoid Fertilization: Refrain from fertilizing for 4-6 weeks post-repotting to allow the roots time to heal and adjust (Gregarious).
Repotting a spider plant is a vital aspect of spider plant care, promoting healthier growth and vibrant foliage. Remember to give the plant time to adjust post-repotting and monitor its response to ensure a successful transition. For more details, explore our related articles on spider plant fertilizers and spider plant light requirements.
Spider Plant Root Health
Maintaining healthy roots is vital for the overall well-being of spider plants. By understanding the tubers, the division of spiderettes, and potential toxicity concerns, gardeners can ensure their spider plants thrive.
Tubers and Root Development
Spider plants develop dense, fleshy clusters of tubers as part of their root system. These tubers are white, smooth, twisting masses that may occasionally push to the surface of the soil. Although spider plants prefer being slightly root-bound since it encourages the development of flowers and offsets (Lively Root), excessive exposure of tubers signals the need for fresh potting or topping up with soil.
In cases where the tubers are highly visible or the roots start to circle inside the pot, it indicates that repotting might be essential. Repotting can prevent stunted growth and leaf issues by giving the plant necessary space to expand. For more information on recognizing and managing root-bound conditions, explore our guide on spider plant root bound.
Division of Spiderettes
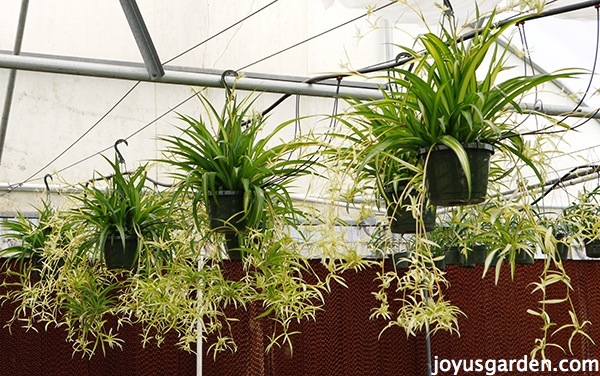
Spiderettes, or plantlets, are the baby plants that grow from the mother spider plant. When a spider plant becomes root-bound, it naturally produces more spiderettes as a response to stress (Wild Interiors). These spiderettes can be divided and potted separately, which not only helps in propagating new plants but also aids in reducing the stress on the parent plant.
To divide spiderettes effectively:
- Identify mature spiderettes with at least a few roots.
- Gently separate them from the mother plant.
- Plant them in small pots with suitable soil mix.
For detailed steps on propagation methods, visit our page on spider plant propagation.
| Spiderette Care Tips | Description |
|---|---|
| Roots | Ensure spiderettes have visible roots before division. |
| Soil | Use well-draining soil mix suitable for spider plants. |
| Watering | Water the newly potted spiderettes lightly until they establish. |
Toxicity Concerns
While spider plants are generally considered safe, some may have concerns about their toxicity. It’s important to know that spider plants are non-toxic to humans and pets, making them an excellent choice for households with children and animals. However, they can be mildly toxic to cats, causing mild gastrointestinal upset if ingested.
If concerned about the safety of pets, particularly cats, refer to our guide on spider plant toxic to cats.
By understanding these aspects of spider plant roots, gardeners can better manage and care for their plants, ensuring health and longevity.
Explore related topics for further insights:
Spider Plant Potting Tips
When potting spider plants, it is crucial to consider the appropriate pot size and soil mix to ensure optimal growth and health. Below are guidelines to help you select the right pot and soil mix for your spider plant.
Pot Size Recommendations
Spider plants prefer shallow (or wide) pots over deep or tall ones. This is because their root system’s growth pattern benefits from more horizontal space for the roots to expand. Additionally, spider plants like to be slightly root-bound, as this encourages the production of more flowers and offsets (Lively Root).
However, if the roots start circling inside the pot or run out of space, repotting becomes necessary to prevent stunted growth and leaf issues. For detailed repotting guidelines, visit our article on spider plant repotting.
| Pot Type | Root Growth Pattern | Benefits |
|---|---|---|
| Shallow or Wide | Horizontal | Encourages root expansion |
| Deep or Tall | Vertical | Can lead to root-bound issues |
Soil Mix for Spider Plants
Spider plants thrive in well-draining soil that retains moisture without becoming waterlogged. A good soil mix combines potting soil with perlite or peat moss, ensuring proper aeration and drainage while maintaining a slightly acidic to neutral pH for optimal root development.
-
Perlite: Perlite improves drainage and aeration, prevents soil compaction, aids in nutrient absorption, and reduces the risk of overwatering and root rot. Using coarse perlite is preferred for the highest porosity (Lively Root).
-
Sand: Adding a small amount of sand to the soil mix can also aid in drainage and balanced water accumulation. Mixing sand with other materials like peat moss or perlite helps balance moisture retention and aeration (Lively Root).
| Soil Component | Benefits |
|---|---|
| Potting Soil | Basic structure, nutrient-rich |
| Perlite | Improves drainage and aeration |
| Sand | Aids in drainage and moisture balance |
| Peat Moss | Retains moisture, slightly acidic pH balance |
Ensuring that spider plants have the appropriate pot size and soil mix is essential for their healthy growth and preventing issues such as root boundness and overwatering. For more information on caring for spider plants, visit our detailed sections on spider plant care, spider plant repotting, and spider plant root rot.
Soil Mix for Spider Plants
Proper soil mix is essential for keeping spider plants healthy and thriving. The right combination of soil components ensures adequate drainage, moisture retention, and aeration, which are crucial for avoiding root bound issues.
Importance of Well-Draining Soil
Spider plants thrive in well-draining soil that retains moisture without becoming waterlogged. Well-draining soil prevents root rot and other conditions that can negatively impact spider plant root health. A suitable soil mix typically includes potting soil blended with elements like perlite or peat moss to ensure proper aeration and drainage while maintaining a slightly acidic to neutral pH for optimal root development (Lively Root).
| Component | Purpose |
|---|---|
| Potting Soil | Basic substrate for nutrients |
| Perlite/Peat Moss | Enhances aeration and drainage |
| Sand (optional) | Improves drainage |
Perlite in Soil Mix
Using perlite in the soil mix is beneficial for spider plants. Perlite is a volcanic glass that, when heated, expands to form a lightweight, porous material ideal for improving soil texture. It helps with drainage, prevents soil compaction, and promotes better root aeration and nutrient absorption. Coarse perlite is preferred for higher porosity.
| Benefits of Perlite |
|---|
| Enhances drainage |
| Improves aeration |
| Prevents soil compaction |
| Aids nutrient absorption |
| Reduces risk of overwatering |
For more information on preventing soil-related issues, visit our guide on spider plant root rot.
Addition of Sand in Soil
Sand can also be beneficial in creating a well-draining soil mix for spider plants. Adding sand helps balance moisture retention and aeration, preventing waterlogging. It’s particularly beneficial when mixed with other materials like peat moss or perlite. However, it’s essential to use sand sparingly to avoid overly heavy soil which can inhibit root growth (Lively Root).
| Sand Addition Benefits |
|---|
| Improves drainage |
| Balances water retention |
| Enhances aeration |
A balanced soil mix tailored to the needs of spider plants can significantly contribute to their overall health and vigor. For more tips on achieving optimal conditions for your plants, check out our articles on spider plant care and spider plant repotting.


