Indoor Care for Peace Lilies
Peace lilies, known for their graceful appearance and low-maintenance needs, require specific indoor conditions to thrive. This section outlines the ideal temperature, humidity, and light requirements essential for their well-being.
Ideal Temperature and Humidity
Peace lilies flourish in warm conditions. They prefer daytime temperatures between 68 and 85 degrees Fahrenheit. During the nighttime, temperatures should be about 10 degrees cooler to mimic their natural environment. It’s crucial to avoid exposing these plants to temperatures below 60 degrees Fahrenheit to prevent cold damage.
| Temperature | Range |
|---|---|
| Daytime | 68 – 85 °F |
| Nighttime | About 10 °F cooler than daytime |
| Minimum Safe Temperature | 60 °F |
In addition to temperature, peace lilies thrive in humid conditions. Misting the plant every few days, placing it in a humid room, or grouping it with other plants can help create a suitable microclimate.
Light Requirements
Peace lilies favor bright, indirect light to promote blooming. Direct sunlight can scorch their leaves, whereas too little light can impede flower production.
To ensure optimal lighting conditions:
- Place the plant near a window with filtered light.
- Avoid direct sunlight exposure.
- Consider using a sheer curtain to diffuse intense light if placing near a south-facing window.
Peace lilies also benefit from being kept away from drafts created by air conditioning or heating vents, which can affect their health.
For more detailed information on issues you might face, such as peace lily plant yellow leaves or peace lily plant leaves turning brown, refer to our troubleshooting section.
Maintaining the right indoor conditions for your peace lily ensures it remains a stunning and healthy addition to your indoor garden. For further insights, explore our complete guide on peace lily plant maintenance.
Watering and Soil Conditions
Proper watering and soil conditions are crucial for the overall health and longevity of peace lilies. Understanding the right moisture levels and watering frequency can help ensure that your peace lily thrives.
Moisture Levels and Drainage
Peace lilies thrive in well-draining soil. It’s important to use a potting mix that allows excess water to drain away, preventing root rot. Consider using a mix designed for indoor plants or a combination of potting soil, peat moss, and perlite to ensure good drainage.
Maintaining proper moisture levels in the soil is essential. Peace lilies prefer consistently moist soil, but not waterlogged. To achieve this, water the plant thoroughly until water drains out of the bottom, then allow the top inch of soil to dry out before watering again. Peace lilies are also fans of high humidity. Misting them every few days can be beneficial. Rooms with high humidity, like kitchens or bathrooms, are ideal places to grow peace lilies.
To increase humidity, fill the saucer under the pot with water and pebbles to help raise the moisture level around the plant (Miracle-Gro).
Recommended Soil Composition:
- Potting Soil: 40%
- Peat Moss: 30%
- Perlite: 30%
Watering Frequency
The frequency of watering peace lilies depends on the environment and the plant’s specific needs. During the growing season (spring and summer), peace lilies may require more frequent watering, about once a week, while in the dormant period (fall and winter), they need less water.
To determine when to water, check the soil moisture level by inserting your finger about an inch into the soil. If it feels dry, it’s time to water. Over-watering can lead to root rot, while under-watering can cause the leaves to droop and turn brown.
Peace lilies also benefit from misting, which helps maintain the high humidity they prefer. In dry climates, consider using a humidifier or placing the plant on a tray with water and pebbles to increase the surrounding humidity.
| Season | Watering Frequency |
|---|---|
| Spring/Summer | Once a week |
| Fall/Winter | Every 2 weeks |
By understanding and implementing proper watering and soil conditions, gardeners can ensure their peace lily remains healthy and vibrant. For more information on peace lily care, including repotting guidelines and fertilization, check out our other detailed guides.
Repotting and Propagation
Proper repotting and propagation are essential aspects of peace lily plant care instructions, ensuring that your plant remains healthy and vibrant. This section provides detailed guidelines on how to repot and propagate your peace lilies effectively.
Repotting Guidelines
Peace lilies, also known as Spathiphyllum, tend to thrive better when they are slightly root-bound. However, there comes a time when repotting becomes necessary to prevent the roots from becoming overly cramped and to promote healthier growth.
-
When to Repot:
Late winter or early spring is the optimal time to repot your peace lily (Pennington). Signs that it’s time to repot include roots growing through the drainage holes or circling the surface of the soil. -
Choosing a Pot:
Select a new pot that is just one to two inches larger in diameter than the current one. This helps prevent the soil from becoming too waterlogged, which can lead to root rot. -
Steps to Repotting:
- Gently remove the peace lily from its current pot.
- Loosen the root ball to encourage new growth.
- Place the plant in the new pot and fill with fresh potting mix.
- Water thoroughly to settle the soil around the roots.
| Step | Description |
|---|---|
| 1 | Remove the plant gently from the current pot |
| 2 | Loosen the root ball |
| 3 | Place in larger pot and fill with potting mix |
| 4 | Water thoroughly |
For more guidance on repotting, visit our article on peace lily plant repotting.
Propagation Techniques
Propagating peace lilies is a straightforward process that involves dividing the plant to create new individuals. Propagation is best done during repotting to minimize stress on the plant.
-
When to Propagate:
Late winter or early spring, the same time as repotting, is ideal for propagation (Pennington). -
Steps to Propagate:
- Remove the peace lily from its pot.
- Gently separate the root clump into smaller sections, ensuring each section has at least a few healthy leaves and strong roots.
- Plant the divisions in separate pots filled with potting mix.
- Water each new plant thoroughly.
- Tips for Successful Propagation:
- Ensure each division has sufficient roots.
- Use clean tools to avoid disease spread.
- Monitor the new plants closely for the first few weeks and provide appropriate care.
| Step | Description |
|---|---|
| 1 | Remove and separate the plant into smaller sections |
| 2 | Ensure each section has healthy roots and leaves |
| 3 | Plant divisions in separate pots with potting mix |
| 4 | Water thoroughly and monitor closely |
Propagation can help rejuvenate an older peace lily and provide you with multiple plants to enjoy or share. For additional tips and techniques, refer to our section on peace lily plant propagation.
Repotting and propagating your peace lily appropriately will ensure that the plant continues to thrive and remain a beautiful addition to your indoor garden. Regular maintenance and the right conditions will keep your peace lily healthy for years to come. Visit our other related articles for more about peace lily plant care and troubleshooting issues such as yellow leaves and brown tips.
Fertilization and Feeding
Proper care for your peace lily plant involves understanding its specific fertilization and feeding needs. Let’s take a look at the types of fertilizers suitable for peace lilies and the ideal feeding schedule to follow.
Fertilizer Types and Application
Peace lilies require minimal fertilizer, and overfertilizing can be detrimental, causing burning of leaf tips and browning of roots. The best approach is to use a balanced, liquid houseplant fertilizer applied sparingly.
| Fertilizer Type | Application Method |
|---|---|
| Balanced Liquid Houseplant Fertilizer | Mix at one-quarter strength of the recommended dose |
For optimal results, water the plant with a room temperature liquid fertilizer every six to eight weeks during the growing season (spring and summer). This helps promote healthy foliage and blooms while preventing nutrient overload. Visit our peace lily plant fertilizer guide for more detailed information.
Feeding Schedule
A regular feeding schedule is essential to maintain the health and vigor of your peace lily. Below is a recommended feeding timeline:
| Time of Year | Fertilizer Frequency |
|---|---|
| Spring | Every 6-8 weeks |
| Summer | Every 6-8 weeks |
| Fall | No fertilizer needed |
| Winter | No fertilizer needed |
This schedule ensures your peace lily receives adequate nutrients during its active growth phases while avoiding excessive fertilizer use that can lead to issues such as leaf discoloration or roots turning brown. Additionally, always monitor your plant for signs of overfertilization and adjust accordingly.
For more tips on caring for your peace lily, including watering practices and pest control, explore our other guides such as peace lily plant maintenance and peace lily plant diseases. By following these guidelines, you can ensure your peace lily thrives, boasting vibrant green leaves and stunning white flowers.
Common Issues and Troubleshooting
Peace lilies are known for their elegant white flowers and straightforward care requirements, but even these hardy houseplants can face some challenges. Below, we address common issues related to pests, diseases, and leaf discoloration in peace lilies.
Pests and Diseases
Peace lilies can occasionally fall victim to pests and diseases. Here are the most common ones:
Common Pests
- Mealybugs: These pests look like small, white cotton balls and can cause yellow spots on leaves. Mealybugs feed on the plant’s sap, weakening it over time.
- Thrips: These tiny insects can cause similar damage to mealybugs, leading to chlorosis (yellowing of leaves) and stunted growth.
- Spider Mites: These pests thrive in dry conditions and can cause fine webbing on leaves, leading to speckled yellow damage.
Treatment: Pests can be removed with neem oil or insecticidal soap. Consistent application may be necessary to fully eliminate the infestation. For more detailed pest management, see peace lily plant diseases.
Common Diseases
- Root Rot: Often a result of overwatering, root rot leads to mushy, discolored roots and wilting leaves. Repotting and trimming damaged roots can often save the plant.
- Fungal Leaf Spot: This disease presents as brown or black spots on the leaves. The affected areas should be pruned, and the plant should be placed in a drier, well-ventilated area to prevent recurrence.
Leaf Discoloration
Leaf discoloration can be a sign of various issues, ranging from pests and diseases to environmental stressors. Below are the common types of leaf discoloration seen in peace lilies:
Yellow Leaves
- Solid Yellow Leaves: This often results from overwatering. Excess water can cause the roots to become mushy, preventing them from absorbing necessary nutrients. Other causes include underwatering, cold drafts, overfertilizing, and recent repotting (Epic Gardening).
- Spotted Yellow Leaves: This can indicate nutrient deficiency or pest problems like mealybugs or thrips. Balancing micronutrients with appropriate fertilizer and removing pests with neem oil can restore the health of the leaves.
For more tips on managing yellow leaves, visit our detailed guide on peace lily plant yellow leaves.
Brown or Black Tips
- Brown Tips: This is often a symptom of low humidity or improper watering routines. It can also be a sign of salt buildup from overfertilization or poor water quality (Epic Gardening). Placing the plant in a more humid environment and flushing the soil periodically can address this issue.
- Black Tips: This is generally a more severe issue, often indicating root rot or severe underwatering. In such cases, immediate repotting and trimming of damaged roots are necessary. For more details on handling blackening, refer to peace lily plant leaves turning black.
Brown Spots
- Sunburn: Exposure to direct sunlight can cause brown spots on the leaves. Peace lilies prefer indirect light, so moving the plant to a shadier spot can prevent further damage.
- Pests and Diseases: Brown spots can also be caused by pests or fungal diseases. Using insecticidal soap or neem oil can mitigate pest-related spots, while pruning and improved ventilation can help with disease-related issues (Epic Gardening).
Wilting Leaves
- Underwatering or Overwatering: Both scenarios can cause wilting. Correcting the watering routine is crucial. Wilting can also stem from a lack of humidity. Placing the plant in a humid environment or misting the leaves can help.
| Issue | Cause | Solution |
|---|---|---|
| Yellow Leaves | Over/underwatering, nutrient deficiency | Adjust watering routines, apply balanced fertilizer |
| Brown Tips | Low humidity, salt buildup | Increase humidity, flush soil |
| Black Tips | Root rot, severe underwatering | Immediate repotting, trim damaged roots |
| Brown Spots | Sunburn, pests, diseases | Move to indirect light, use insecticidal soap, prune affected areas |
| Wilting Leaves | Watering issues, low humidity | Correct watering frequencies, increase humidity |
Understanding these common issues and how to address them can ensure that your peace lily remains healthy and vibrant. For comprehensive care instructions, including details on repotting and propagation, visit our other resources like peace lily plant repotting.
Longevity and Blooming
Lifespan and Maintenance
Peace lilies are popular houseplants known for their long lifespan and minimal maintenance requirements. Typically, the lifespan of a peace lily ranges from three to five years. However, with proper care and ideal conditions, they can live up to two decades or more (Pennington). Here are some core maintenance practices for extending the life of your peace lily:
- Regular Watering: Keep the soil consistently moist but avoid overwatering.
- Proper Lighting: Peace lilies thrive in low to medium indirect light.
- Optimal Temperature: Maintain indoor temperatures between 65°F and 85°F.
- Humidity Levels: Peace lilies prefer a humid environment, similar to their native tropical habitats.
For more detailed guidance, check our article on peace lily plant maintenance.
Encouraging Blooms
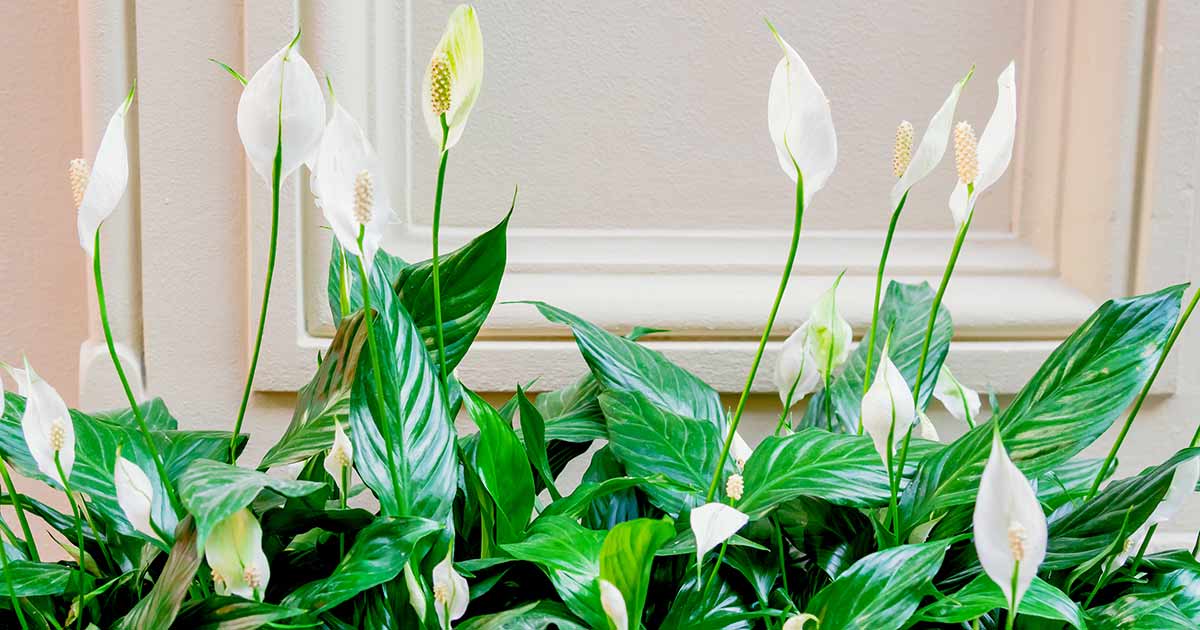
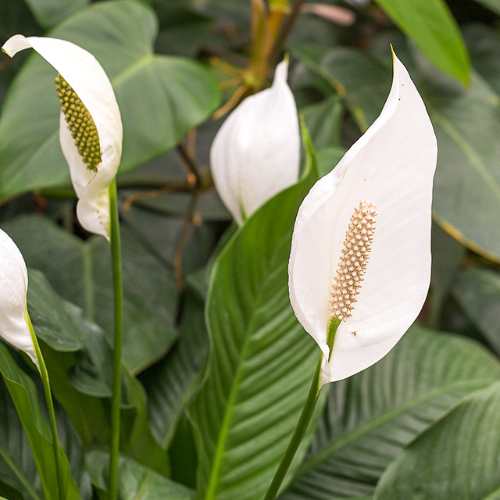
Peace lilies are celebrated for their beautiful white blooms, which can last a month or more (Epic Gardening). With the right care, they can bloom freely year-round. Here are some strategies to encourage blooming:
- Light Exposure: While peace lilies do not require direct sunlight, placing them in an area with more bright indirect light can encourage blooming (Miracle-Gro).
- Feeding: Regular use of a balanced fertilizer, applied during the growing season, can promote robust blooms. For specific recommendations, visit our peace lily plant fertilizer guide.
- Repotting: Repotting your peace lily in late winter or early spring can provide fresh soil and space, encouraging new growth and blooming (Pennington).
- Maintenance of Ideal Conditions: Ensuring your peace lily is in a humid environment and protected from drafts can foster blooming.
| Factor | Condition | Impact on Blooming |
|---|---|---|
| Light | Bright, indirect light | Encourages blooms |
| Temperature | 65°F to 85°F | Optimal growth |
| Humidity | High humidity | Reduces leaf stress |
| Fertilization | Regular balanced feeding | Promotes blooms |
Maintaining these conditions can help your peace lily flourish, transforming it from an ordinary houseplant into a centerpiece of your indoor garden. For more essential tips on blooming, refer to our guide on peace lily plant flower.


