Managing Rubber Plant Height
Understanding Rubber Plant Growth
Rubber plants, also known as Ficus elastica, are known for their impressive growth rates and tall stature. In natural environments such as tropical rainforests, these plants can reach up to 40 meters (approximately 130 feet) in height (Plantura). In more temperate climates where they are grown outdoors year-round, they can grow to heights of about 80-100 feet.
For indoor gardeners, managing the height of a rubber plant is essential to ensure it remains within a suitable size for your space. Rubber plants can grow up to 60 centimeters (approximately 24 inches) in a year, making regular height control practices necessary.
Pruning Techniques for Height Control
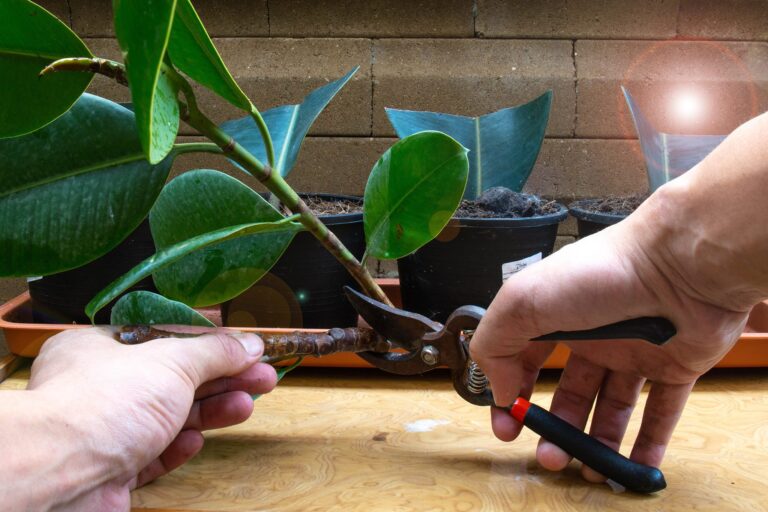
Pruning is one of the most effective methods for managing the height of your rubber plant. Here are some key techniques to keep your rubber plant’s growth in check:
- Containing Growth: Regularly trim the crown of the tree to limit its vertical growth. This helps keep the plant at a manageable height for indoor environments.
- Promoting Growth: Encourage new side shoots by cutting back branches. This not only controls height but can also create a fuller, bushier appearance.
- Shaping the Plant: Use topiary methods to shape the plant. This involves selective pruning to achieve a desired form, which can be both aesthetic and practical.
- Removing Diseased Parts: Prune away any diseased or pest-affected sections to prevent the spread of issues and maintain the overall health of the plant.
| Pruning Technique | Purpose |
|---|---|
| Containing Growth | Limit vertical growth |
| Promoting Growth | Encourage new side shoots |
| Shaping the Plant | Achieve desired form |
| Removing Diseased Parts | Prevent spread of disease |
For detailed instructions on the best practices for pruning your rubber plant, refer to our article on rubber plant pruning.
Regular maintenance and observation are crucial to keeping your rubber plant thriving at a desirable height. Pruning not only helps manage the size of your plant but also promotes healthy and robust growth, ensuring your plant remains a beautiful addition to your indoor garden. Explore more about rubber plant care, such as tineke rubber tree care and burgundy rubber tree care, to keep your plants in top condition.
Rubber Plant Care Issues
Maintaining the health of your rubber plant involves understanding some common care issues and addressing them effectively. Here, we’ll explore leaf drop due to overwatering and how to manage brown spots and yellowing leaves on your rubber plant.
Leaf Drop and Overwatering
One of the most common issues gardeners face with rubber plants is leaf drop, often caused by overwatering. Overwatering can lead to waterlogged soil, causing the roots to suffer from lack of oxygen and potentially leading to root rot. Symptoms include leaves turning yellow, drooping, and eventually falling off.
| Condition | Symptoms | Solution |
|---|---|---|
| Overwatering | Yellowing leaves, drooping, leaf drop | Reduce watering frequency, ensure well-draining soil, check for root rot |
| Root Rot | Black, mushy roots, foul smell | Remove affected roots, repot in fresh soil, ensure proper drainage |
It’s crucial to plant your rubber tree in a pot with drainage holes and use a well-draining soil mix. Consider reducing watering frequency and allowing the top inch of soil to dry out before watering again. For more tips on soil care, see our article on rubber plant soil mix.
Visit rubber plant overwatered for additional guidance on managing overwatered rubber plants.
Addressing Brown Spots and Yellowing Leaves
Brown spots on rubber plant leaves can arise from several causes, including overwatering, lack of light, or root rot. Overwatering remains a frequent culprit, but poor lighting and improper practices can also contribute.
| Cause | Symptoms | Solution |
|---|---|---|
| Overwatering | Brown spots, yellowing leaves | Adjust watering routine |
| Lack of Light | Brown edges, pale leaves | Place plant in brighter, indirect light |
| Root Rot | Brown, mushy roots | Trim diseased roots, repot |
Yellow leaves might indicate chlorosis, which is caused by a lack of chlorophyll formation. Chlorosis often results from nutrient deficiencies in the soil.
For brown spots and yellowing, ensure your rubber plant receives sufficient, indirect light. Adjust your watering practices and check for signs of nutrient deficiencies. Pruning affected leaves can also help rejuvenate the plant (Plantura).
Explore our resource on rubber plant leaves turning yellow for more detailed solutions.
By understanding the causes and addressing these common care issues, you can maintain a thriving rubber plant. For further reading on related topics, check out our guides on rubber plant pruning and rubber plant repotting.
Repotting and Root Health
Maintaining the root health of your Rubber Plant is vital for managing its height and ensuring long-term vitality. This section will guide you on understanding the effects of pot size on your Rubber Plant’s growth and how to prevent potbound conditions.
Effects of Pot Size on Growth
Rubber Plants thrive in conditions where their roots have ample space to grow. When choosing a pot, ensure it matches the size of your plant to provide the roots with plenty of room. If the pot is too small, your Rubber Plant might become potbound, causing stress and poor growth (Joy Us Garden).
| Pot Size | Plant Height (inches) | Root Health |
|---|---|---|
| Small (6-8 inches) | Up to 12 | Limited root expansion |
| Medium (10-12 inches) | 12-24 | Moderate growth |
| Large (14-16 inches) | 24 and above | Optimal root growth |
Plants in bigger pots don’t need frequent repotting, which minimizes root disturbance. Rubber Plants are moderate to fast growers and may need repotting every 2-3 years. For more details about the top sizes, read our comprehensive guide on rubber plant pot size.
Preventing Potbound Conditions
Rubber Plants can become potbound if not given adequate space. A potbound plant faces difficulty in taking up water and nutrients, leading to poor growth and health issues. Here are some signs your Rubber Plant might be potbound:
- Roots growing through drainage holes
- Slower growth
- Water draining quickly
To prevent potbound conditions, repot your Rubber Plant every 2-3 years to a slightly larger pot. This provides more space for root expansion, reducing stress on the plant. Always check the current pot size and plant’s growth before deciding to repot.
For more information, check out our articles on rubber plant repotting and dealing with a rubber plant root bound situation. Proper care and timely repotting will contribute to the long-term health and height management of your Rubber Plant.
Light and Water Considerations
Optimal Light Conditions
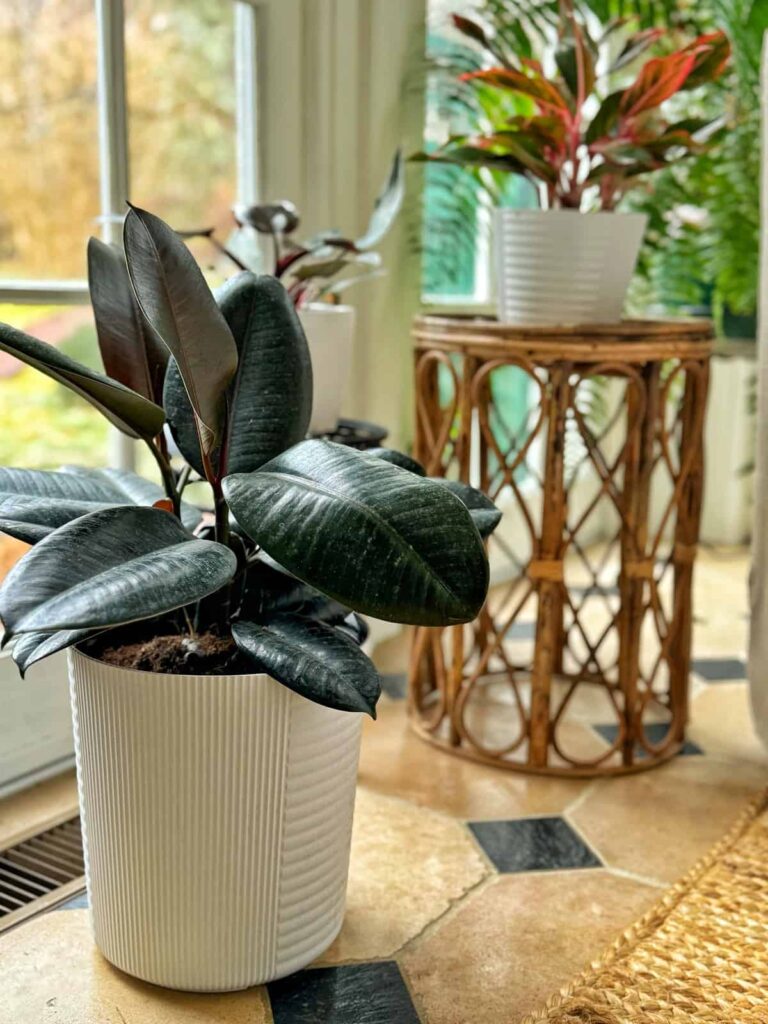
Rubber Plants thrive in medium to high-light indoor conditions. Insufficient light can cause them to lean towards a light source, become leggy, sparse, and develop smaller leaves. These plants, native to deep forests and jungles, adapt in their early growth stages to shade, but mature plants prefer sunlight once their foliage reaches the upper canopy (Quora).
Legginess and leaf loss in Rubber Plants can be a sign of poor light conditions. Once leaves drop from the lower parts of the stalks, they will not regrow; new foliage only emerges from the top. To enhance the plant’s appearance, smaller stalks can be replanted in the same container.
Additionally, placing your Rubber Plant in a material less absorbent than wood may prevent thirsty leaves from curling back. Repotting every 2-3 years is recommended to accommodate its moderate to fast growth, depending on the growth rate and pot size.
| Lighting Condition | Effect on Rubber Plant |
|---|---|
| Medium to High Light | Thrives, strong and healthy growth |
| Low Light | Leggy growth, sparse foliage, smaller leaves |
| Inadequate Light | Leans towards light source, leggy |
For more on Rubber Plant lighting needs, visit our page on rubber plant light requirements.
Watering Techniques for Healthy Growth
Rubber Plants can be sensitive to the quality and quantity of water. Tap water with high salt content may cause salt burn on the leaf edges over time. Using filtered water can mitigate this issue. Proper drainage is essential to prevent root rot, which can cause leaves to droop, turn yellow, and fall off.
Simultaneous leaf drop might indicate overwatering, leading to root rot and potentially killing the plant. Rubber Plants grow rapidly in optimal conditions, sometimes sprouting up to 24 inches in a growing season. They may become potbound if not repotted timely, impeding water and nutrient uptake, thereby affecting growth.
| Watering Practice | Outcome |
|---|---|
| Filtered Water | Prevents salt burn |
| Proper Drainage | Avoids root rot |
| Overwatering | Leaf droop, yellowing, falling, root rot |
| Adequate Pot Size | Prevents being potbound, ensures healthy growth |
Explore more about appropriate watering methods in our article rubber plant watering.
Understanding the light and water requirements of your rubber plant is crucial in managing its height and ensuring its overall health. Be mindful of these considerations to keep your plant thriving indoors.
Staking and Support
Tall rubber plants often require additional support to prevent them from toppling over. Staking offers a solution to manage their height and promote upright growth.
Importance of Supporting Tall Plants
Supporting your rubber plant is essential as it grows taller. Rubber plants can reach impressive heights, sometimes up to 60-80 feet in their native environments (Joy Us Garden). Indoors, they can commonly grow up to 8 feet before needing support.
Without proper staking, tall rubber plants are at risk of bending or breaking. Staking helps each stem grow more upright, maintaining the plant’s aesthetic and structural integrity. It also minimizes the chances of damage from accidental bumps or strong drafts.
Proper Staking Methods
When it comes to staking your rubber plant, following the correct methods ensures successful support and continued healthy growth.
-
Choose the Right Stake: Use a stake that is tall enough to support the top of your plant. Bamboo or wooden stakes are good options. Ensure it’s sturdy but not too thick, to avoid damaging the roots.
-
Insert the Stake: Carefully insert the stake into the soil near the base of the plant, avoiding the root system. Aim to position it as close to the main stem as possible without damaging the roots.
-
Tie the Stem: Use soft, flexible ties like gardening twine or old pantyhose to gently secure the rubber plant stem to the stake. Avoid tying too tightly, as this can damage the plant. Tying at multiple points along the stem provides better support.
-
Adjust as Needed: As your rubber plant continues to grow, adjust the ties and the position of the stake accordingly. Check regularly to ensure the plant remains upright and supported.
Below is a table summarizing the steps for proper staking:
| Step | Action | Notes |
|---|---|---|
| 1 | Choose the Right Stake | Bamboo or wooden stakes are ideal |
| 2 | Insert the Stake | Avoid damaging the root system |
| 3 | Tie the Stem | Use soft ties like gardening twine |
| 4 | Adjust as Needed | Check regularly for continued support |
For more information on rubber plant care, you can explore articles related to rubber plant pruning and rubber plant care in winter.
Keep in mind that supporting your rubber plant is just one aspect of ensuring its healthy growth. Light and water considerations, repotting practices, and regular maintenance all contribute to a thriving plant. Learn about rubber plant light requirements and rubber plant watering to provide the best care for your green companion.
Propagation and Rejuvenation
Propagation Methods for New Plants
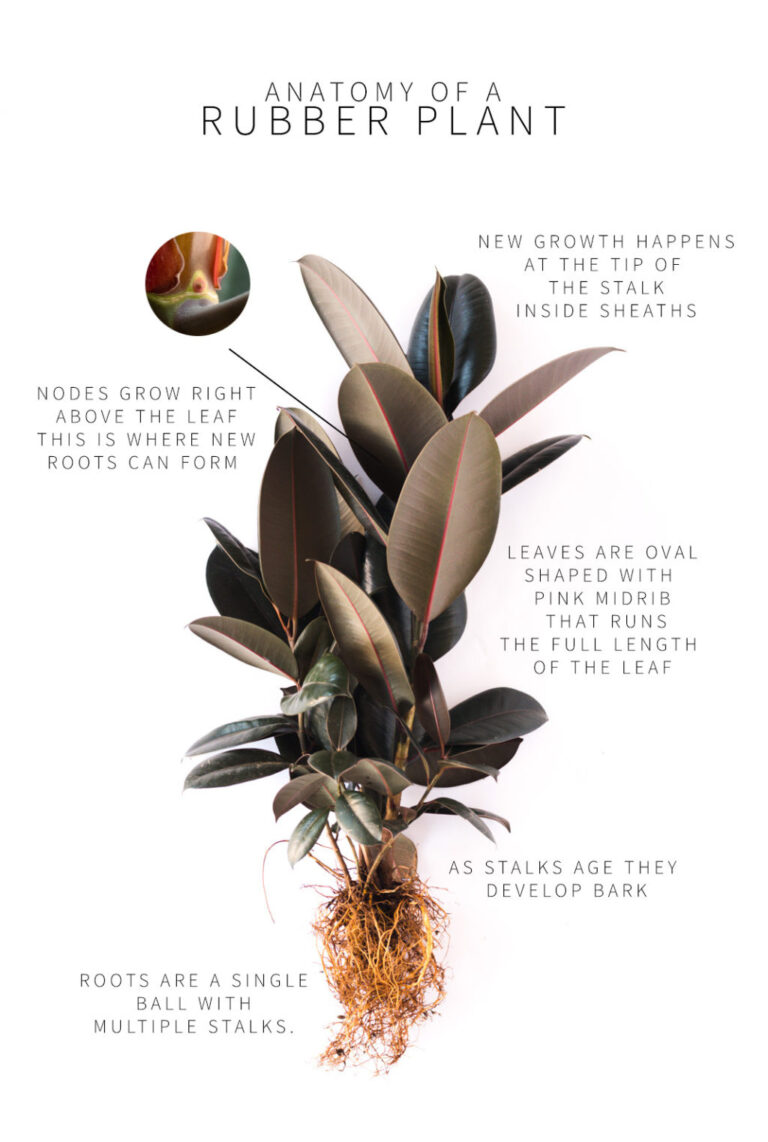
Propagating your rubber plant is a simple and effective way to manage its height and create new plants. The plant can be propagated using nodes, either in water or directly in soil. When taking cuttings, ensure that each piece has a small portion of the stalk and at least one leaf.
Here is a quick overview of propagation methods:
| Method | Steps |
|---|---|
| Water Propagation | 1. Cut a healthy node with a leaf. 2. Place the cutting in water. 3. Wait for roots to develop (usually a few weeks). 4. Transplant into soil once roots are established. |
| Soil Propagation | 1. Cut a node with a leaf attached. 2. Place cutting directly into moist soil. 3. Keep the soil slightly damp. 4. Monitor for new growth as roots establish. |
By following these methods, you can easily propagate new rubber plants from your existing one.
Rejuvenating Leggy Rubber Plants
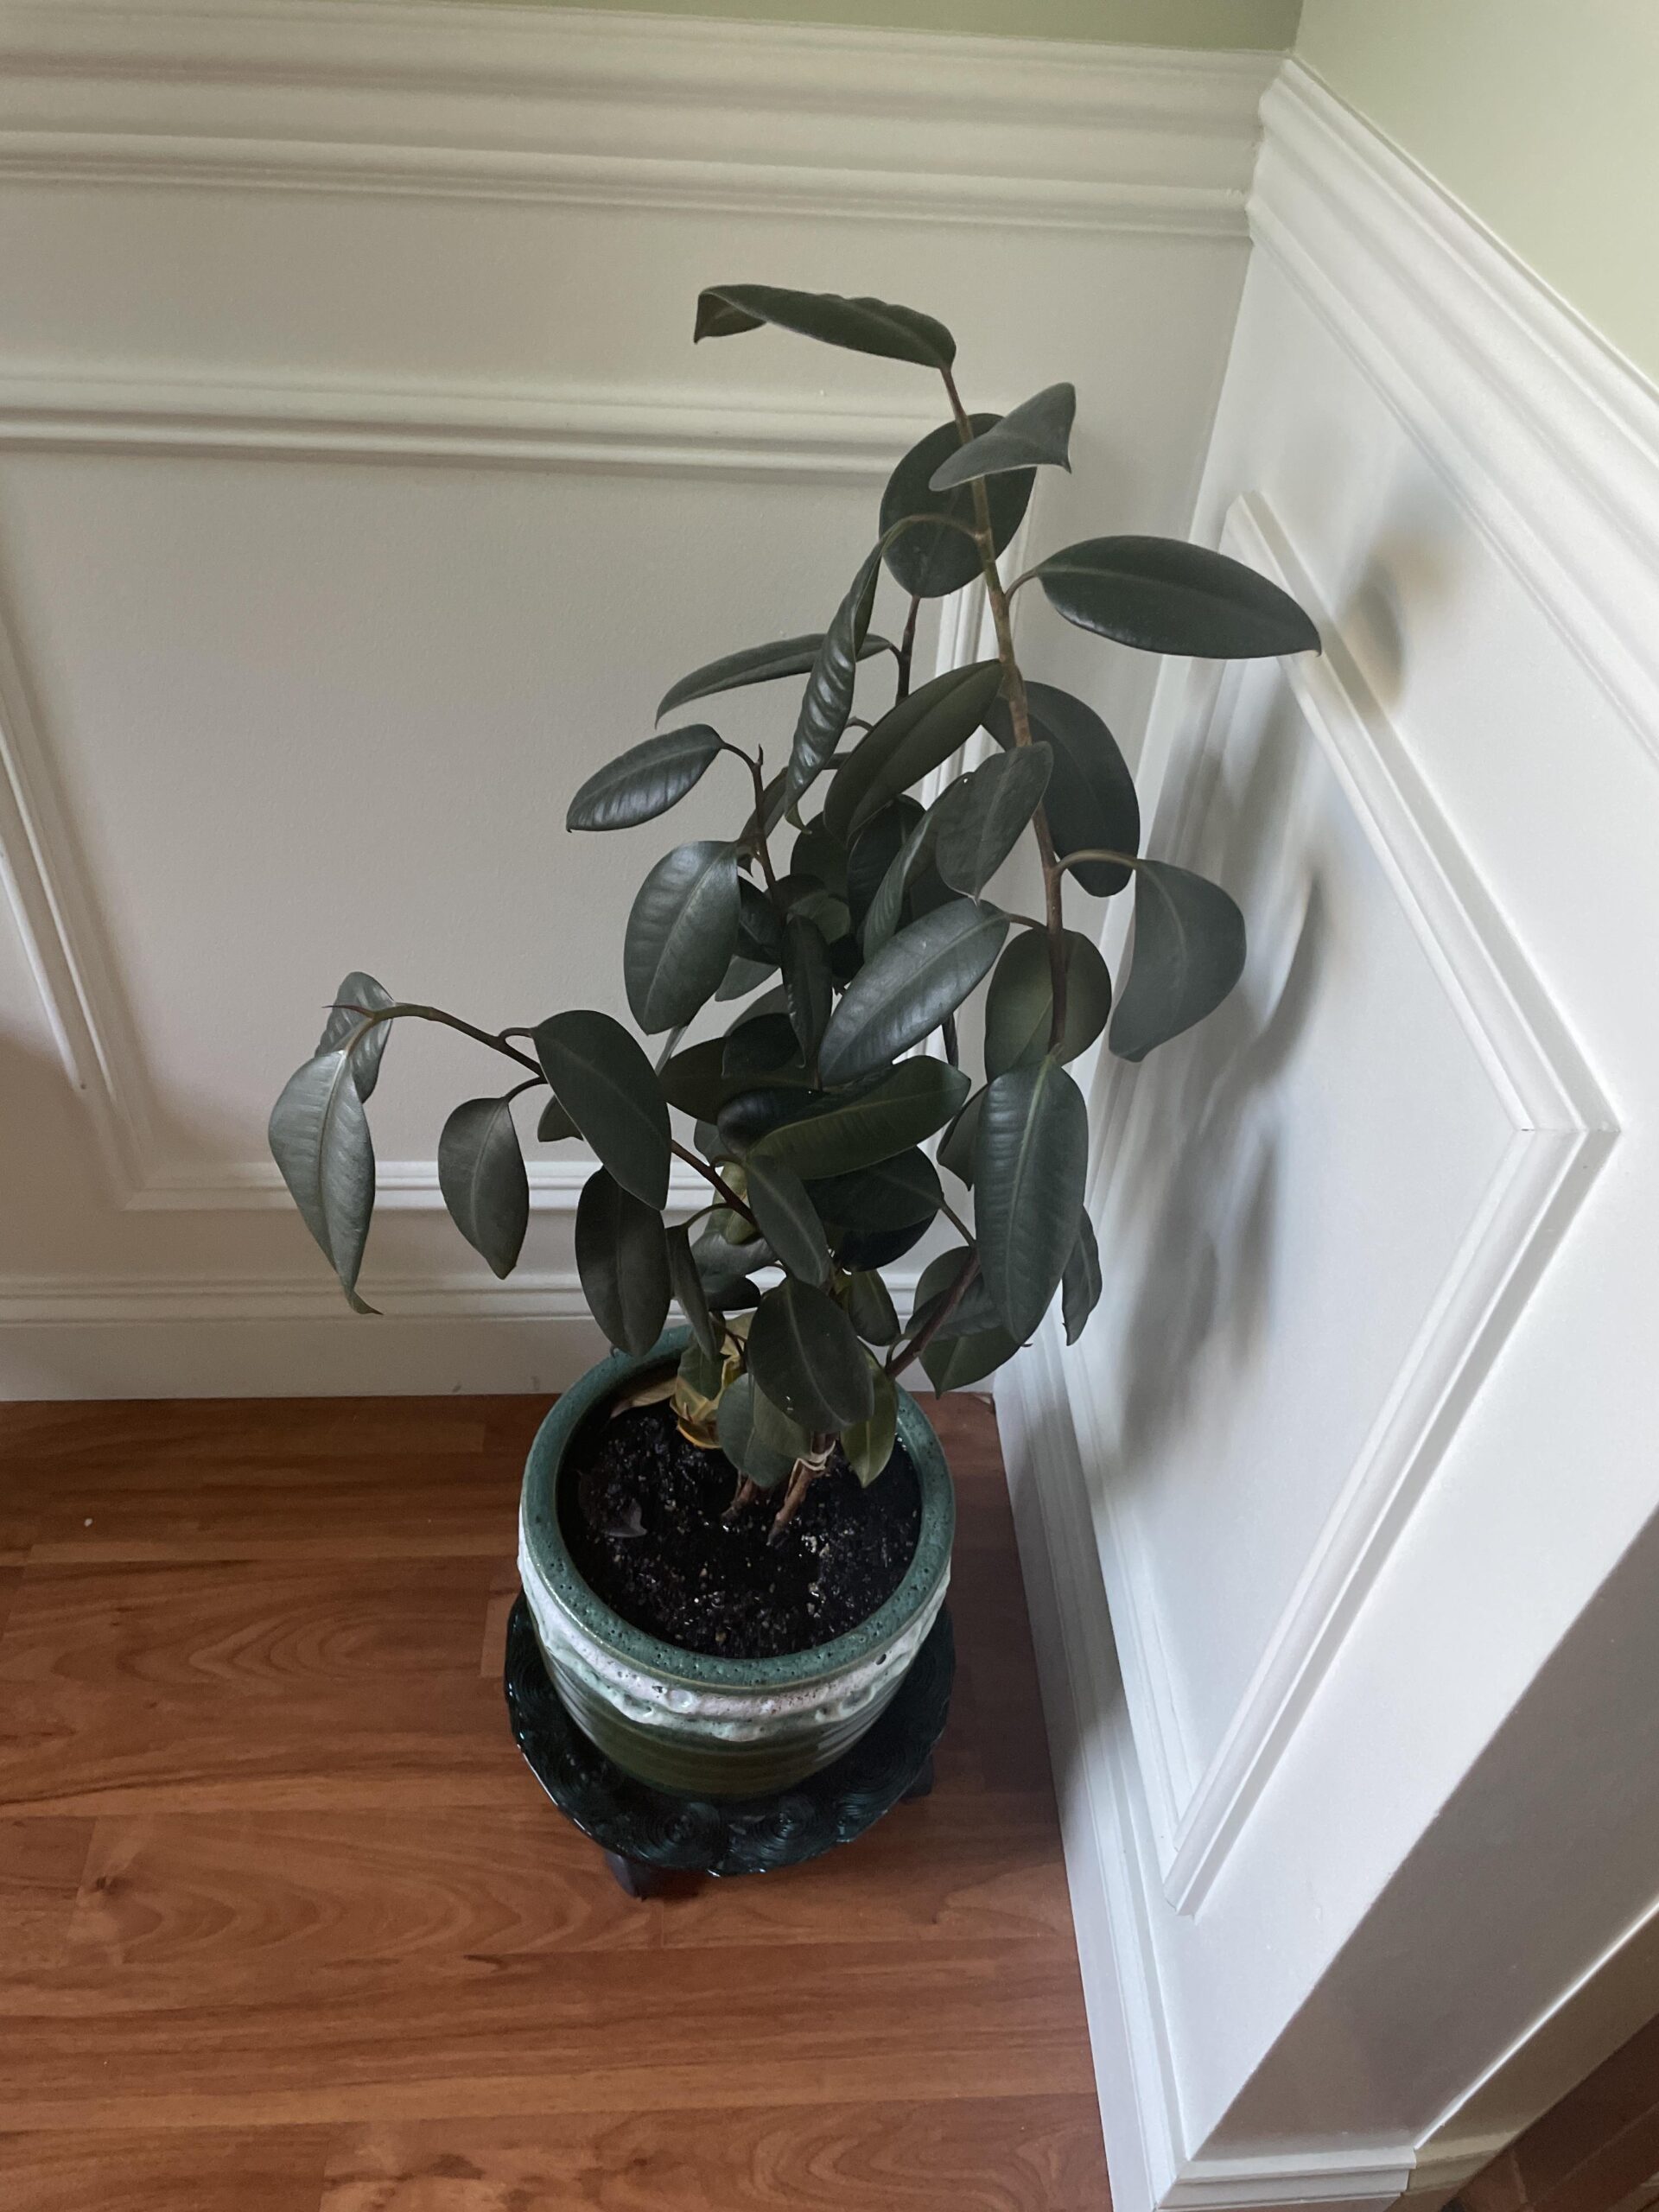
A leggy rubber plant with long, thin stalks and sparse leaves often indicates inadequate lighting or other environmental issues. For instance, lack of proper light makes the plant stretch towards the light source, resulting in legginess. Ensure your rubber plant receives optimal light by placing it in a well-lit area. You can learn more about this in our article on rubber plant light requirements.
If the leaves are curling back, the plant may be thirsty. Consider changing its planter to a less absorbent material to retain more moisture.
Unfortunately, rubber plants won’t regrow leaves on the lower part of the stalks once they are lost. However, you can create a fuller appearance by planting smaller stalks around the main plant. This makes the plant look more bushy and balanced.
For additional tips on managing your rubber plant, visit our resources on rubber plant pruning and rubber plant care in winter.
By understanding the needs of your rubber plant and applying these practices, you can keep your plant healthy and manageable, regardless of its height.


