Understanding Spider Plant Care
Caring for spider plants requires attention to their specific needs in terms of nutrients, watering, and lighting. Addressing these aspects properly can prevent common issues like curling leaves.
Nutrient Imbalance and Fertilization
Spider plants can exhibit curling leaves if they are not receiving the right balance of nutrients. A nutrient imbalance may lead to yellowing of the leaves, indicating that the plant is not getting what it needs to thrive (Greg App). To avoid this, it’s essential to use a balanced fertilizer regularly.
| Nutrient | Importance | Signs of Imbalance |
|---|---|---|
| Nitrogen (N) | Promotes leaf growth | Yellowing or pale leaves |
| Phosphorus (P) | Supports root and flower development | Poor root growth |
| Potassium (K) | Enhances overall plant health | Brown leaf tips |
For optimal results, feeding your spider plant with a balanced fertilizer every two weeks during the growing season can help maintain healthy, vibrant foliage. For more details on fertilization, check out spider plant fertilizer.
Watering Techniques and Mistakes
Watering spider plants correctly is crucial to prevent issues such as root rot and leaf curling. Overwatered spider plants tend to have soggy soil and limp leaves, while underwatered ones display crispy foliage (Greg App).
| Condition | Symptoms | Solution |
|---|---|---|
| Overwatering | Soggy soil, limp leaves | Ensure proper drainage, reduce watering frequency |
| Underwatering | Crispy, dry leaves | Increase watering frequency, check soil moisture regularly |
To maintain ideal soil moisture, allow the top inch of soil to dry out before watering again. Use room-temperature water and ensure the pot has adequate drainage. For more tips on watering, visit our guide on spider plant watering techniques.
Lighting and Temperature Requirements
Spider plants thrive in bright, indirect light and stable temperatures. Placing the plant in a spot with bright, indirect sunlight helps avoid stress on the leaves, which can lead to curling (Greg App). Direct sunlight can scorch the leaves, leading to brown tips or curling.
| Lighting Condition | Symptoms | Solution |
|---|---|---|
| Direct Sunlight | Scorched, brown-tipped leaves | Move to indirect light |
| Low Light | Slowed growth, pale leaves | Increase light exposure |
Additionally, spider plants prefer temperatures between 60-75°F. Maintaining stable temperatures without sudden fluctuations prevents leaf stress. For more detailed information on lighting, visit spider plant light requirements and spider plant temperature tolerance.
Understanding and addressing these key aspects of spider plant care can significantly reduce the risk of leaf curling and other common issues, ensuring your plant thrives. For more comprehensive care guidelines, explore our extensive resources on spider plant care.
Ensuring Healthy Root Growth
A thriving root system is vital for the overall health of your spider plant. Proper root care can prevent common issues such as leaves curling or browning. Below, we discuss essential guidelines for potting and repotting your spider plant, as well as methods for preventing and treating root rot.
Potting and Repotting Guidelines
Regular potting and repotting are crucial to ensure that your spider plant has adequate space to grow. If roots are circling the bottom or poking out of drainage holes, it may be time to upgrade to a larger pot. This helps prevent the plant from becoming root-bound and experiencing issues like leaves flopping over due to incorrect pot size.
Repotting Steps
- Choose the Right Pot Size: Select a pot that is 1-2 inches larger in diameter than the current pot.
- Prepare the Pot: Ensure the new pot has proper drainage holes.
- Use Suitable Soil: A well-draining potting mix is ideal.
- Gently Remove Plant: Carefully take the spider plant out of its current pot.
- Inspect the Roots: Trim any damaged or overgrown roots.
- Position in New Pot: Place the plant in the center of the new pot and fill with soil.
- Water Thoroughly: Water the plant well after repotting.
Root Rot Prevention and Treatment
Root rot is a common problem in spider plants, often caused by overwatering. Overwatered spider plants tend to have soggy soil and limp leaves, while underwatered plants have crispy foliage. Adjusting watering techniques by checking the soil moisture regularly, using room-temperature water, and ensuring proper drainage is crucial.
Root Rot Prevention
- Watering Techniques:
- Water when the top inch of the soil feels dry.
- Use room-temperature water.
- Ensure the pot has drainage holes to allow excess water to escape.
- Check for Root Bound: Routinely check the roots every six months. If the plant appears root-bound, it’s time for repotting.
- Proper Drainage: Use pots with adequate drainage to prevent waterlogging.
Treatment for Root Rot
If root rot is detected, it’s essential to act quickly to save your plant.
- Remove from Pot: Carefully take the spider plant out of its pot.
- Inspect Roots: Check for soft, mushy, or discolored roots and trim the affected parts.
- Replant: Place the plant in fresh, well-draining potting mix.
- Adjust Watering: Cut back on watering to prevent recurrence.
By providing the right conditions for root growth and addressing issues like root rot promptly, your spider plant can remain healthy and vibrant. For more tips on spider plant root rot and other care concerns, explore our articles on spider plant repotting and spider plant care.
Addressing Leaf Issues
Proper care is essential to ensure the health and vibrancy of spider plants. This section explores common leaf issues including brown tips, yellowing, and curling leaves, as well as strategies for addressing and preventing these problems.
Dealing with Brown Tips
Spider plant leaves often develop brown tips, commonly due to sensitivity to fluoride in water. Using fluoride-free water, such as distilled or rainwater, may help prevent browning (Lively Root). Moreover, low humidity can contribute to this issue. Increasing humidity by misting the plant regularly or placing it on a pebble tray with water can be beneficial.
| Cause | Solution |
|---|---|
| Fluoride Sensitivity | Use fluoride-free water |
| Low Humidity | Increase humidity with misting or a pebble tray |
For more detailed tips on handling brown tips, see our article on spider plant brown tips.
Preventing Yellowing of Leaves
Yellow leaves on spider plants can result from various factors, including overwatering, temperature fluctuations, inadequate lighting, and low humidity. Addressing these issues involves:
- Allowing the soil to dry out completely before the next watering
- Maintaining stable indoor temperatures
- Ensuring the plant receives adequate indirect light
- Enhancing indoor humidity levels.
It is also beneficial to feed the plant during the growing season to promote overall health (Lively Root).
| Cause | Solution |
|---|---|
| Overwatering | Let soil dry before watering again |
| Temperature Fluctuations | Maintain stable temperature |
| Inadequate Light | Provide sufficient indirect light |
| Low Humidity | Increase humidity |
For an in-depth guide on preventing yellowing, visit our section on spider plant yellow leaves.
Tackling Curling Leaves
Curling leaves on spider plants can be caused by several issues, including overwatering, nutrient deficiencies, and root rot. Each of these problems requires a specific approach for resolution.
-
Overwatering: Ensure the soil is well-draining and reduce the watering frequency. Repotting into more suitable soil might be necessary.
-
Nutrient Deficiencies: Proper fertilization, following the guidelines found in our spider plant fertilizer section, can help address these deficiencies.
-
Root Rot: Root rot is a common result of overwatering, leading to bacterial or fungal infections. Repotting in fresh, well-draining soil and pruning affected roots is essential.
| Cause | Solution |
|---|---|
| Overwatering | Ensure proper drainage and repot |
| Nutrient Deficiencies | Follow proper fertilization techniques |
| Root Rot | Prune affected roots and repot in fresh soil |
For further assistance on managing leaf curling, see our detailed guide on spider plant leaves curling.
By understanding these common leaf issues and their remedies, you can ensure your spider plant thrives. For broader care tips, check our comprehensive spider plant care guide.
Pests and Leaf Health
Maintaining the health of your spider plant includes protecting it from common pests that can cause damage to its leaves. Understanding these pests and how to combat them is essential for keeping your plant thriving.
Spider Mites and Infestations
Spider mites are tiny relatives of spiders known for causing significant damage to spider plants. These minuscule pests have four pairs of legs, no antennae, and sharp mouths that pierce plant cells and suck out the fluids. This results in yellow, orange, or white speckles on the leaves (Safer Brand). A single female spider mite can produce thousands of new mites in less than a month, making infestations difficult to control if not addressed promptly.
| Pest | Characteristics | Damage |
|---|---|---|
| Spider Mites | Tiny, 4 pairs of legs, no antennae | Yellow, orange, or white speckles on leaves |
Monitoring your plant regularly is key to catching infestations early. Check the undersides of leaves for signs of spider mites or their egg sacs. Consider isolating new plants and giving them a thorough wash on top and bottom of leaves before integrating them into your indoor garden (Safer Brand).
For further details on managing spider mites, you can explore additional strategies in our leaf issues section.
Protection from Common Pests
Protecting spider plants from common pests involves regular inspection and preventive measures. Here are some tips to keep your spider plant pest-free:
- Regular Inspection: Routinely examine leaves, especially the undersides, for signs of pests.
- Cleanliness: Keep the plant area clean and free from debris which can harbor pests.
- Isolation: Quarantine new plants for a week before introducing them to your collection.
- Natural Predators: Introduce natural predators such as ladybugs to control pest populations.
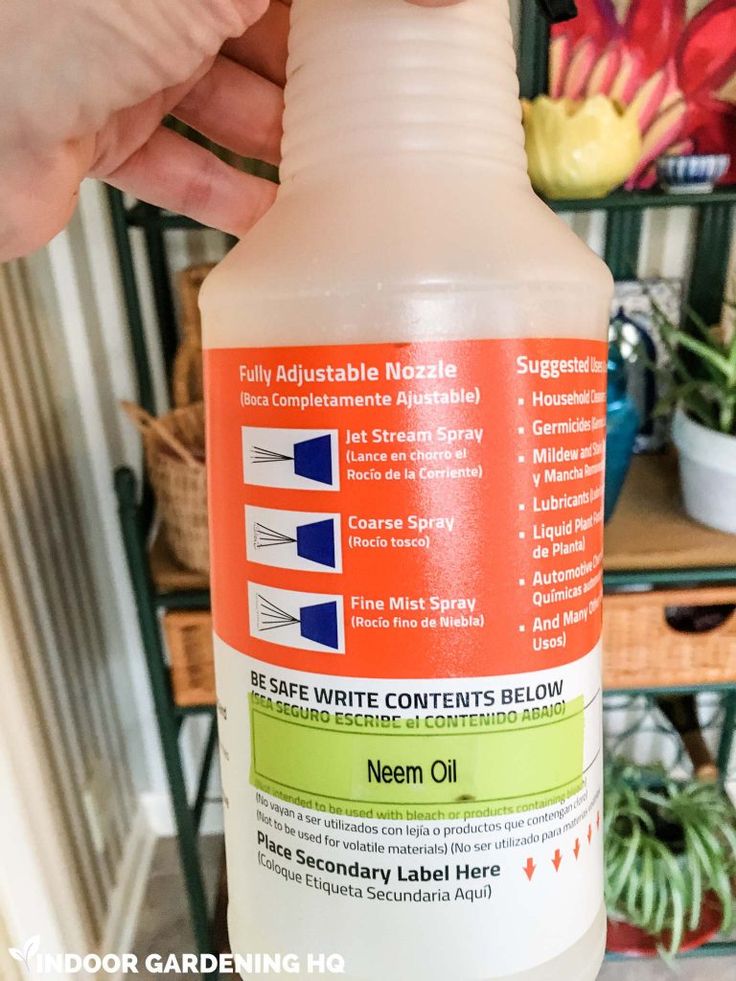
- Homemade Sprays: Use solutions like neem oil or insecticidal soap to treat affected areas.
| Preventive Measure | Benefit |
|---|---|
| Regular Inspection | Early detection of pests |
| Cleanliness | Reduces pest habitat |
| Isolation | Prevents spread from new plants |
| Natural Predators | Controls pest population |
| Homemade Sprays | Eco-friendly pest control |
Spider plants are generally hardy, but they can still fall victim to various pests. Taking these steps can help maintain their health and prevent issues like spider plant leaves curling. For more on pest prevention, check out our section on root rot prevention.
By understanding the role pests play and implementing effective strategies to combat them, you can ensure that your spider plant remains healthy and vibrant. For further reading on spider plant care, check our detailed guides on topics such as spider plant fertilizer and spider plant light requirements.
Environmental Factors and Leaf Curling
Environmental factors such as humidity, temperature, soil pH, and water quality play a significant role in spider plant care. Addressing these factors can help prevent the curling of spider plant leaves.
Humidity and Temperature Impact
Spider plants thrive in a humid environment, ideally between 50-60% humidity. Below is a table to illustrate ideal and common indoor humidity levels:
| Environment | Humidity Level (%) |
|---|---|
| Ideal for Spider Plants | 50-60 |
| Typical Indoor Climate | 40-50 |
Low humidity can cause spider plant leaves to curl and become crispy. To increase humidity, consider using a humidifier, placing the plant on a pebble tray, or misting it regularly. For additional tips, refer to our article on improving spider plant humidity.
Temperature also affects spider plant health. They prefer temperatures between 65-75°F during the day and slightly cooler at night. Extreme temperature fluctuations or drafts can lead to leaf curling. Keep the plant away from heaters, air conditioners, and drafty windows. For more details, visit our page on spider plant temperature tolerance.
Soil pH and Water Quality Concerns
Soil pH can impact the nutrient availability for spider plants. They prefer slightly acidic to neutral soil, with a pH range of 6.0 to 7.0. Below is a table to illustrate optimal pH levels:
| Soil Type | pH Level |
|---|---|
| Optimal for Spider Plants | 6.0 – 7.0 |
| Common Potting Mix | 5.5 – 6.5 |
To ensure your soil is within the appropriate range, you may need to adjust with pH amendments accordingly.
Water quality is crucial for spider plants, as they are sensitive to chemicals like fluoride and chlorine found in tap water. Using filtered, rain, or dehumidifier water can prevent these chemicals from causing browning and curling of leaves (Quirky Plants).
For more holistic care insights, explore our article on spider plant root rot which discusses root health and its impact on overall plant wellness.
By understanding and managing these environmental factors, you can keep your spider plant leaves healthy and free from curling. Be sure to periodically check humidity and soil pH levels and adjust as necessary to provide the best care for your plant.
Specific Care Concerns
Overwatering vs. Underwatering
Overwatering and underwatering are common issues that can lead to curling leaves on spider plants. Both of these watering mistakes can stress the plant and impact its overall health.
Overwatering
Overwatering can result in soggy soil, which deprives the roots of necessary oxygen, leading to root rot. This condition is often indicated by curling leaves and can be remedied by evaluating the soil moisture level and ensuring proper drainage quality. Repotting your spider plant into well-draining soil and adjusting your watering frequency can assist in resolving the issue of overwatering.
Signs of Overwatering:
- Soggy soil
- Yellowing leaves
- Root rot
Underwatering
Underwatering is the most common issue leading to leaf problems for houseplants, including spider plants. When the soil is too dry, the plant can’t absorb sufficient water, causing the leaves to curl and wilt. Regularly checking the soil moisture level using a finger, wooden chopstick, or moisture meter can help determine if the plant is underwatered. Adequate watering to keep the soil moist, but not soggy, can rectify this problem (Houseplant Resource Center).
Signs of Underwatering:
- Dry soil
- Wilted leaves
- Leaf curling
| Symptoms | Overwatering | Underwatering |
|---|---|---|
| Soil Condition | Soggy | Dry |
| Leaf Appearance | Yellowing, Curling | Wilted, Curling |
| Root Health | Root Rot | Healthy but dry |
For more information on watering techniques, visit our sections on watering techniques and mistakes, and ensuring healthy root growth.
Leaf Browning and Tips Management
Leaf browning and brown tips are other issues that can affect the appearance and health of your spider plant. Addressing these concerns requires understanding the underlying causes.
Causes of Leaf Browning
-
Chemical Sensitivity: Spider plants are sensitive to chemicals and substances in tap water. Using purified, distilled, or rainwater can help alleviate this issue. Allowing tap water to sit overnight before use can also help dissipate harmful chemicals (Houseplant Resource Center).
-
Soil pH: Spider plants prefer slightly alkaline soil within the pH range of 6.1 to 6.5. Monitoring and adjusting the soil pH by repotting into suitable soil can help manage leaf browning issues.
-
Inadequate Humidity: Low humidity can lead to browning leaf tips. Keeping your plant in a more humid environment or using a humidity tray can help.
-
Overfertilization: Too much fertilizer can cause salt build-up in the soil, leading to brown leaf tips. It’s crucial to follow a proper fertilization schedule and to occasionally flush the soil with water to remove excess salts. For more information on proper fertilization, visit our spider plant fertilizer guide.
| Cause | Solution |
|---|---|
| Chemical Sensitivity | Use purified, distilled, or rainwater |
| Soil pH | Monitor and adjust soil pH (6.1 – 6.5) |
| Inadequate Humidity | Increase surrounding humidity or use a humidity tray |
| Overfertilization | Follow proper fertilization schedules, flush the soil |
For detailed troubleshooting on brown tips, you can refer to our article on spider plant brown tips.
Understanding these specific care concerns will help ensure your spider plant remains healthy and vibrant. For additional tips and comprehensive guides, check out our pages on spider plant light requirements and spider plant humidity.


