Understanding Rubber Plant Care
Rubber plants require specific care to thrive. This section explores key aspects of rubber plant maintenance, focusing on replanting frequency and flowering behavior.
Replanting Frequency
Replanting, or repotting, is crucial for maintaining a healthy rubber plant. Over time, the plant can outgrow its container, and the soil can become depleted of essential nutrients. Here is a simple guideline for replanting your rubber plant:
- Replanting Interval: Rubber plants should be repotted after they double in size or once a year, whichever comes first (Greg App). This helps in replenishing nutrients and providing sufficient space for root growth.
- Potting Soil: Using fresh potting soil during repotting provides all the necessary nutrients the plant needs. This ensures continued health and vitality as the rubber plant grows. For more guidance, check our detailed article on rubber plant repotting.
Flowering Behavior
Rubber plants have a unique flowering behavior that differs significantly between indoor and outdoor settings.
- Indoor Flowering: When kept as houseplants, rubber plants generally do not flower. The controlled atmosphere and conditions of indoor environments rarely mimic those necessary for flowering.
- Outdoor Flowering: In their natural habitat, or when grown outdoors in suitable climates, rubber plants do produce flowers. These inflorescences are typically insignificant compared to the lush foliage but are a natural part of the plant’s life cycle.
To learn more about the flowering behavior of rubber plants and ways to encourage it, you can visit our page on rubber plant flower.
Replanting and Flowering Behavior Overview
| Aspect | Indoor Rubber Plant | Outdoor Rubber Plant |
|---|---|---|
| Replanting Frequency | Once a year or after doubling in size | Similar to indoor, replant annually or when size doubles |
| Flowering | Generally does not flower | Can produce flowers in natural habitat |
Understanding these aspects of rubber plant care ensures your plant remains healthy and vibrant. For more tips and comprehensive information, explore other related sections, such as rubber plant soil, rubber plant watering, and rubber plant pruning.
Nutrient Requirements of Rubber Plants
Maintaining the nutrient balance of your rubber plant is vital to ensure healthy growth and vibrant foliage. Here we delve into the nutrient sources and fertilization guidelines essential for your plant’s care.
Nutrient Source
Rubber plants derive their essential nutrients from a combination of sunlight, soil, and fertilizers. When repotting, using a well-draining, all-purpose potting mix enriched with additional aeration materials such as perlite or orchid mix is recommended. This mix offers a proper balance between moisture retention and drainage. Fresh potting soil, changed yearly or once the plant doubles in size, can also provide the necessary nutrients.
Fertilization Guidelines
Fertilizing your rubber plant can significantly improve its growth and overall health. A general all-purpose houseplant fertilizer, either in liquid form or as a slow-release variant added to the soil, works effectively (Espoma).
| Season | Fertilization Frequency |
|---|---|
| Spring/Summer | Every other watering session |
| Fall/Winter | Reduce or stop fertilizing, depending on dormancy |
During the growing season (spring and summer), fertilize your plant every other watering session to provide a consistent supply of nutrients. In the fall and winter, the rubber plant’s growth may slow down, and it may go dormant. During this period, reduce or even cease fertilization to prevent over-fertilization (Greg App).
Using excessive fertilizer can harm your plant, leading to nutrient burn. If you suspect over-fertilization, water the plant thoroughly to flush the roots and skip the next fertilization round to allow the plant time to recover. This balance helps maintain healthy growth without risking damage.
For more information on rubber plant care, refer to our articles on rubber plant pruning and rubber plant soil mix.
Fertilization Techniques
A well-planned fertilization routine can significantly enhance the health and growth of your rubber plant. This section delves into the aspects of creating an effective fertilizing schedule and choosing the best fertilizers for your rubber plant.
Fertilizing Schedule
Rubber plants thrive when they are fed appropriately. Following a proper fertilization schedule is essential for promoting healthy growth. Here are some guidelines:
-
Growing Season (Spring/Summer): During the active growing season, fertilize your rubber plant every other watering session. This generally means feeding the plant every 2-4 weeks. (A Beautiful Mess)
-
Dormant Season (Fall/Winter): In the dormant season, the plant’s growth slows down, and it requires less nutrition. Reduce fertilization to once every 6-8 weeks (Greg App). Over-fertilization during this period can stress the plant.
The table below summarizes the fertilizing schedule:
| Season | Frequency |
|---|---|
| Spring/Summer | Every 2-4 weeks |
| Fall/Winter | Every 6-8 weeks |
Adhering to this schedule can prevent nutrient imbalances and ensure the plant’s robust growth. For more detailed instructions on caring for your rubber plant during different seasons, you can visit our guides on rubber plant care in winter and rubber plant growth in summer.
Choosing the Right Fertilizer
Selecting the appropriate fertilizer is just as important as the feeding schedule. A balanced fertilizer ensures that the plant receives all necessary nutrients. Typically, a standard houseplant fertilizer works well for rubber plants, but you should consider the following options:
-
Liquid Fertilizers: Ideal for those who prefer regular feeding. Always read the label and follow the instructions for dosage.
-
Slow-Release Fertilizers: These fertilizers are mixed into the soil and release nutrients over time. They are highly convenient, lasting up to six months.
Ensure the fertilizer has a balanced ratio of Nitrogen (N), Phosphorus (P), and Potassium (K) for comprehensive nutrient support.
| Nutrient | Role |
|---|---|
| Nitrogen (N) | Promotes leaf growth |
| Phosphorus (P) | Encourages root development |
| Potassium (K) | Enhances overall health |
By choosing the right fertilizer and maintaining a proper feeding routine, you can significantly enhance the health and appearance of your rubber plant. For more information on preventing and treating issues related to fertilization, consider reading about signs of over-fertilization and corrective actions.
Proper fertilization is key to vibrant growth and lush foliage. Understanding and implementing the right techniques will ensure your rubber plant remains a stunning addition to your home.
Preventing Over-Fertilization
Ensuring the health of your rubber plant involves not only knowing how to properly fertilize but also understanding how to avoid over-fertilization. Over-fertilization can be detrimental to your plant, causing stress and damage. Here’s how you can identify the signs and take corrective actions to mitigate the issue.
Signs of Over-Fertilization
Recognizing the early signs of over-fertilization is crucial to prevent long-term damage to your rubber plant. Here are some common indicators:
- Yellowing Leaves: Over-fertilization can cause the leaves to turn yellow or brown at the edges. For more information on this, visit our page on rubber plant leaves turning yellow.
- Leaf Drop: An excess of nutrients can cause the plant to shed leaves. More details on leaf drop can be found at rubber plant leaves falling off.
- Stunted Growth: Over-fertilization can inhibit growth, leading to a lack of new leaves and shoots. Check out rubber plant not growing for more insights.
- Root Burn: Too much fertilizer can “burn” the roots, causing them to turn brown and become less effective at nutrient uptake.
| Sign | Symptom |
|---|---|
| Yellowing Leaves | Leaves turn yellow or brown at edges |
| Leaf Drop | Plant sheds leaves unusually |
| Stunted Growth | Lack of new leaves and shoots |
| Root Burn | Brown and ineffective roots |
Corrective Actions
If you suspect that your rubber plant has been over-fertilized, you can take several steps to remedy the situation:
- Flush the Soil: Give your plant a thorough watering to help flush out excess fertilizer from the soil. Make sure the water drains well to avoid root rot.
- Hold Off on Fertilizing: Avoid adding more fertilizer for at least a week to allow your plant time to recover and rest.
- Prune Damaged Leaves: Remove any leaves that show signs of severe damage to prevent further stress on the plant.
- Adjust Fertilizer Use: Reevaluate your fertilization schedule and decrease the frequency or concentration of fertilizer used. Always follow the instructions on the fertilizer label for recommended doses (A Beautiful Mess).
- Use Slow-Release Fertilizers: Consider using slow-release plant food, which provides nutrients over a longer period and reduces the risk of over-fertilization (Espoma).
For more detailed information on avoiding common pitfalls, check our guide on rubber plant diseases.
By understanding the signs of over-fertilization and taking appropriate corrective actions, you can ensure your rubber plant remains healthy and vibrant. For more tips on optimizing your rubber plant care routine, including information on pruning and propagation, see our rubber plant pruning guide and propagation methods.
Enhancing Growth and Appearance
Enhancing the growth and appearance of your rubber plant involves several key practices, including proper pruning and understanding the different varietal considerations.
Pruning Tips
Pruning your rubber plant is essential for maintaining its shape and promoting new growth. Here are some effective pruning tips:
-
Promote Branching: Pinching off the new growing tips or lightly trimming branches encourages the plant to grow fuller and bushier (A Beautiful Mess). This technique helps to avoid the common issue of rubber plants growing one long, vertical trunk.
-
Timing: The best time to prune is during the plant’s active growing season, typically in spring or early summer. Pruning during this period allows for faster recovery and growth.
-
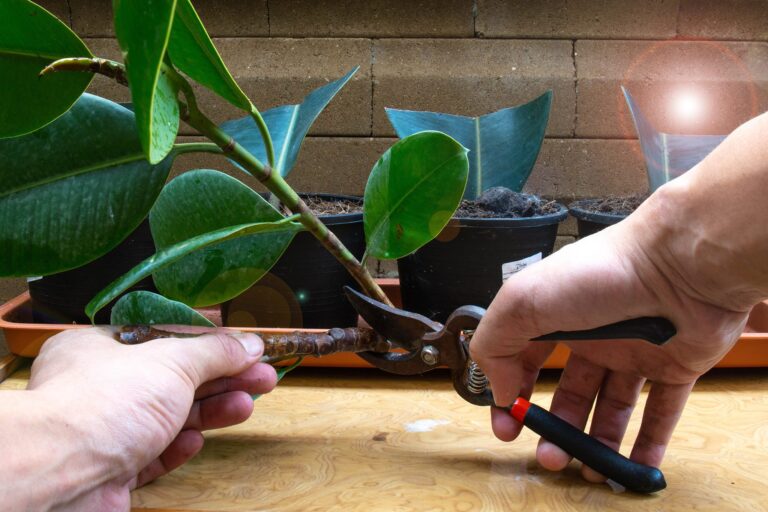
Tools: Use clean, sharp pruning shears to make precise cuts. This reduces the risk of damaging the plant or introducing diseases.
-
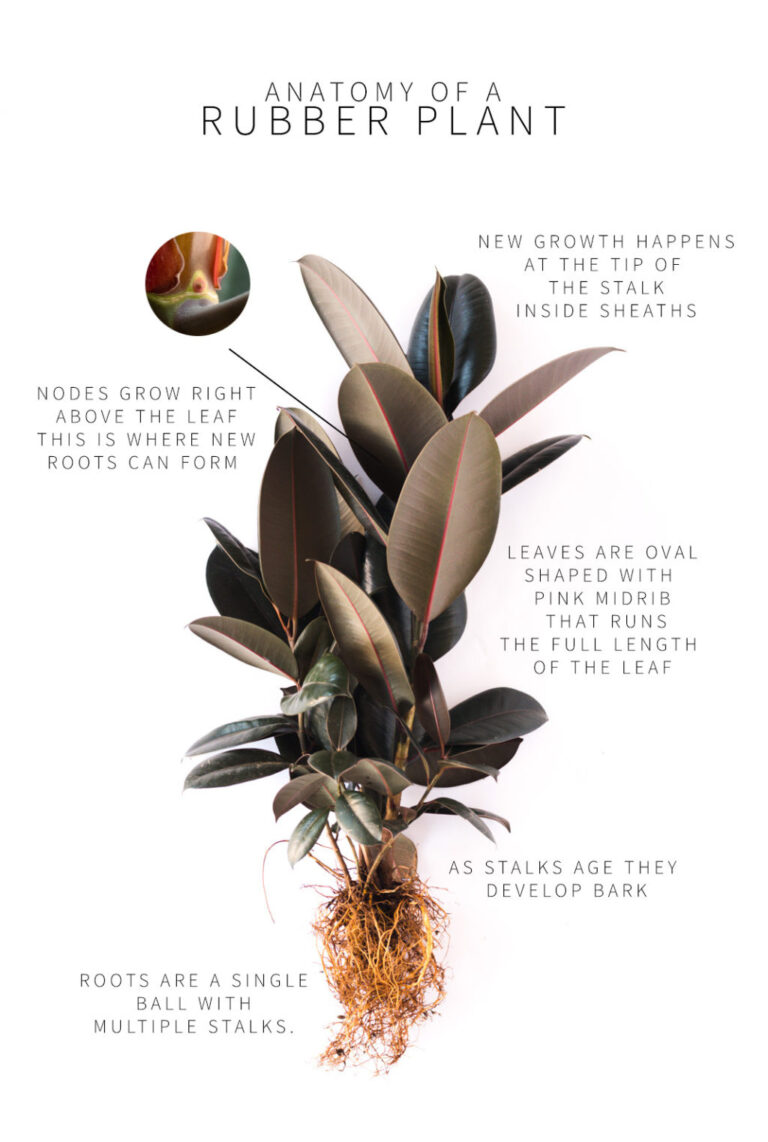
Height Management: Trim the stem back to a node (the point where leaves grow) if the plant starts to get too tall. This encourages lateral growth, resulting in a fuller appearance.
For a comprehensive guide to pruning practices, visit our article on rubber plant pruning.
Varietal Considerations
Rubber plants come in various varieties, each with unique characteristics. Understanding these differences can help you choose the right type for your home and ensure optimal care.
-
Ficus elastica ‘Decora’: Known for its large, glossy green leaves. This variety is robust and grows rapidly.
-
Ficus elastica ‘Robusta’: Features thicker leaves compared to ‘Decora’, making it more resistant to environmental stress.
-
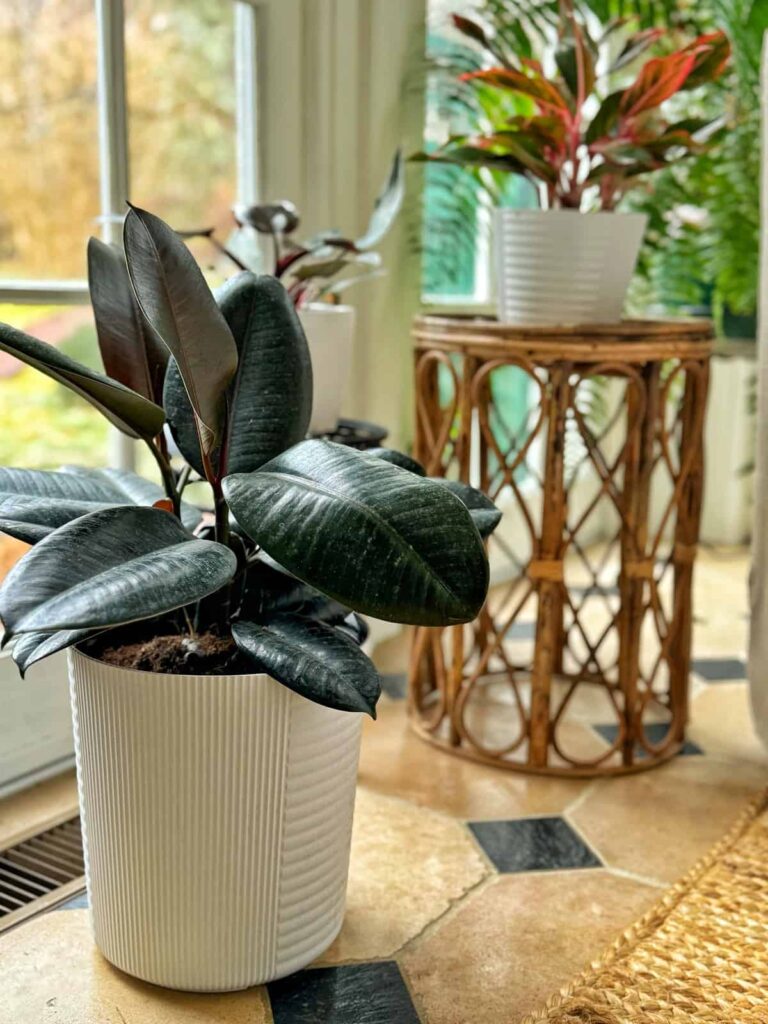
Ficus elastica ‘Burgundy’: Identified by its deep wine-red leaves, adding a striking contrast to your indoor decor (burgundy rubber tree care).
-
Ficus elastica ‘Tineke’: Displays variegated leaves with creamy white and green patterns. This variety requires bright, indirect light to maintain its vibrant colors (tineke rubber tree care).
-
Ficus elastica ‘Ruby’: Boasts pink-tinted leaves, which can add a unique touch to your plant collection.
-
Ficus elastica ‘Doescheri’: Similar to ‘Tineke’, it features variegated leaves but with more muted color variations.
| Variety | Key Characteristics |
|---|---|
| Ficus elastica ‘Decora’ | Large, glossy green leaves |
| Ficus elastica ‘Robusta’ | Thicker leaves, fast-growing |
| Ficus elastica ‘Burgundy’ | Deep wine-red leaves |
| Ficus elastica ‘Tineke’ | Variegated leaves, cream and green patterns |
| Ficus elastica ‘Ruby’ | Pink-tinted leaves |
| Ficus elastica ‘Doescheri’ | Muted variegated leaves |
By understanding the specific needs and characteristics of each variety, you can ensure that your rubber plant thrives and maintains its aesthetic appeal. For more in-depth information on different rubber plant varieties, check out our article on rubber plant types.
Propagation Methods
Propagating rubber plants allows you to expand your collection and share the beauty of these lush plants with others. There are two primary methods: air layering and node cutting, each suitable for different situations and preferences.
Air Layering Technique
Air layering is an effective method for propagating rubber plants with woody branches. This technique involves encouraging a branch to develop roots while it is still attached to the parent plant.
Steps for Air Layering:
- Choose a Healthy Branch: Select a mature, healthy branch that is about 12 inches long.
- Make a Cut: About halfway down the branch, make a small cut (about 1/3 of the way through the branch).
- Insert a Spacer: Insert a small toothpick or piece of plastic into the cut to keep it open.
- Apply Hormone: Apply rooting hormone to the cut area to encourage root growth.
- Wrap the Cut: Cover the cut area with moist sphagnum moss.
- Secure the Moss: Wrap the moss with plastic wrap and secure it with twist ties or string.
- Monitor and Maintain Moisture: Check the moss regularly to ensure it remains moist.
- Wait for Roots: After a few weeks, roots should begin to form. Once a substantial root system has developed, you can cut the branch below the roots and plant it in soil.
For more detailed guidance, you can read our article on rubber plant propagation through air layering.
Node Cutting Process
Node cutting is another effective method for propagating rubber plants, and it’s often easier for beginners. This method involves cutting a section of the plant that includes a node and planting it in soil or water.
Steps for Node Cutting:
- Select a Node: Choose a healthy stem with at least one node (a point where leaves grow).
- Make the Cut: Cut the stem just below the node, ensuring the cutting is about 4-6 inches long.
- Remove Lower Leaves: Remove any leaves from the bottom half of the cutting.
- Apply Rooting Hormone: Dip the cut end of the stem in rooting hormone to encourage root growth.
- Plant the Cutting: Place the cutting in a pot filled with well-draining soil or in a container of water.
- Maintain Moisture: If planted in soil, keep the soil moist but not waterlogged. If using water, ensure it covers the nodes but change it regularly.
- Provide Care: Place the cutting in a location with bright, indirect light. In a few weeks, roots should begin to develop.
Check out our article on rubber plant node cutting propagation for further insights.
Comparison Table
| Method | Difficulty | Time to Develop Roots | Best For |
|---|---|---|---|
| Air Layering | Moderate | 4-8 weeks | Woody branches |
| Node Cutting | Easy | 2-4 weeks | New plant enthusiasts |
Utilizing these propagation methods can help you grow more rubber plants successfully. For optimal results, be sure to use the appropriate rubber plant fertilizers and follow proper rubber plant care guidelines to maintain healthy growth.


