Best Soil Mix for Rubber Plants
When it comes to rubber plants, the right soil mix is crucial. A well-balanced potting mix not only supports healthy growth but also prevents common issues such as root rot by ensuring proper drainage and aeration.
Optimal Potting Mix
Rubber plants thrive in soil that provides good drainage and holds adequate moisture. A popular choice among gardeners is the Miracle-Gro® Indoor Potting Mix, which is specifically designed to drain well, promote air circulation, and hold and release water as needed.
For an optimal homemade mix, consider the following components:
- Loamy Soil: A balanced mixture of sand, silt, and clay. It offers excellent drainage, moisture retention, and encourages beneficial soil organisms (Cafe Planta).
- Organic Matter: Such as compost or peat moss, it enriches the soil and improves both water retention and drainage.
- Perlite or Sand: Helps improve aeration and prevent soil compaction.
Here’s a simple DIY mix:
- 2 parts loamy soil
- 1 part organic matter
- 1 part perlite or sand
Importance of Good Drainage
Rubber plants are susceptible to root rot if their soil remains waterlogged. Ensuring good drainage is essential to prevent this issue.
Why drainage matters:
- Prevents root rot: Keeps roots healthy by avoiding stagnant water.
- Enhances aeration: Allows roots to get the oxygen they need.
- Reduces soil compaction: Keeps soil structure loose and facilitates root growth.
A soil mix with a balanced pH, leaning towards slightly acidic to neutral, is also ideal. Sandy soil, while good at draining, may dry out quickly. Adding organic matter to sandy soil can enhance its water-holding capacity (Cafe Planta). Conversely, clay soil holds water but can become compacted. Incorporating organic matter helps improve its structure and aeration.
For more information on creating the best environment for your rubber plant, you can explore our article on rubber plant soil. Understanding the specific needs of your rubber plant will help you provide the optimal conditions for healthy growth.
| Soil Type | Characteristics | Improvement Tips |
|---|---|---|
| Loamy Soil | Balanced sand, silt, and clay; excellent drainage and moisture retention | Ideal as-is |
| Sandy Soil | Good drainage, dries out quickly | Add organic matter |
| Clay Soil | Holds water, prone to compaction | Add organic matter and perlite |
Additional knowledge on the importance of well-draining soil will aid in maintaining a thriving rubber plant. For more comprehensive care tips, visit burgundy rubber tree care and tineke rubber tree care.
Watering and Soil Moisture
Your rubber plant’s health heavily depends on maintaining the right balance of soil moisture. Proper watering techniques and understanding how to prevent root rot are crucial for a thriving plant.
Proper Watering Techniques
Rubber plants enjoy a moist environment but are sensitive to over-watering. Proper watering of rubber trees is essential, as they like to dry out but not become bone dry. The plant should be watered generously but allowed to dry out to avoid root rot. Here are some guidelines for effective watering:
- Wait Until Top Soil Dries: Allow the top 2/3 of the plant’s soil to dry out before watering again (A Beautiful Mess).
- Water Generously: When you do water, ensure you do so generously, enabling water to reach the root system without waterlogging the soil.
- Check Frequency: The frequency of watering depends on climate and humidity levels. In warmer climates, you may need to water more frequently, whereas in more humid conditions, less frequent watering might suffice.
| Time Period | Watering Frequency |
|---|---|
| Spring/Summer (Growing Season) | Once a week |
| Fall/Winter (Dormant Season) | Every 2-4 weeks |
For more information on rubber plant watering, refer to our dedicated guide.
Preventing Root Rot
Root rot is a common issue in rubber plants caused by soil that is too moist or waterlogged for extended periods. It can be detrimental to your plant if not addressed promptly. Symptoms of root rot include rapidly yellowing leaves, stunted growth, yellow or brown deflated leaf sections, and a rotten brown base.
Tips to Prevent Root Rot
- Well-Draining Soil: Use a well-draining soil mix (see rubber plant soil) to facilitate proper water drainage.
- Proper Pot Size: Ensure the pot has drainage holes and is appropriately sized. Pots that are too large or too small can lead to water retention or inadequate water distribution.
- Monitor Soil Moisture: Regularly check the soil moisture using a moisture meter or by sticking your finger about 2 inches into the soil. Water only if the soil feels dry at this depth.
If you suspect overwatering has led to root rot, you should act quickly to save your plant. Remove the rubber plant from its current soil and repot it in fresh, well-draining soil. Signs of recovery should be visible within a week to 10 days (Fig & Bloom). Rubber plants are resilient to drier conditions, so it’s recommended to err on the side of underwatering to prevent overwatering issues in the future.
Learn more about rubber plant root rot and other common rubber plant diseases on our site. For comprehensive guidance, check out our detailed articles on rubber plant overwatered and rubber plant repotting.
Repotting and Plant Adjustment
Repotting your rubber plant is an important step to ensure its health and growth. Understanding when and how to repot can make a significant difference.
Signs of Needing Repotting
Knowing when to repot your rubber plant is crucial for its health. Several signs indicate it’s time for a new pot:
- Root Bound: If roots are circling the bottom of the pot or coming out through the drainage holes, your plant is root bound.
- Stunted Growth: If the growth rate slows down even during the growing season, it might be due to a lack of space. Check for more information on rubber plant growth rate.
- Yellowing Leaves: Persistent yellow leaves could indicate an overgrown root system (UK Houseplants).
- Frequent Wilt: If the plant wilts frequently despite proper watering, it may be pot-bound and unable to access sufficient nutrients and moisture.
| Sign | Indication |
|---|---|
| Root circling or emerging from pot | Root bound |
| Slowed growth in growing season | Lack of space |
| Persistent yellow leaves | Overgrown root system |
| Frequent wilting | Pot-bound roots |
Care After Repotting
Care after repotting is essential for your rubber plant’s recovery and continued growth. Here are key steps to ensure a smooth transition:
-
Select the Right Soil: Use a well-draining soil mix. A common mix is one part peat, one part pine bark, and one part coarse sand or perlite. This composition ensures your plant gets the drainage it needs. For details on soil mix, visit rubber plant soil.
-
Watering: After repotting, water the plant thoroughly but allow excess water to drain out. Avoid overwatering to prevent root rot (Fig & Bloom). For proper watering methods, see rubber plant watering.
-
Light Exposure: Place the repotted plant in a spot with indirect light to avoid sunburn. Learn more about rubber plant light requirements.
-
Monitor for Stress: After repotting, monitor the plant closely for signs of stress, such as drooping leaves or color changes. Recovery should start within a week to 10 days.
-
Fertilizing: Hold off on fertilizing for the first few weeks after repotting to give the roots time to settle. When ready, use a balanced houseplant fertilizer. Check out rubber plant fertilizer for more details.
By following these guidelines, you can ensure your rubber plant not only survives repotting but thrives afterward. For additional advice on rubber plant pruning and general care, browse our related articles.
Pruning and Fertilizing Tips
Investing time in pruning and fertilizing your rubber plant can lead to more robust growth and a healthier plant overall. Here, we’ll cover strategies for promoting healthy growth and establishing a proper fertilizing schedule.
Promoting Healthy Growth
To ensure your rubber plant thrives, regular pruning is essential. Pruning helps manage the shape of the plant and encourages bushier growth.
- Timing: The best time to prune is during the growing season in spring and summer.
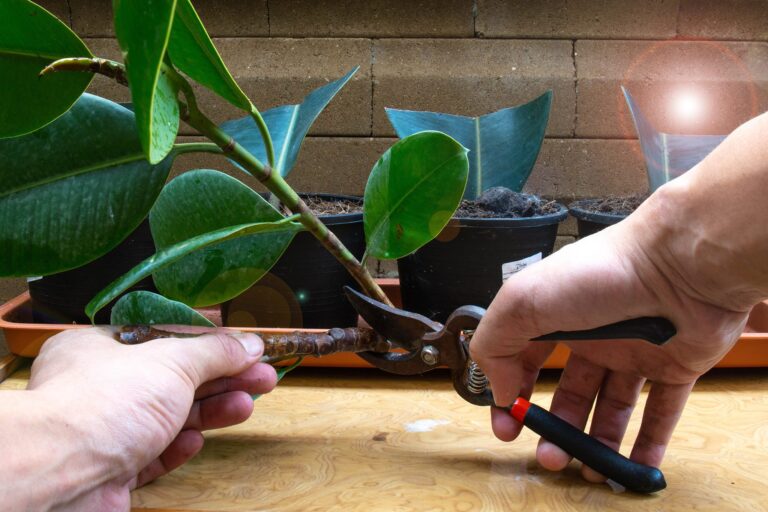
- Tools: Use sterile, sharp pruning shears to make clean cuts and minimize the risk of disease.
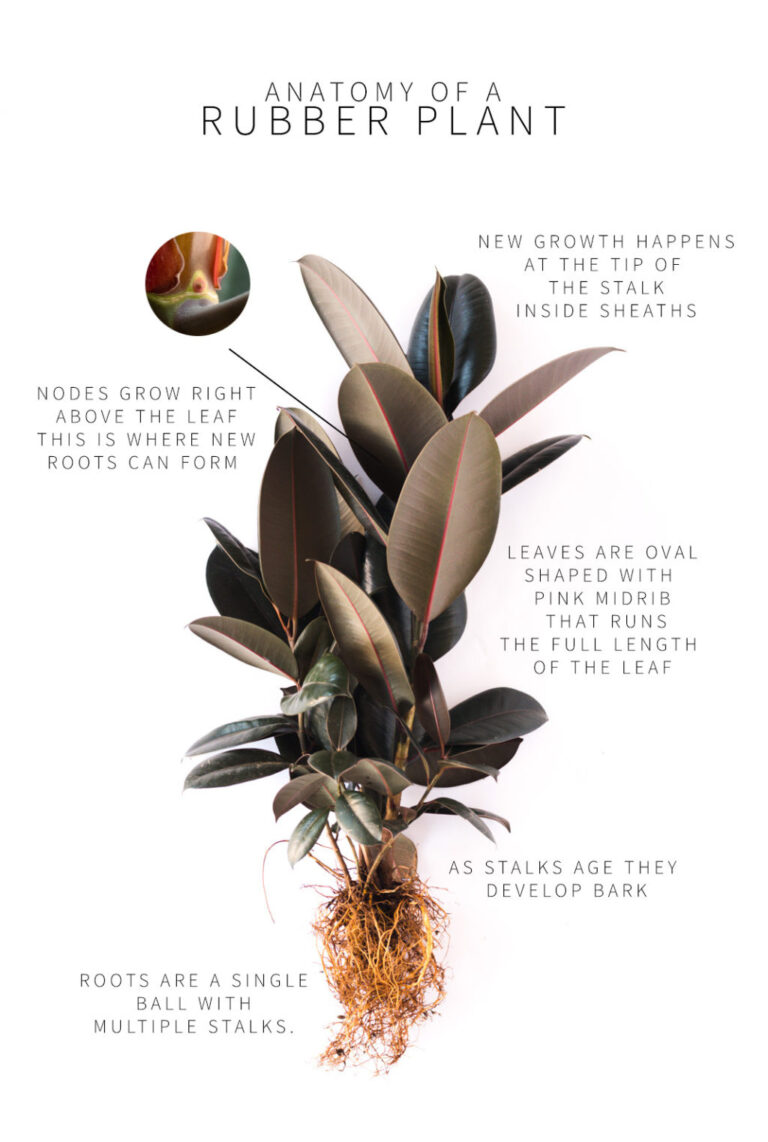
- Technique: Cut just above a leaf node, which is where the leaf attaches to the stem. This encourages new branches to form at the cut point.
- Maintenance: Remove any dead or yellowing leaves to keep the plant looking its best.
For more detailed tips, you can refer to our rubber plant pruning guide.
Fertilizing Schedule
Fertilizing your rubber plant correctly aids in maintaining its vibrant, lush foliage. The key is to choose the right fertilizer and apply it at optimal times. Rubber plants benefit from fertilizers rich in nitrogen, phosphorus, and potassium (NPK).
| Season | Frequency | Type of Fertilizer |
|---|---|---|
| Spring/Summer | Every other watering | Liquid fertilizer following the label instructions (A Beautiful Mess) |
| Autumn/Winter | Every six waterings | Houseplant labeled fertilizer (UK Houseplants) |
- Application: Always pre-water the soil before applying fertilizer to prevent root burn. A consistent schedule ensures your rubber plant receives a steady nutrient supply.
- Type: Organic fertilizers can offer a continuous release of nutrients, promoting steady growth. Choosing a balanced liquid fertilizer will often yield the best results.
For more information on the best products to use, visit our page on rubber plant fertilizer.
By following these pruning and fertilizing tips, you’ll encourage your rubber plant to reach its full potential, becoming a thriving and visually appealing addition to your indoor garden. Check out our additional resources on rubber plant soil and rubber plant growth rate to further enhance your plant care routine.
Ideal Light Conditions
Rubber plants are popular for their attractive foliage and ease of care. To keep your rubber plant healthy and thriving, understanding its light requirements is essential.
Importance of Indirect Light
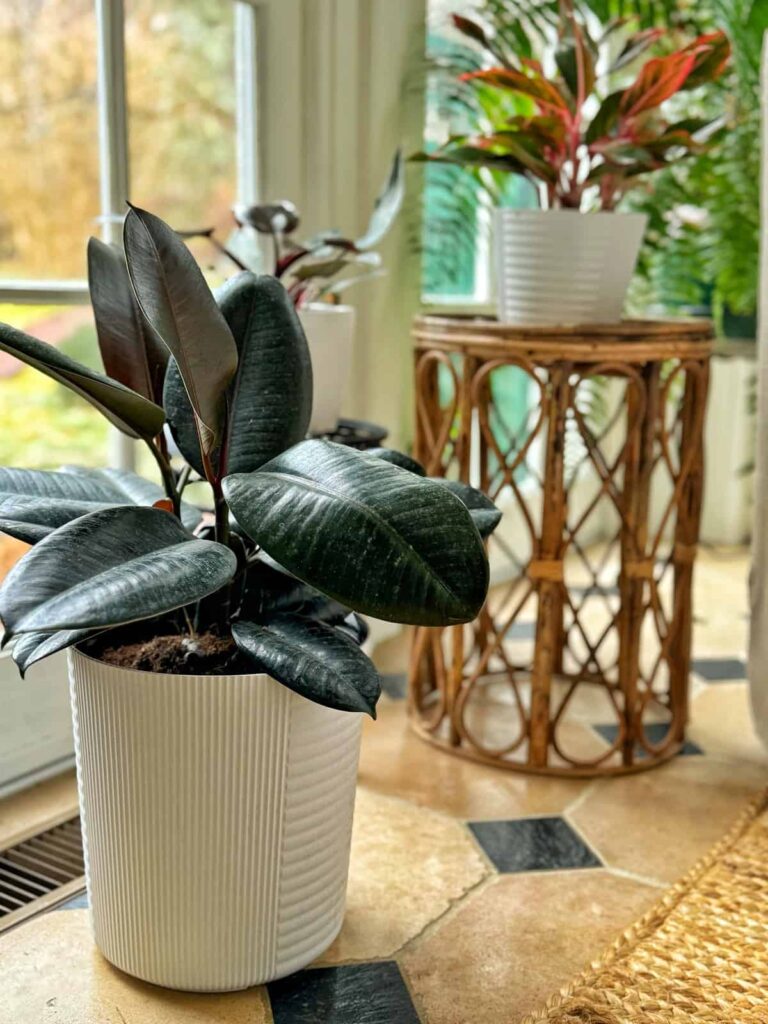
Rubber plants, also known as Ficus Elastica, thrive in bright, indirect light. Direct sunlight can be too harsh and may scorch the leaves, leading to dehydration and damage. Placing the plant near a window with filtered light or using sheer curtains can provide the optimal lighting conditions.
Insufficient light can also have negative effects. If your rubber plant is placed in a dimly lit area, it may lose its variegated patterns and experience stunted growth. Additionally, low light levels can increase the risk of root rot due to slower soil drying times. It’s important to find the right balance of light to support the health and growth of your plant.
For more information on the specific light requirements, check out our detailed guide on rubber plant light requirements.
| Light Condition | Effect on Rubber Plant |
|---|---|
| Bright, Indirect Light | Optimal growth, healthy foliage |
| Direct Sunlight | Scorched leaves, dehydration |
| Low Light | Loss of variegation, stunted growth |
Avoiding Sunburn and Dehydration
To avoid sunburn and dehydration, it’s crucial to monitor the amount of direct sunlight your rubber plant receives. Prolonged exposure to direct sunlight can lead to leaf scorching, where the leaves develop brown or burnt spots. This not only affects the appearance of the plant but also its overall health.
Maintaining a humid environment is also important for preventing dehydration. Rubber plants benefit from stable humidity levels, which can be achieved through the use of a pebble tray or frequent misting (UK Houseplants). Signs of low humidity include slowed growth, browning leaf tips, and leaf loss.
If you notice yellowing or browning leaves, it may be an indication of improper watering or humidity levels. Yellowing leaves can be caused by overwatering, while browning tips are often a sign of low humidity (Fig & Bloom). Ensure that you’re providing the right amount of water and maintaining adequate humidity to keep your plant in optimal condition.
For more tips on avoiding common issues such as yellowing leaves, visit our article on rubber plant leaves turning yellow.
By understanding the ideal light conditions and how to prevent sunburn and dehydration, you can ensure your rubber plant remains healthy and vibrant. Explore other common rubber plant issues to keep your plant thriving year-round.
Common Plant Issues
Like any houseplant, rubber plants can experience issues that affect their health and appearance. Two of the most common problems encountered are yellowing leaves and brown spots.
Troubleshooting Yellowing Leaves
Yellowing leaves on a rubber plant are typically a sign of improper watering, with overwatering being the usual culprit. When rubber plants are overwatered, the older leaves often turn yellow before falling off. To address this issue, ensure you are watering your plant correctly.
Follow these steps to troubleshoot yellowing leaves:
- Check soil moisture: Water only when the top few inches of soil have dried out. Use your finger to feel the soil or use a moisture meter.
- Ensure proper drainage: Make sure your pot has adequate drainage holes to prevent water from accumulating at the bottom.
- Adjust watering frequency: Reduce the frequency if the soil is too wet. Rubber plants prefer soil that is mildly dry between watering.
If yellowing persists, it could also indicate root rot caused by overwatering. In that case, repot the plant in fresh, well-draining soil and ensure the new pot has drainage holes. For more detailed information on dealing with yellow leaves, check out our article on rubber plant leaves turning yellow.
Addressing Brown Spots
Brown spots on rubber plant leaves are generally indicative of overwatering rather than underwatering or sunburn, which is common with other houseplants. If you notice brown spots on the leaves, it’s crucial to reassess your watering routine and pot drainage (Fig & Bloom).
Follow these steps to address brown spots:
- Evaluate the watering schedule: Ensure that you are not watering too frequently. Let the soil dry out partially between waterings.
- Examine the potting mix: Make sure the soil mix is well-draining. Amend with perlite or pumice if necessary.
- Ensure proper drainage: Verify that the pot has sufficient drainage holes. Consider using a pot with better drainage if needed.
Brown spots could also be a sign of pests or fungal infections. Inspect your plant closely for any signs of pests and treat accordingly. You can find more information on handling these issues in our article on rubber plant brown spots.
By regularly monitoring your rubber plant and providing the correct care, you can ensure it remains healthy and vibrant. For more tips on proper care, visit our articles on rubber plant watering and rubber plant soil.


